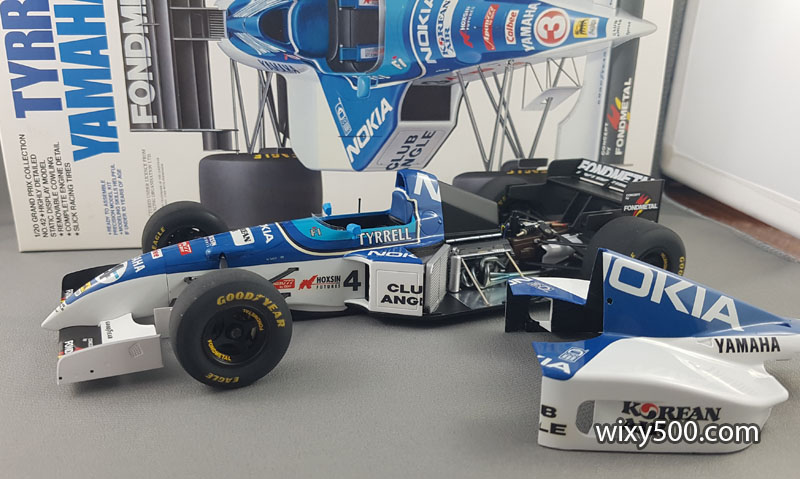
Considering the disaster that happened mid-way through the build, it’s a small miracle this model made it to completion.
It was initially going to be an out-of-box build, but I ended up adding some plumbing, wiring, carbon fibre and suspension mods. And just to prove I’m going crazy, I used the kit’s decals for the blue livery…
The Car
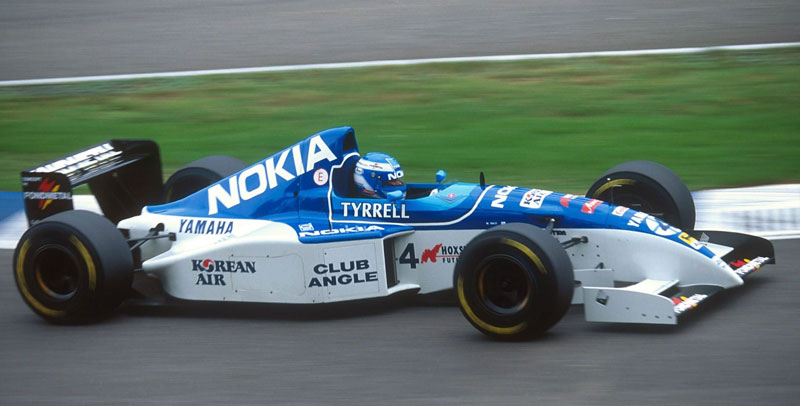
The Tyrrell 023 was nothing special from a performance perspective; no wins, no podiums and some poor reliability – it didn’t finish half the races it started.
Constructed of carbon fibre & honeycomb composite, the monocoque was tall and narrow with a long scuttle (top part of the cockpit) that stiffened the chassis and resulted in a rather small opening for the driver.
Power came from a normally aspirated 3-litre Yamaha V10 engine mated to Tyrrell’s own 6-speed semi-automatic gearbox. It ran a new hydraulically-controlled front suspension that Tyrrell called “Hyrdolink”.
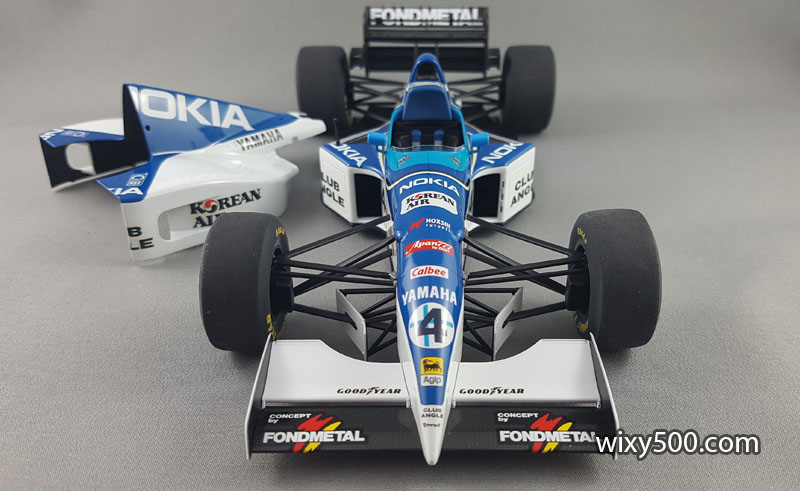
Mika Salo (FIN) and Ukyo Katayama (JAP) were the contracted drivers. I decided to build the Salo #4 version as he was clearly the better driver. Salo scored 5 points to place equal 14th in the 1995 Drivers’ Championship, whereas Katayama scored nothing. Gabrielle Tarquini also raced this car, taking over Katayama’s seat for the European Grand Prix (the Japanese driver was still recovering from a spectacular rollover crash at the start of the previous GP in Portugal), however the kit does not include markings for this version.
The Model
This is kit number 42 in Tamiya’s 1:20 scale Grand Prix Collection. There are many other F1 cars with better results and more deserving of replication in model format that Tamiya could have chosen from, but considering Tamiya is a Japanese company, and this car had a Japanese engine that came with a Japanese driver with Japanese tobacco backing (Mild Seven), I can understand why it was made.
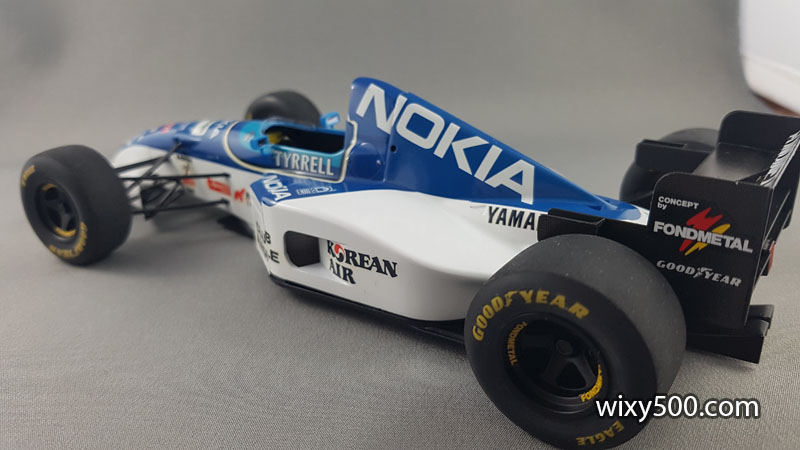
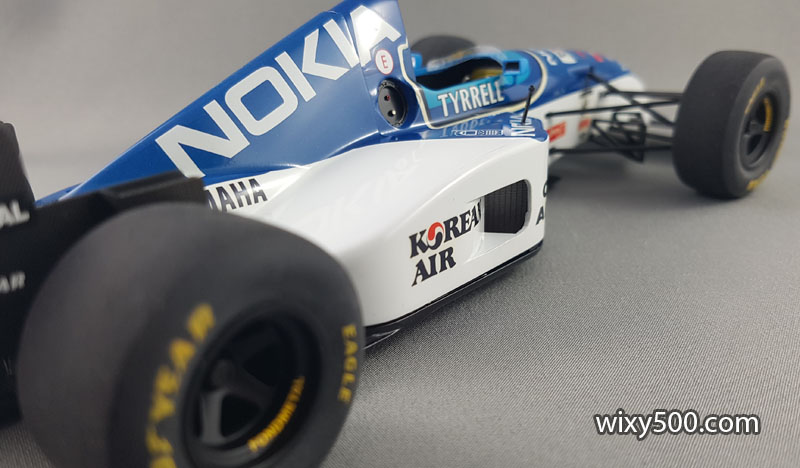
The kit did not include any of the Mild Seven markings. While I used the “Tyrrell” signage that was applied in races where tobacco adverting was not allowed, my build is just a general ‘season’ car and does not depict how it ran at a specific race.
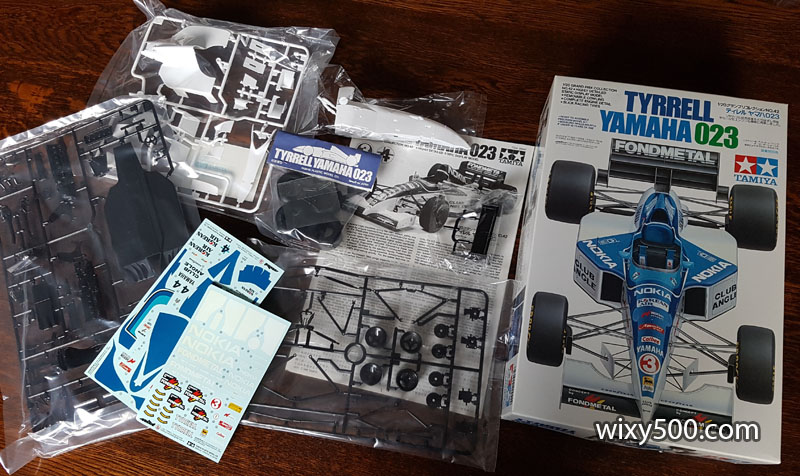
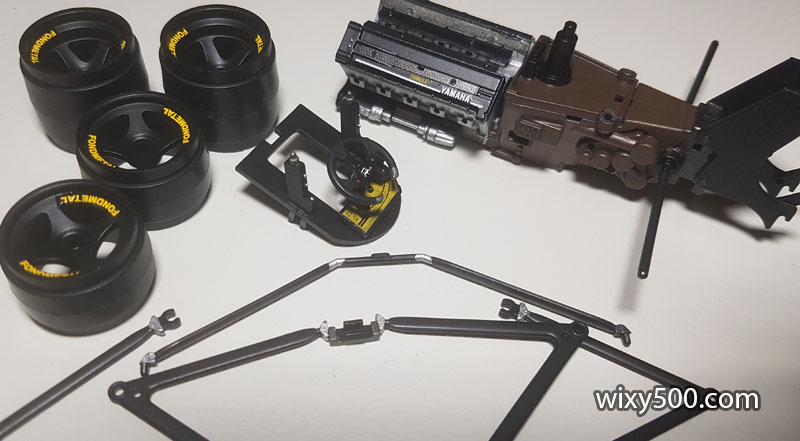
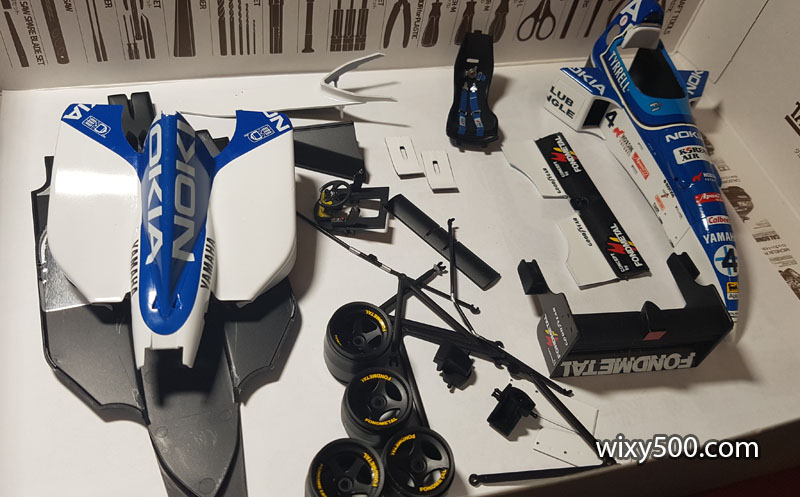
What you get in Tamiya 1:20 Grand Prix Collection kit #42 – Tyrrell Yamaha 023.
There are several after market detail up products that can be purchased for this kit that offer photo-etch parts, full carbon fibre decals & templates plus the missing Mild Seven logos. However, they are hard to find and very expensive. The extra parts would have cost more than the kit in the first place!
The kit is molded in black (2 x sprues, plus rear wing) and white (1 sprue, plus monocoque), comes with two sheets of decals, a bag of tyres and instructions.
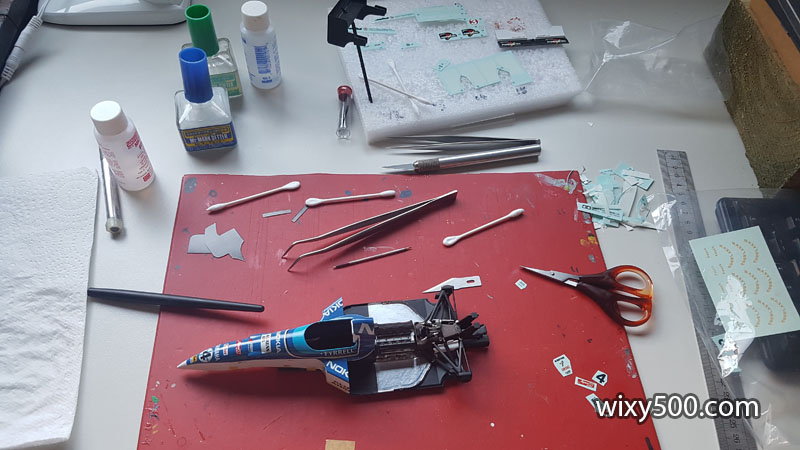
I pulled this one from the stash pre-covid and started prepping parts during the local model club meetings. But then lockdowns started, so it was shelved for months until the Toyota sports car was built.
The Build
These days I don’t build models in strict step-by-step order of the instructions. Instead, I prepare and test fit what pieces I can, then paint lots of parts in one sitting. The idea is to reduce the number of painting sessions and therefore the tedious task of messing around cleaning the airbrush.
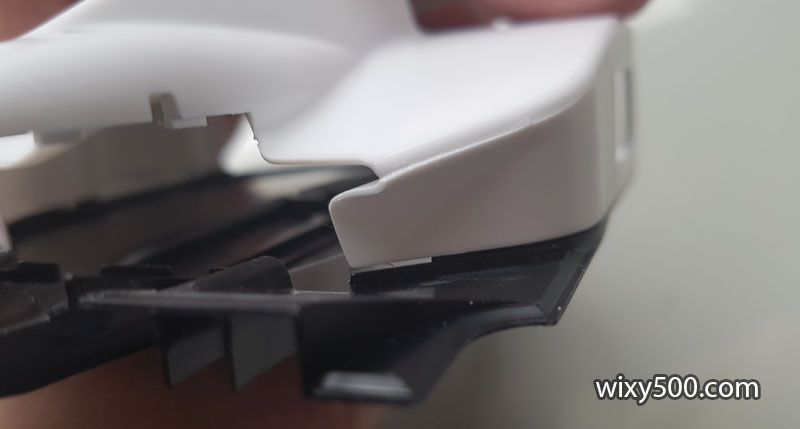
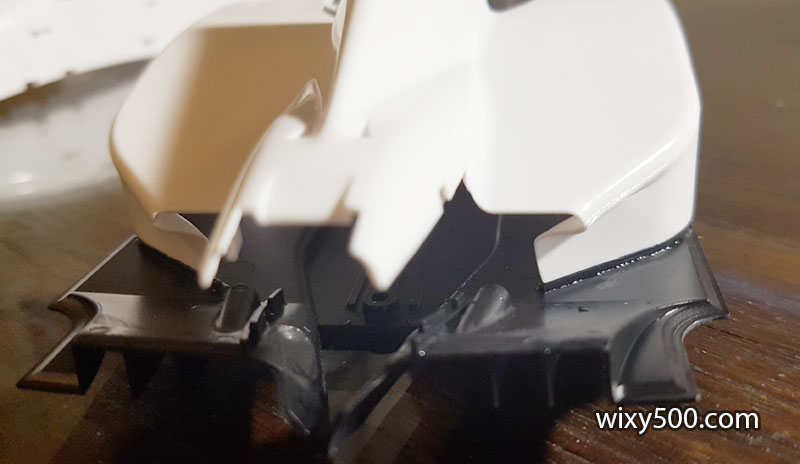
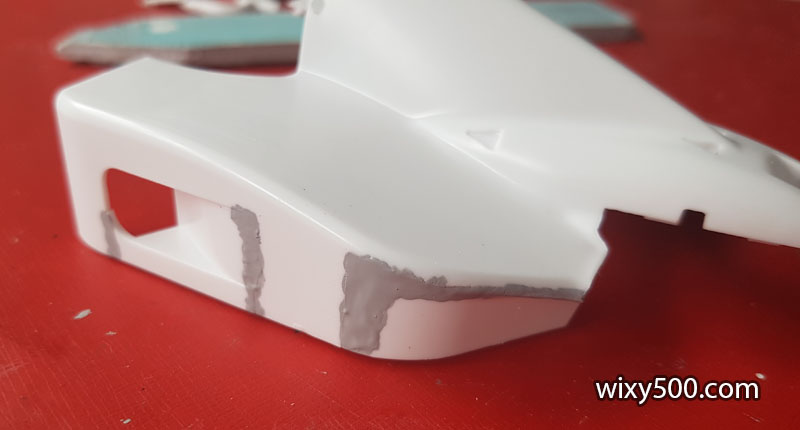
Parts that will be painted the same colour can usually go together beforehand, such as the five pieces that make up the engine cover. A fair bit of file-and-fill was required to get this ready for primer. I could not work out why there was this gap between the bodywork and floor (same gap on both sides at the rear of the cowling).
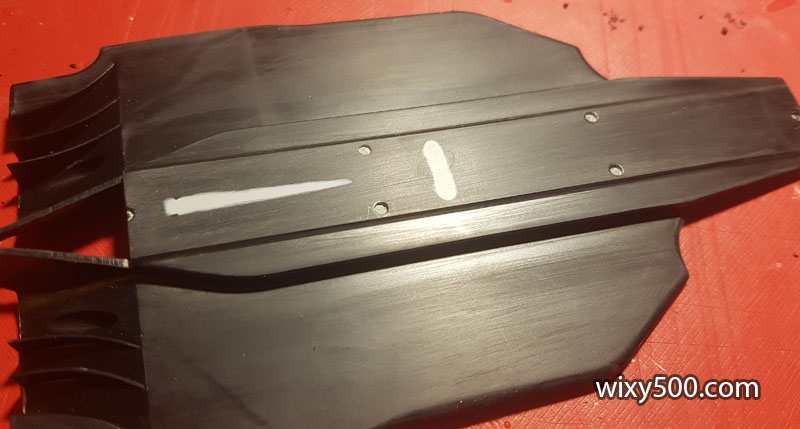
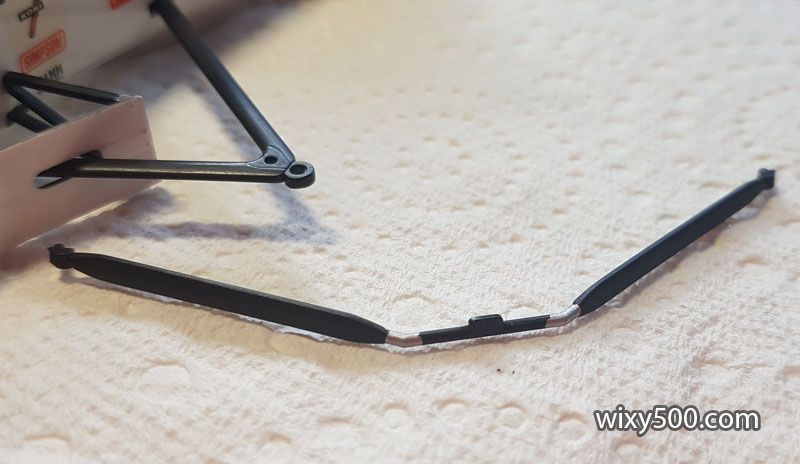
So I placed the floor tray on my glass “setup pad” – check out how badly arched the floor pan is! I’ve not experienced bent parts to this extent in a Tamiya kit before. It was imperative to get this fixed before going any further as the floor is the datum for all the other parts to attached to and line up with.
Placing the floor tray in a container of really hot water made if flexible enough to bend and make it flat, however it also made the front ‘tea-tray’ part curl up (above), which then had to be straightened back out.
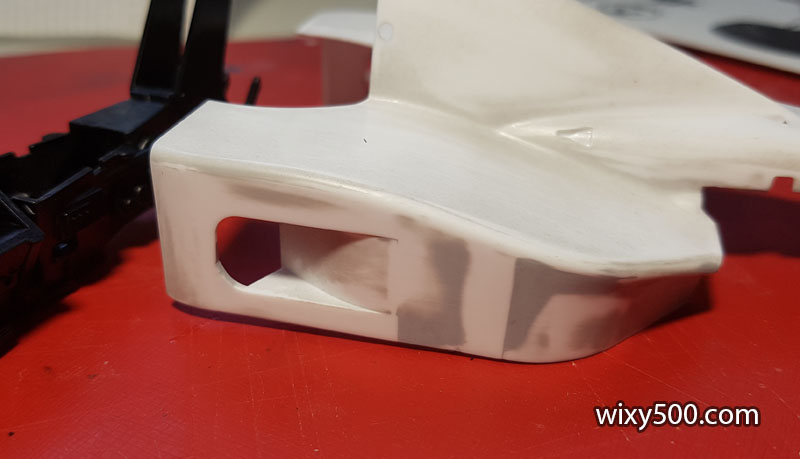
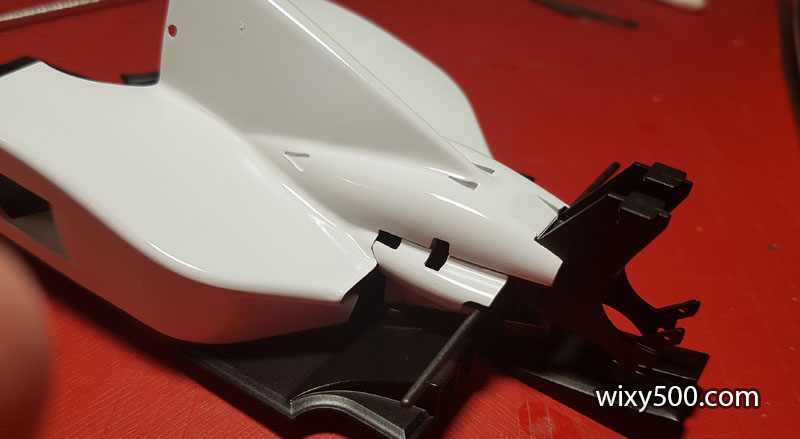
Bodywork now fits and seats properly.
Test fitting the chassis and main bodywork parts to the floor pan.
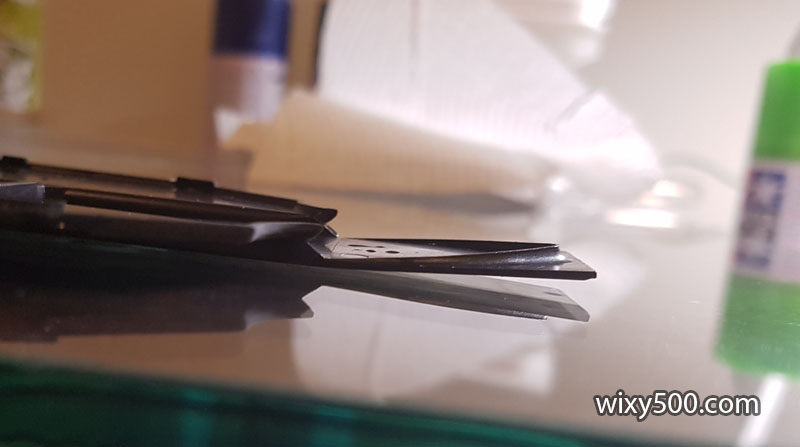
This is the diffuser that goes under gearbox. It has significant pin marks from the manufacturing process.
As this will be partially visible once assembled, I decided to try and remove the circles. I didn’t bother with the two on the left as they can’t be seen once the part is glued in place. For this build I’m using Tamiya’s Surface Primer Liquid that comes in a small glass bottle and use a paint brush to apply it.
Once dry, use a sanding stick to smoothen it all out and apply more filler if needed. This part is now ready for primer; only then can you tell whether it’s properly level or not.
The same process is used on many other parts. This is the floor which has lots of circular pin dimples. I’ve only filled the ones that will be visible when the model is on display or if the engine cover is off.
There are two tabs on the inside of the engine cover that are designed to clip in to the monocoque when fitting the bodywork. If everything fits properly, there is no need for them and they are not part of the real car.
So off they come! In the background is partially assembled rear wing.
(above & below) Trying to make the five pieces that make up the engine cover look like one…
Injection pin holes on the inner surface of the front wing end plates have been filled with Tamiya Liquid Surface Primer, then wet-sanded smooth.
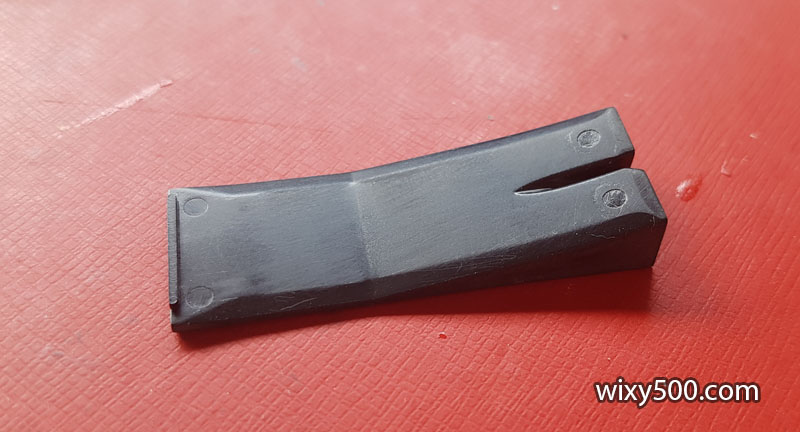
A little filling on the Plank.
Floor dimples smoothened.
(above & below) A lot more fill was required on the engine cover. As mist coat of grey primer helps locate the areas that still need work.
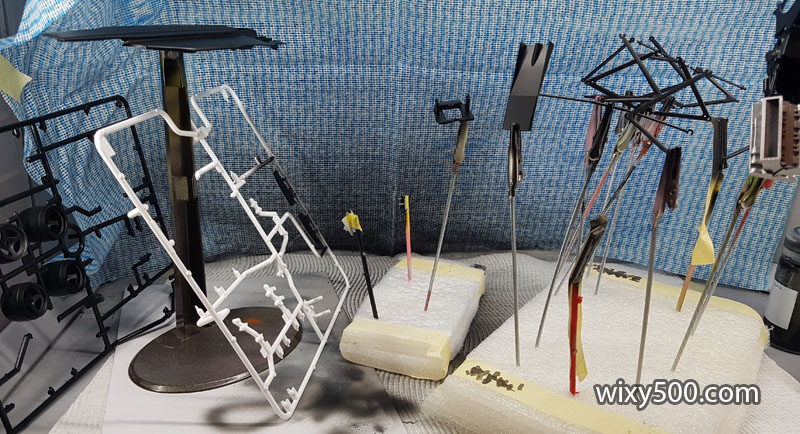
Drying time! After preparation, all the parts for this build were washed in hot soapy water. Preparation involved cutting each part off the sprue (though I left the rims attached), mold lines removed, sink holes & joins filled, smoothened etc. Next step, primer.
I started with a single coat of light grey primer to even out the contrast between white plastic finish and areas that had grey putty filling.
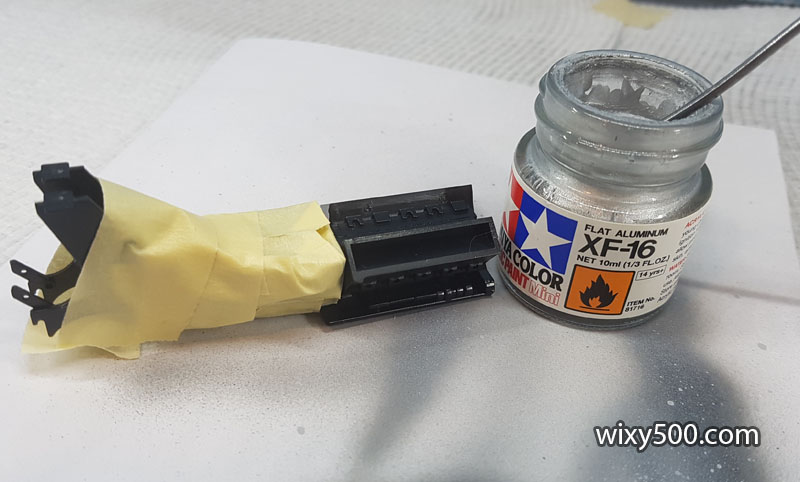
Masking the gearbox off before hitting the engine block with Flat Aluminium.
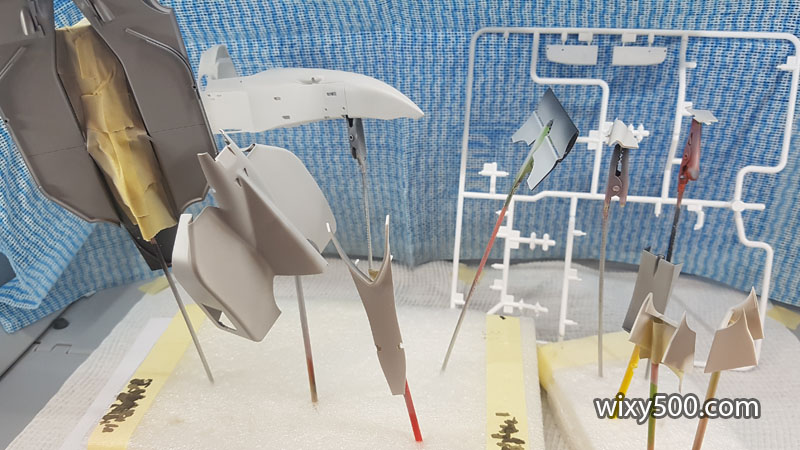
A batch job of semi-gloss black on a whole bunch of parts.
Bulkhead with dash, steering wheel and various buttons/switches. This is largely unseen once assembled because it sits deep inside the cockpit opening.
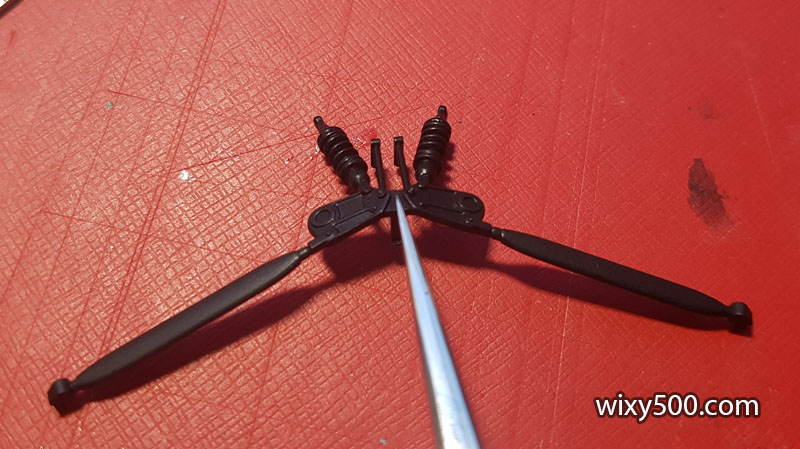
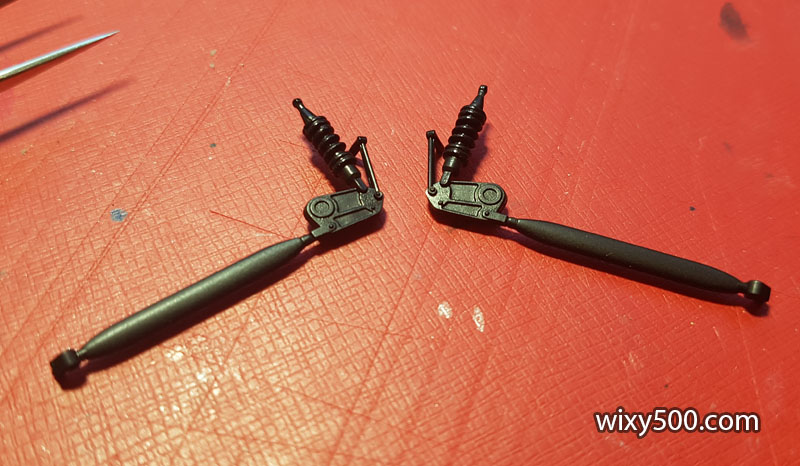
Tamiya made the rear pushrod/rocker/spring assembly as one-piece. The bridge connecting the two sides (being held by the tweezers) should not be there.
So out it comes! The rockers just have to attach to the gearbox sturdily enough to support the weight of the model.
After hitting with white primer, several coats of body colour (Tamiya TS-26, Pure white) go down. A big decision looms – mask and spray the blue, or use the kit decals?
Rims and a bunch of suspension arms are done. Some bodywork has to be added to the gearbox before the rear suspension can be hung off it.
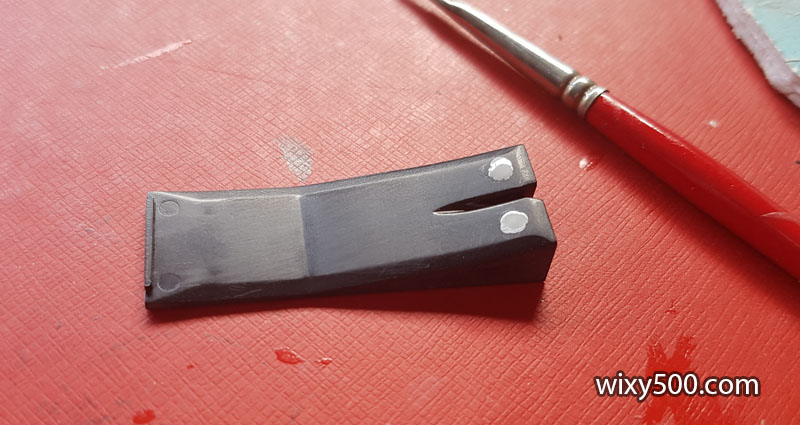
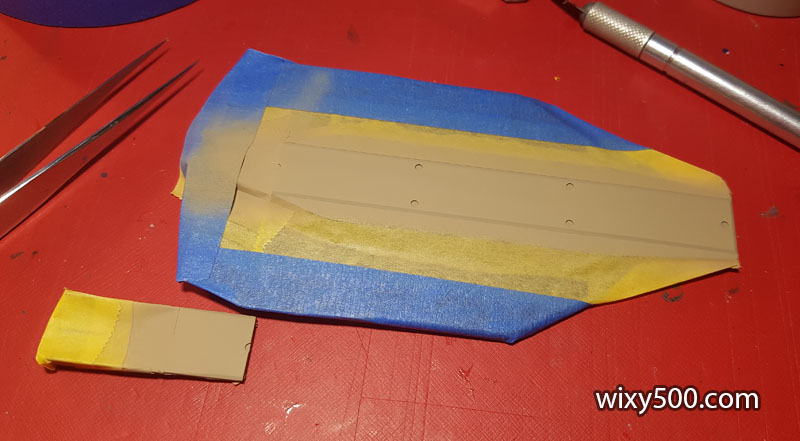
Masked and sprayed – the plank that runs under the floor of the car.
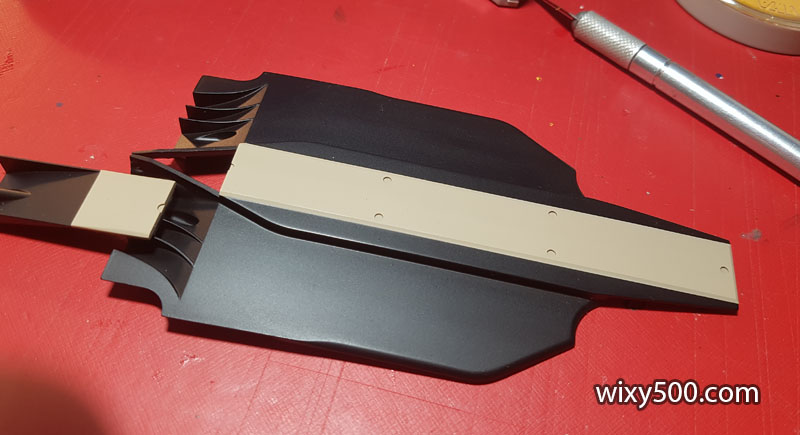
And with mask removed. Panel line wash was later put into the mounting hole recesses.
Two small pieces of bodywork (one each side) need to fit to the gearbox before all the suspension arms can be attached. Once the parts are glued to the gearbox, I dry-fit the engine/gearbox assembly in the chassis and add the engine cover to ensure everything sits at the right angle and spacing. It took a bit of tweaking to get these to line up as above, which is not perfect.
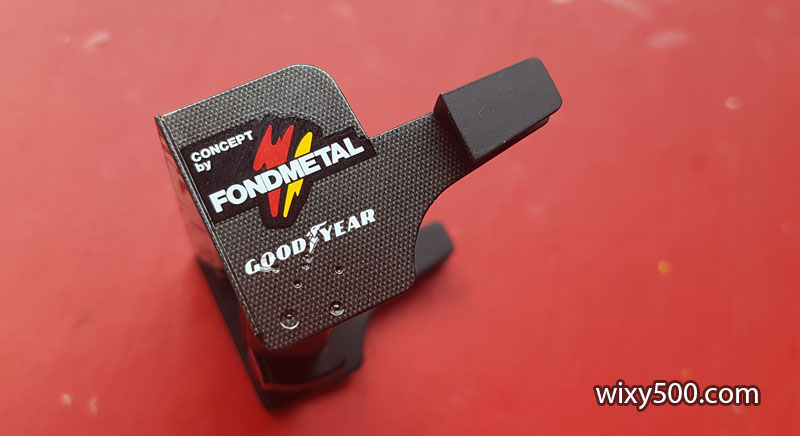
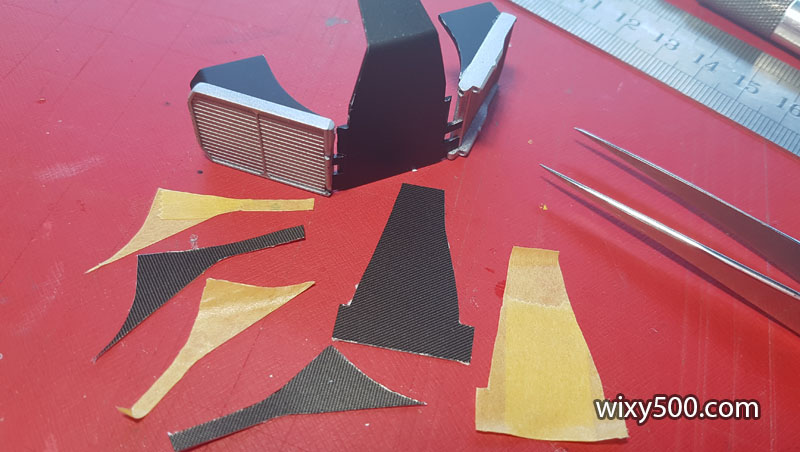
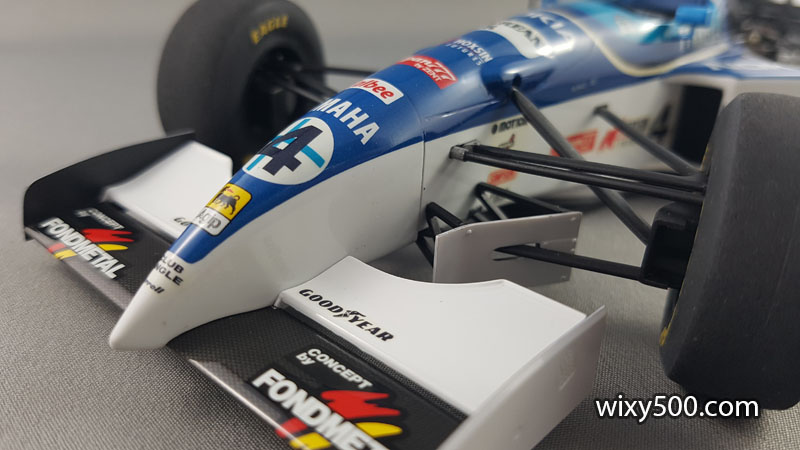
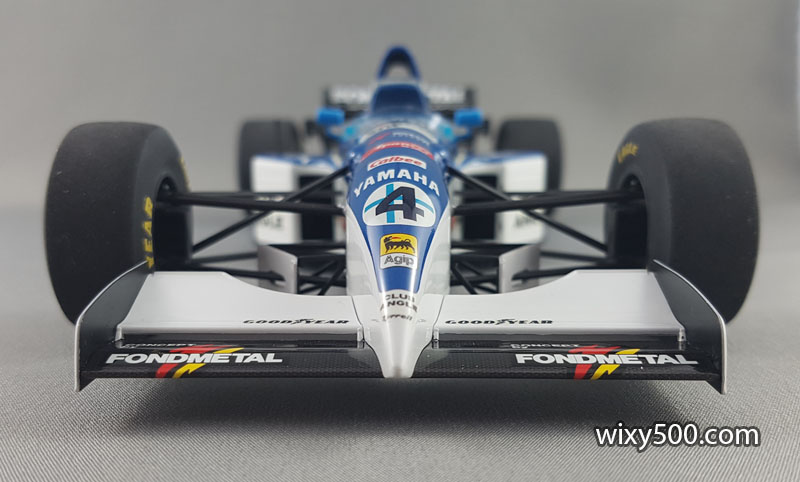
After market carbon fibre decals cut to size for the main plane of the front wing.
A batch of parts ready for semi-gloss black, some with lots of masking (eg, the monocoque). I use small balls of Blu-Tack on the four mounting points on the back of the barge-board (front of pic) to keep the paint out so the glue will adhere later in the build.
Back of the barge-boards after spraying and Blu-Tack removal.
Flat aluminium on the radiators which had earlier been sprayed semi-gloss back.
I took a few parts along to my local model club meeting to show progress of the build so far. I’ve gone off plan from the kits instructions, glueing the sidepod structures to the monocoque in the hope this makes aligning the decals for the blue colour scheme a little easier. The radiators and ducting are still dry-fit in this pic, as is the engine/gearbox assembly in the floor.
At the time of the build, the decals were over 25 years old. When viewed with the light at this angle, it raised concerns they’d gone crispy and cracked.
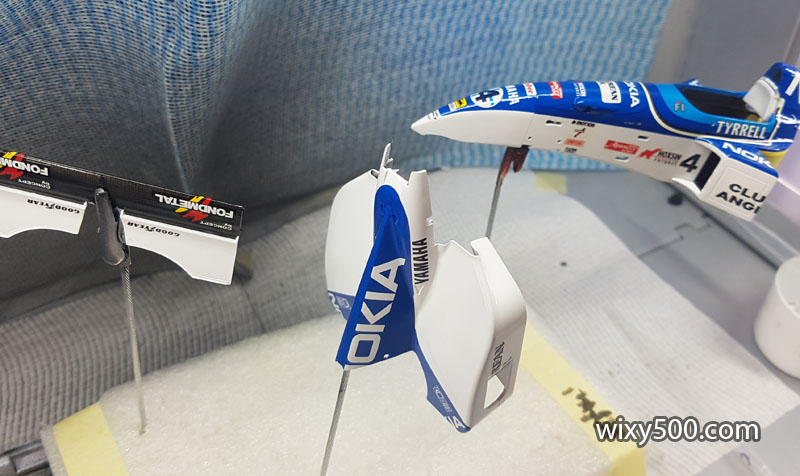
Tape is used to prevent the bodywork from moving so the livery decals can be positioned and aligned properly.
After photocopying the decal sheet (just in case I screwed the decals up and needed reference to create masks for painting the livery), I cut out the blue pieces and got to work with the decal setter and softener. Note that at this point in time, the engine cover fits fine…
Getting the decals stretched around the suspension rocker bumps (and airbox intake) without creases proved impossible, though this side has come up not too bad.
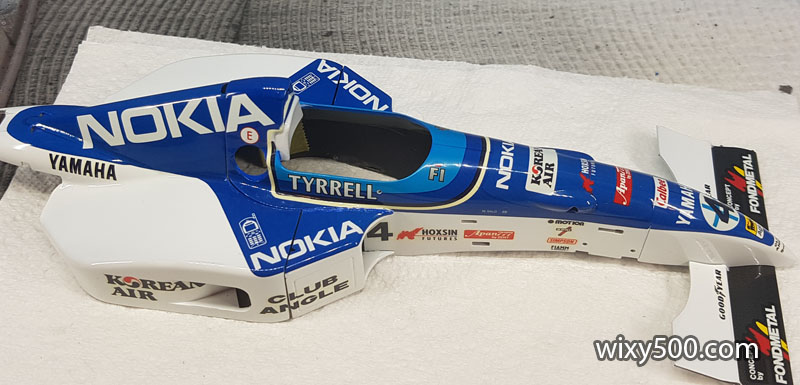
After a mammoth session, the base livery is done. All the blue here is waterslide decal. There’s still some touch-up to do, plus the sponsor logos before clear coating. Once cleared and polished, final assembly can commence.
Once the main colour scheme decals were dry, it was then on to all the sponsor logos and signage.
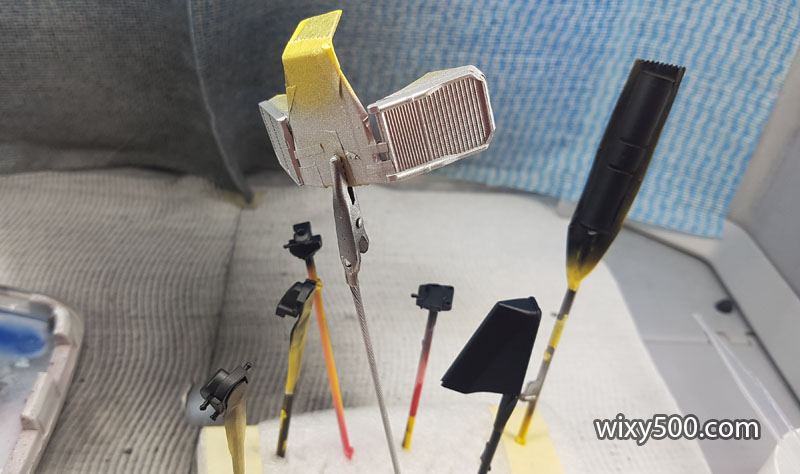
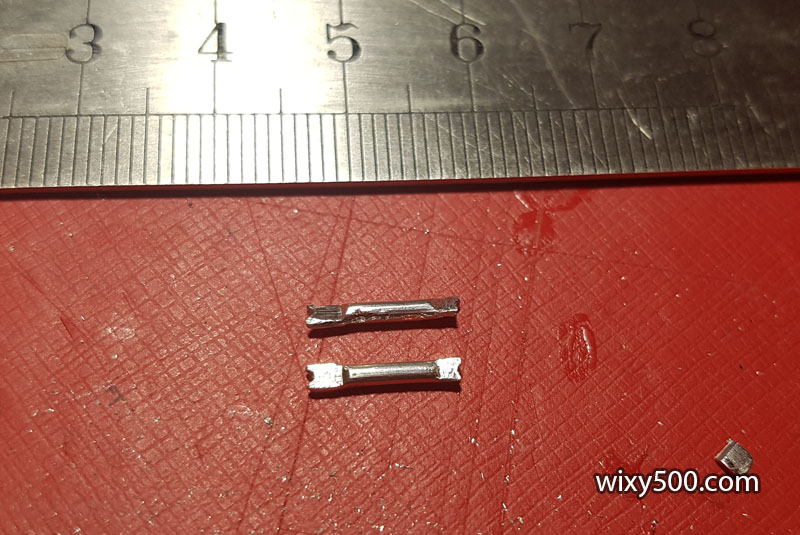
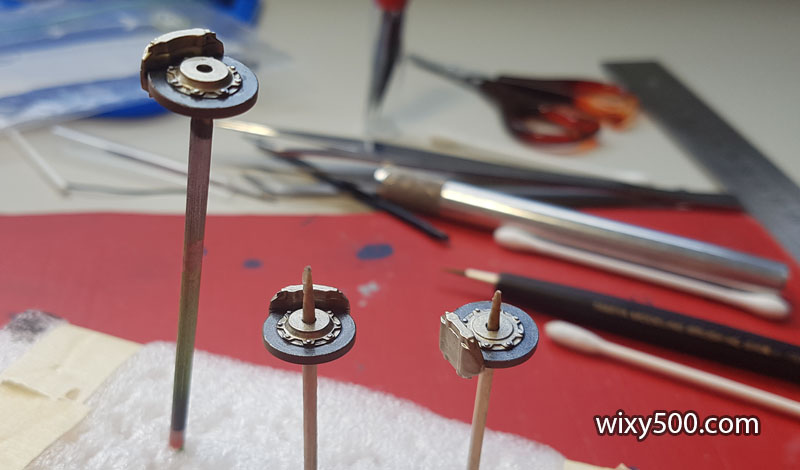
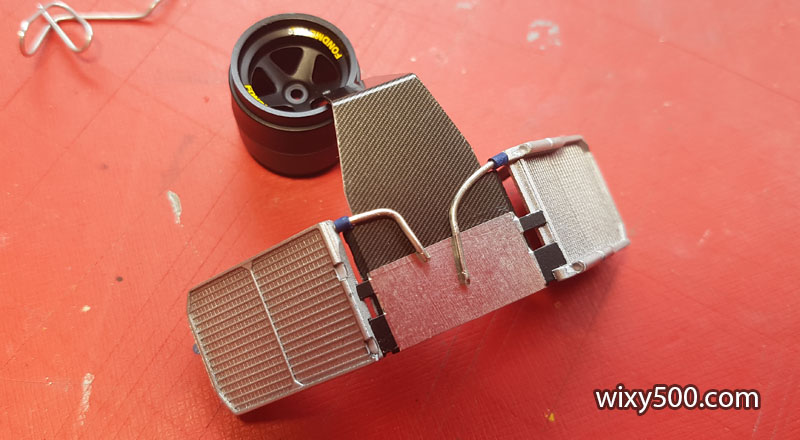
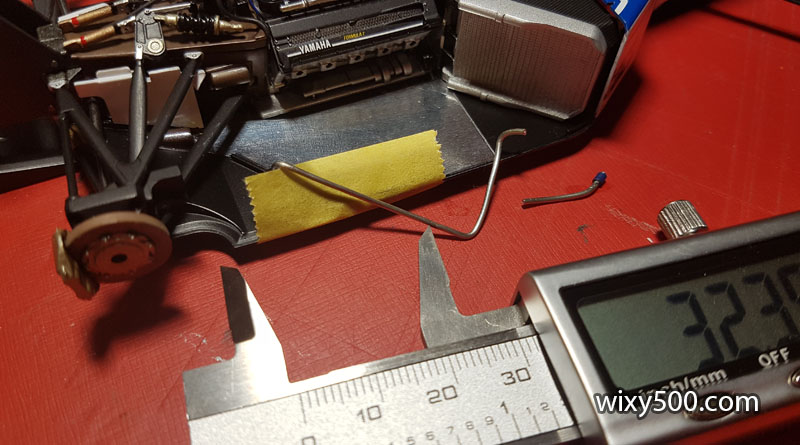
The model included the pushrods, bell-cranks and spring/shock assemblies for the rear suspension. However, this car ran what looks like some sort of double-shock arrangement on the rear, which Tamiya did not include in the kit. I decided to replicate this using two short pieces of solder, flattened at each end, then filed and sanded into shape. The notches are to help seat each end on the model.
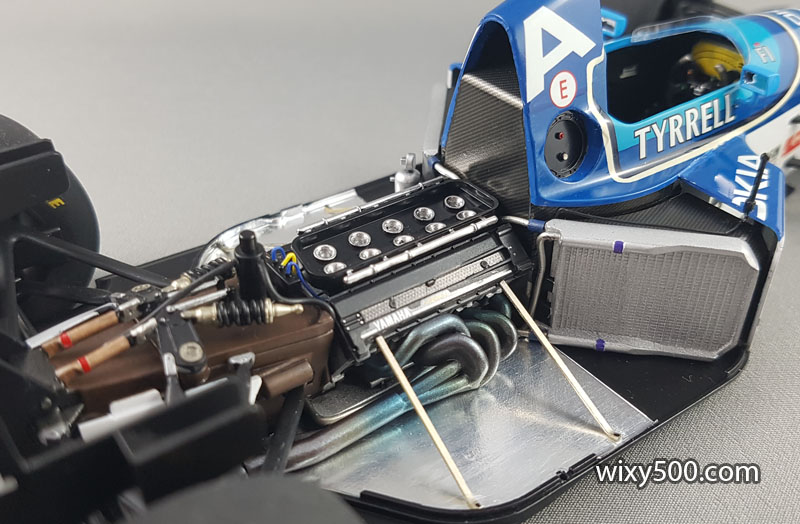
Thin strips of Bare Metal Foil are painted red, then wrapped around the shock body which has already been brush painted.
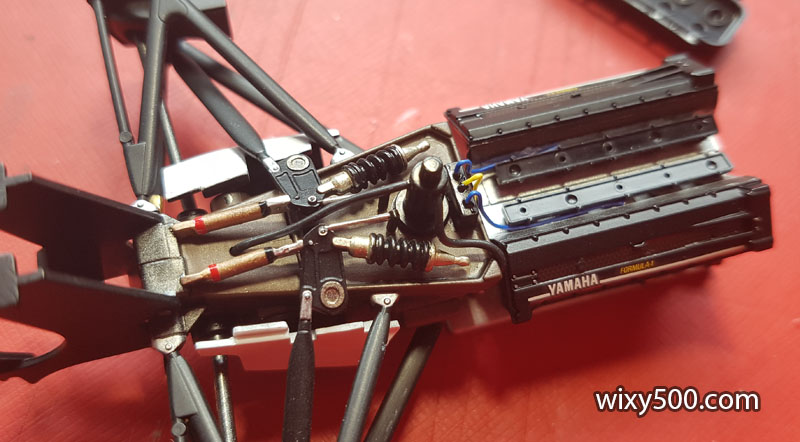
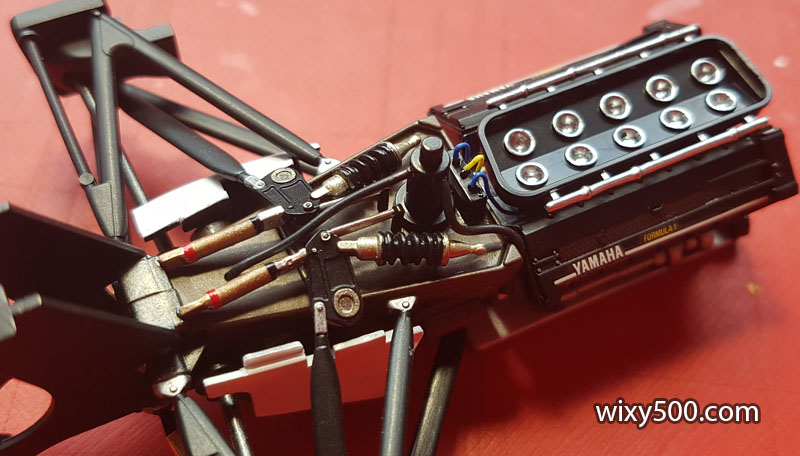
These ‘second shocks’ fit atop the gearbox and connect to the bell-cranks. The two black hoses connected to the oil tank were added by me, as are the blue and yellow wires (which are on a road to nowhere, but help the engine area look a bit more busy).
Addition of the intake trumpets and fuel rail complete the engine/gearbox assembly. Exhaust pipes are added once the engine is fitted to the chassis.
The gold is Bare Metal Foil to replicate the heat shield on the lower rear wishbones that protect them from hot exhaust gases.
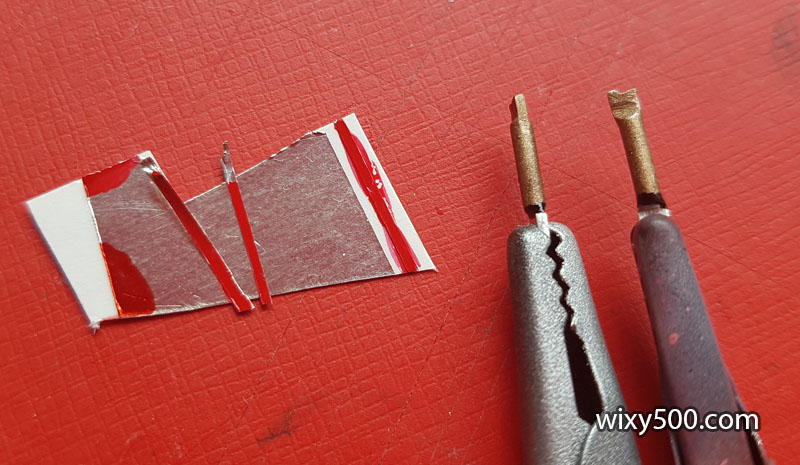
I cut up some carbon fibre decal stock for parts of the rear wing, such as the sides, main plane and the two upper elements (the smaller winglets also got carbon, but after this photo was taken).
Nearly all the parts are done and ready for final assembly, but the body needs to be clear coated first.
First clear is down and decals did not melt 🙂 (it’s always a concern!)
Brakes are done. I’ve just brush painted these parts as they are mostly hidden once assembled. Colours are Gun Metal for the carbon fibre discs with flat earth around the perimeter. Central hat and calipers are Titanium Gold. Then there’s a little panel-line wash and the bolt heads picked out with aluminium.
Looking good for the third and hopefully final application of clear! After waiting at least a couple of days after each airbrush session, I lightly sand/micromesh the body to help reduce the step from the raised decal material. Each session involves three coats going down.
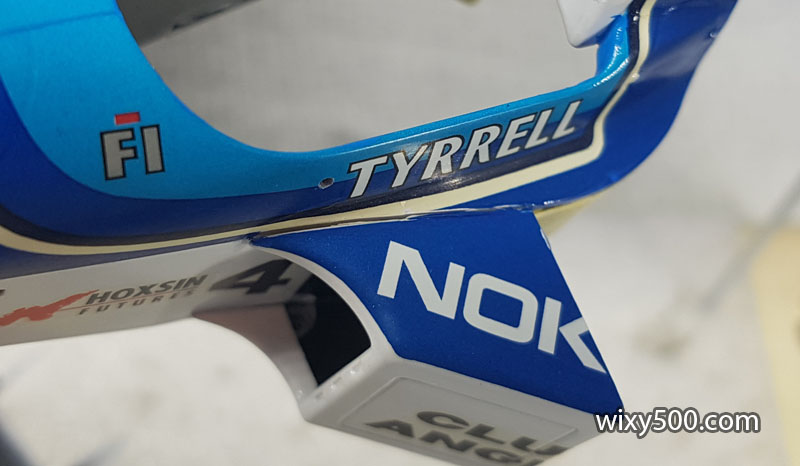
FAAARRRKKK!!! Hours of work ruined. The monocoque fell out of the box and hit the floor as I was leaving my local model club meeting, tearing off the righthand sidepod and fracturing the one on the left. The decoration is stuffed.
The left sidepod also moved, fracturing the existing work.
The point of impact? Not only is the white paint chipped, the plastic was damaged too.
After re-attachment, I felt I had no other option than to carefully brush paint in the missing decal with some Tamiya lacquer (TS-44 Brilliant Blue is a close match). I then gave it a very light micro-mesh to try and smoothen it a little before hitting it with clear and hoping for the best.
Final clear coat came out of the airbrush very glossy and dust free.
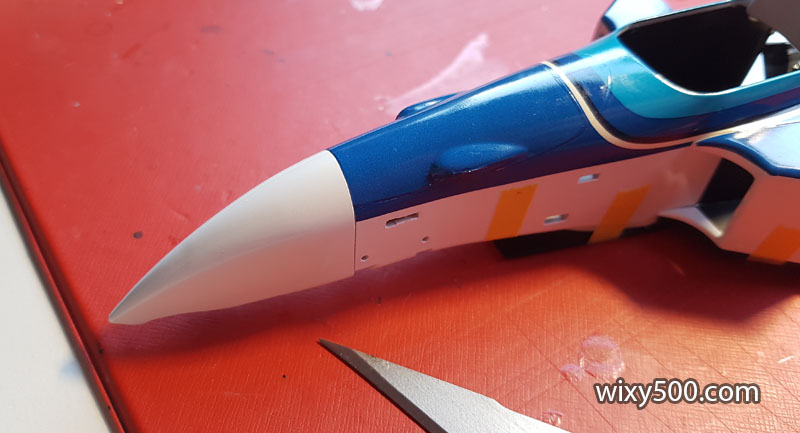
Couldn’t resist doing a bodywork mock-up after the repair and clear coat. The repair is noticeable, but it could have ended a whole lot worse.
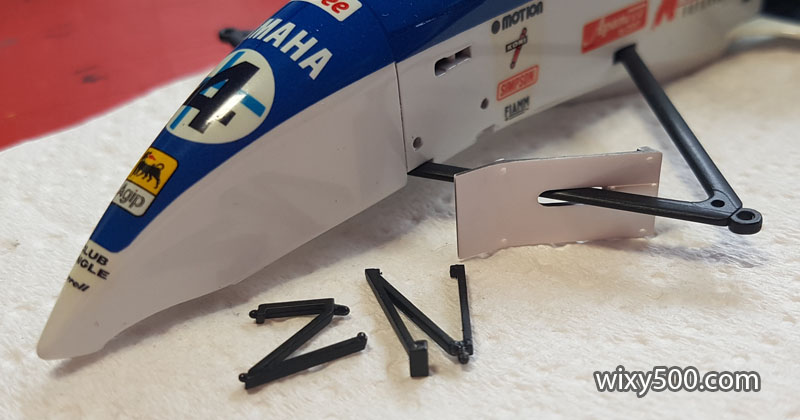
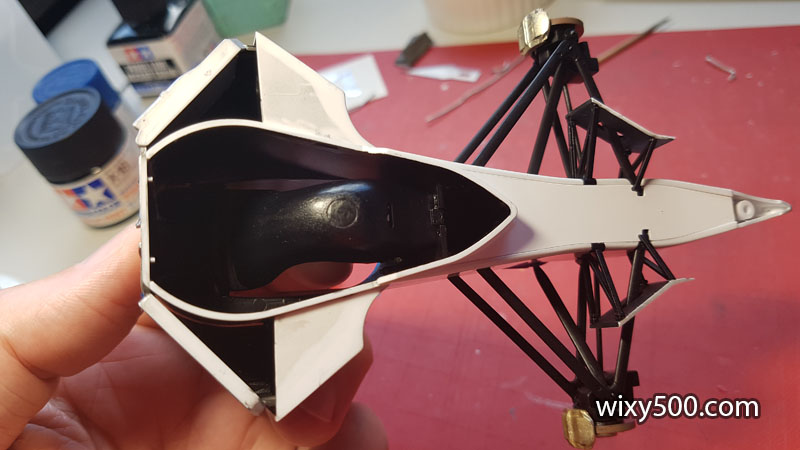
After a final micro-mesh and polish session on the body parts, it’s time to start adding components such as the cockpit and front suspension. Barge boards (air deflectors) have to be fitted to the lower A-arms before they pop into the chassis. Not only is there a left and right deflector, they have to go the right way up as the cut-out is not central. The support brackets are added afterward.
Front pushrods are one piece and I was having trouble getting the little tab to push through the holes in the monocoque (too much paint build-up?)
So I cut the tab out. Now the front suspension is properly independent 🙂
I decided to add carbon fibre decals to the rear bulkhead and internal air ducting. Templates were made by applying masking tape to the model and cutting off excess material. The tape template is then de-tacked (apply to skin a few times – it works!) before placing on carbon fibre decal stock to cut around.
The kit does not come with any plumbing, so I start bending and cutting up pieces of 1mm diameter solder. Attachment points in the radiators are drilled out to accept the solder ‘pipes’.
After cutting and applying a small piece of heat-shrink tubing (right), I brush on a little flat blue to simulate the flexible rubber hose join (left).
Carbon decals in place and top water hoses attached with a little CA glue. Bottom third of the bulkhead is bare metal foil.
With suspension and interior added plus rear bulkhead/radiators in place, this section is ready for the final assembly to commence. Can’t see much of it here, but the head rest has been brush painted with a mix of blue and flat base. I wasn’t game to mask and spray this area, fearing the masking tape might pull the existing decoration off.
The areas on the bottom of the chassis that will glue to the floor are cleaned of paint using a little thinners on a cotton bud.
Same with matching areas on the floor.
Monocoque fixed to the floor. I used Revell’s popular Contacta Professional cement for this job.
For this model, the big step is when the engine and chassis come together. Now we’re getting somewhere 🙂
Lots of fiddling, measuring and bending to get the scratch-built pipes to fit.
Right-side plumbing done. It’s not 100% accurate to the real thing (the right-side radiator was actually a double unit with water and oil coolers and each should have its own inlet and outlet) but I think it looks far better than how it came from Tamiya.
A light mist of clear blue and clear yellow to simulate heat stains in the exhaust. These had previously been hit with Tamiya LP-20 (Light Gun Metal).
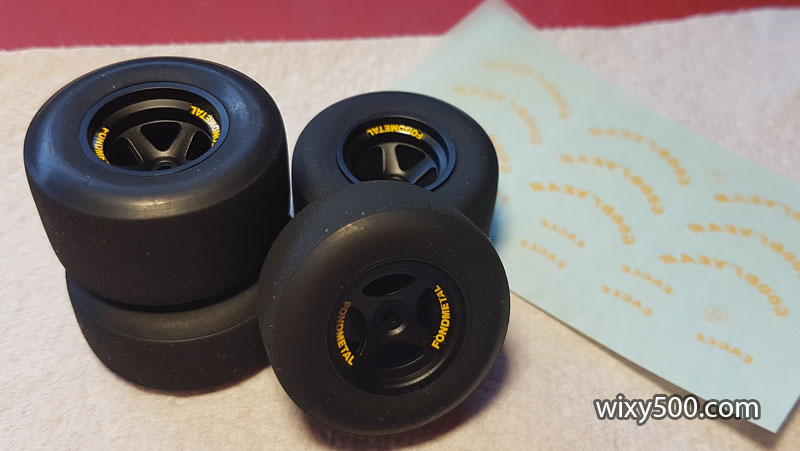
Tyre treads all buffed, cleaned and fitted to rims, ready for Goodyear Eagle decal application.
Tamiya’s tyre decals have a clear film around the edge that gives off a bit of a glossy look. For the first time I decided to spray some flat clear onto the sidewall after application to try and hide and blend the decal into the tyre. First step, circular masks for each rim.
Then some light coats over the sidewall. Both sides of each wheel need to be done.
Wheels prepped and fitted with the supplied metal screws that have a central locking nut cast into the head. Amazingly, the model sat really flat once the wheels were fitted – no twist and nice ride height! F1 cars look fast and racey without their wings 🙂 The floor support straps that connect to the engine (prevents the floor from drooping at high speed) are made from left over photo-etch frets from a Tameo kit.
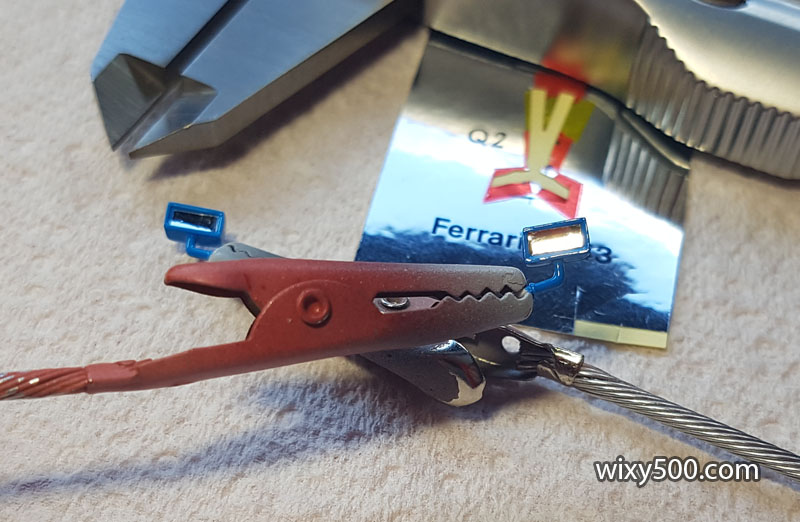
Never throw out old decals or stickers! Instead of paint, I was able to cut out small pieces of this ‘chrome’ sticker sheet from an old Ferrari kit to replicate the reflective surface of the rear view mirrors.
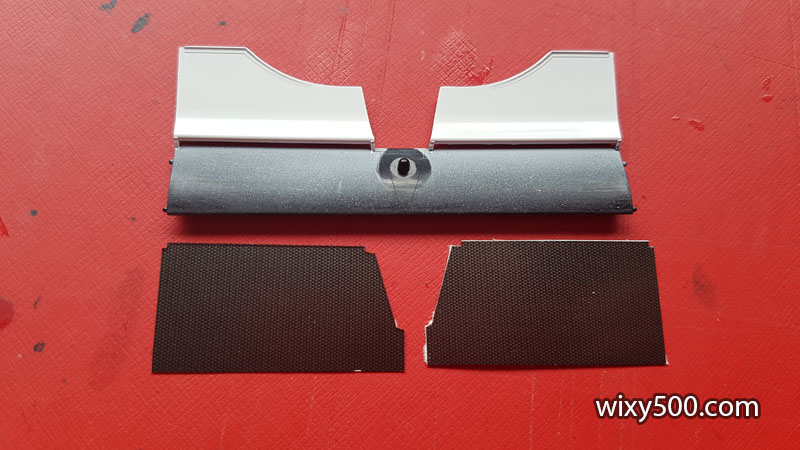
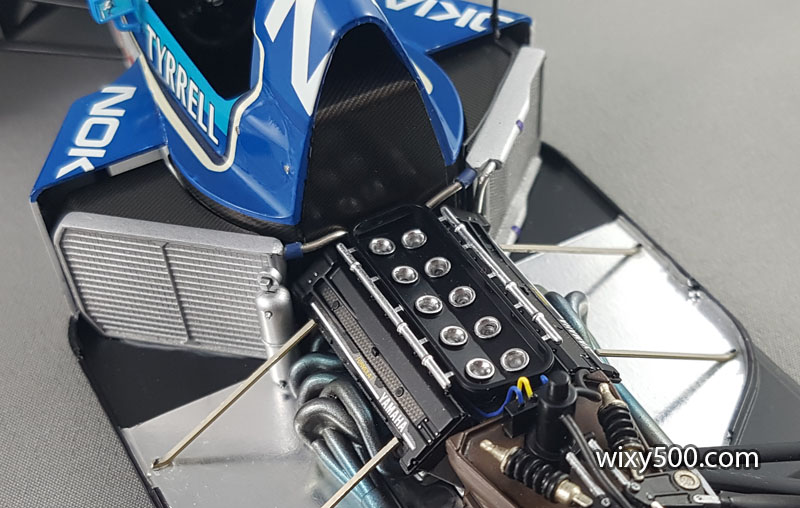
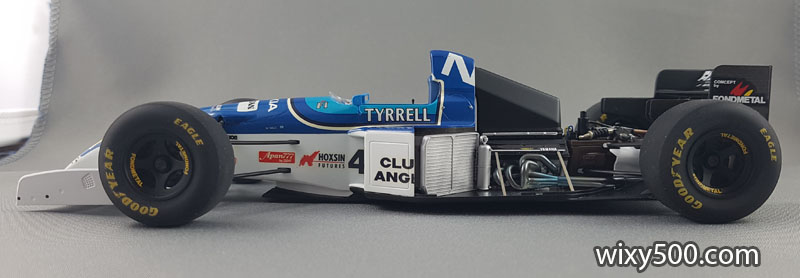
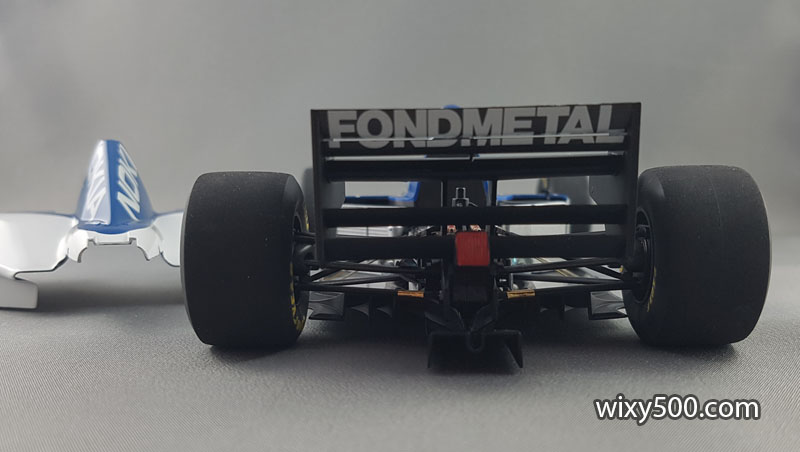
The finished model with airbox and engine cover removed.
Despite fitting without issue prior to and during the build, after final painting, the engine cover decided to no longer fit properly. It wouldn’t snuggle down flush, I can only assume because of the thickness of all the clear coat and decals, or possibly over time the floor has started to arch back a little? Also, once the aerial was fitted atop the righthand sidepod, this prevented the engine cover from being slid into place (it can’t be fitted by simply dropping the engine cover vertically – it has to be slipped down and in from the front to clear the upper arms of the rear suspension).
Bent the aerial getting the cover on… <rolls eyes>
Main element of the front wing is carbon fibre decal
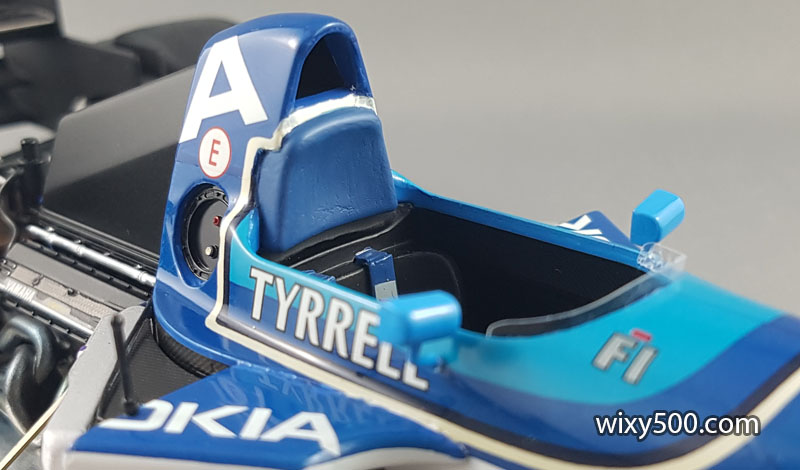
The kit includes this small windshield which is very difficult to secure and glue as there is nothing to locate it by.
Tamiya’s construction of the cockpit is poor compared to some of their other models – there is just empty space down the sides of the seat. Belt detail is brush painted.
Rain light is clear red over silver.
Head rest is hand painted using a mix of Tamiya acrylics that include flat base to give the effect of padding.
Conclusion
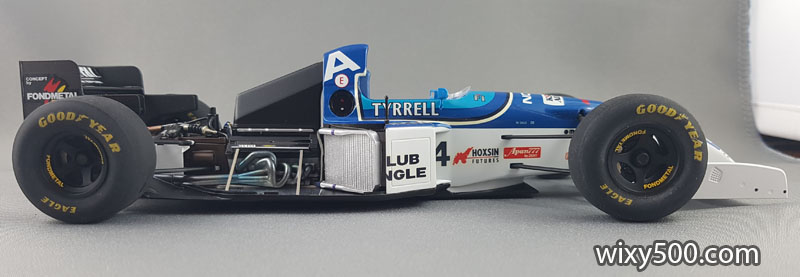
Overall, despite the ‘crash’, I think the model looks ok, but it’s going to have to be displayed with the engine cover off. The model sits square and flat, which is a feat considering how warped the floor was at the beginning.
I like the livery on this car, but despite it appearing fairly basic, it could present a problem for beginner builders – it’s quite complex to get the decals right, but also complex to get masking correct if it were to be painted.
If you are looking at building this kit, check the floor for twist/arching and also engine cover fit (even the photo of a built model on Tamiya’s instruction sheet shows the poor fit) as it’s certainly worth considering building this as a curb-side with the cover glued down in place.