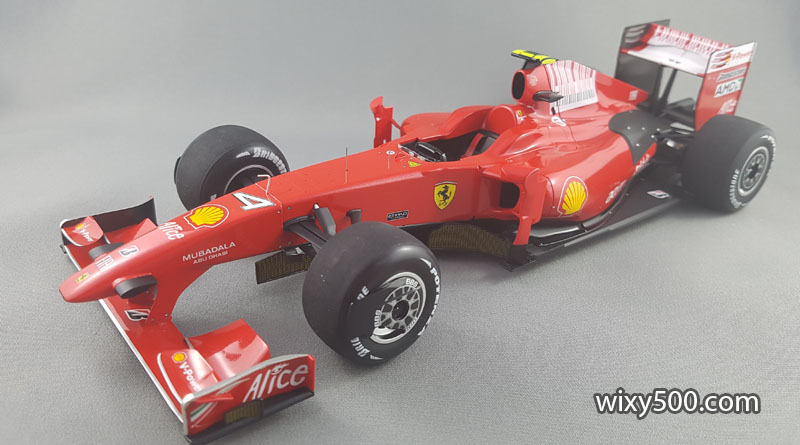
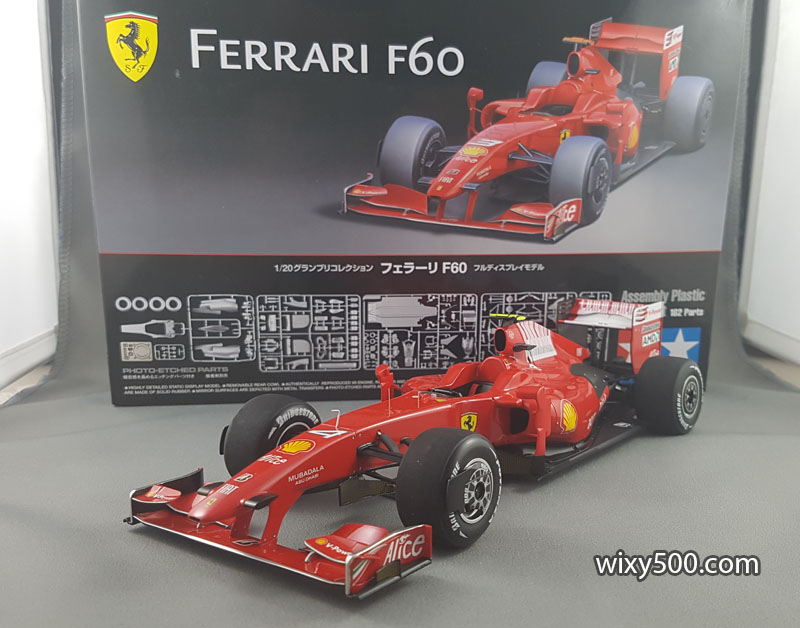
The Iceman, Kimi Raikkonen, was the only driver to manage a win in Ferrari’s 2009 racer, the F60. Here’s the full diary of my build with lots of photos, information and tips.
I decided it was time to tackle a kit of a modern day subject, so grabbed this F60 from the stash – only to realise it was already over ten years old! I really do need to get cracking with some of those older kits…
The Car
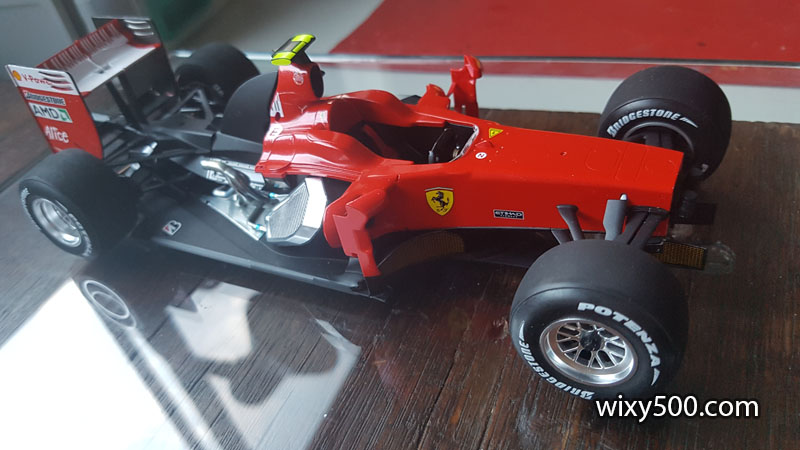
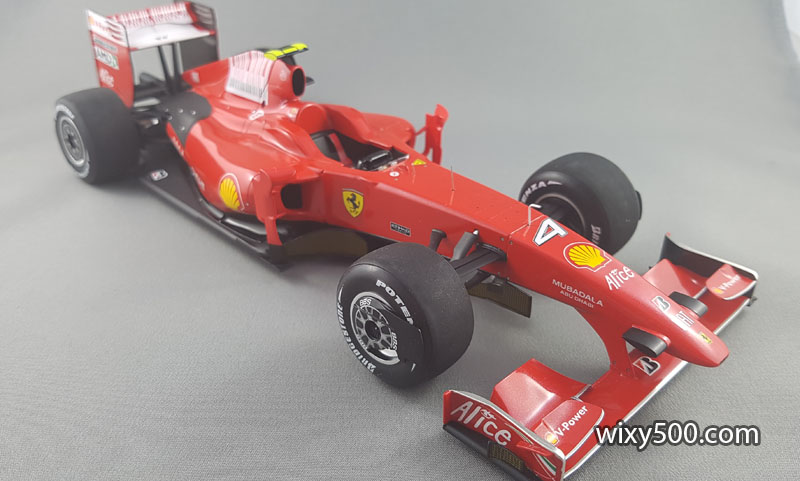
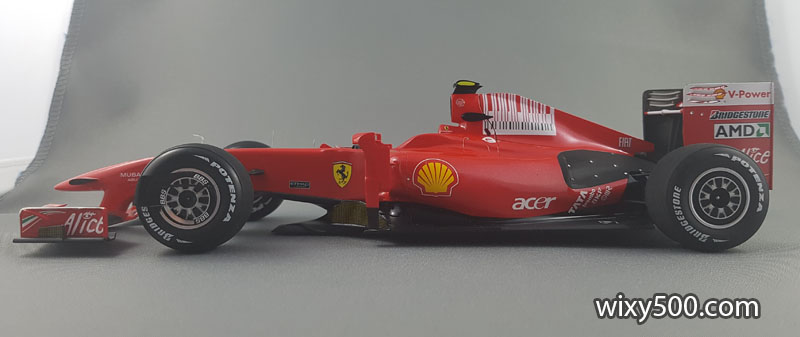
2009 ushered in a new set of rules for Formula One. Slick tyres were back (they’d used grooved rubber since 1998) and regulations allowed for ridiculously wide front wings. The cars were long and retained the regulated “narrow track” width. In my opinion, they looked awkward and silly, and this Ferrari is up there as one of the ugliest race cars of all time.
The F60 (the designation to celebrate Ferrari’s 60th year in F1) was powered by a 2.4 litre naturally aspirated V8 engine with KERS, able to deploy short bursts of an extra 80 horsepower. It was fitted with a 7-speed semi-automatic sequential transmission. Ferrari positioned the rear-vision mirrors outboard, using the vertical mounts for aerodynamic gain. The car also featured wheel covers which were subsequently banned at the end of the year.
Overall, the F60 struggled to be truly competitive. Raikkonen managed to take victory at Spa in the Belgian GP, but a handful of podiums mid-season was all the car could achieve on its way to 4th in the Constructors’ Championship.
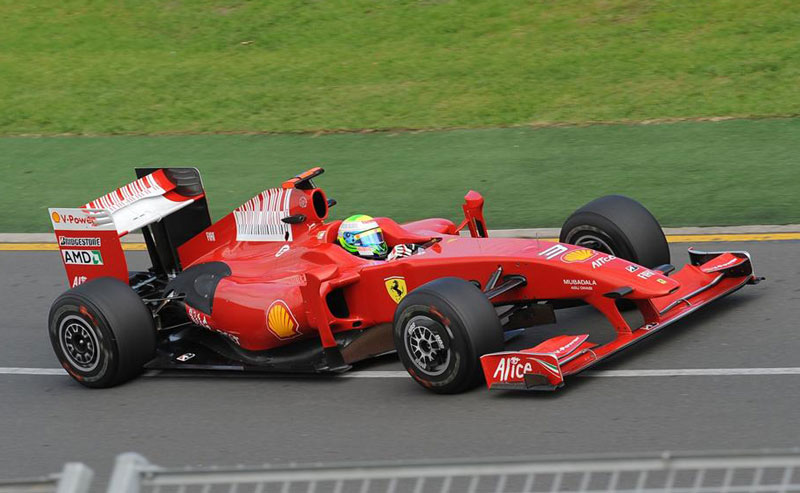
For reference purposes, the real machine at the 2009 AGP, Massa at the wheel.
The Model
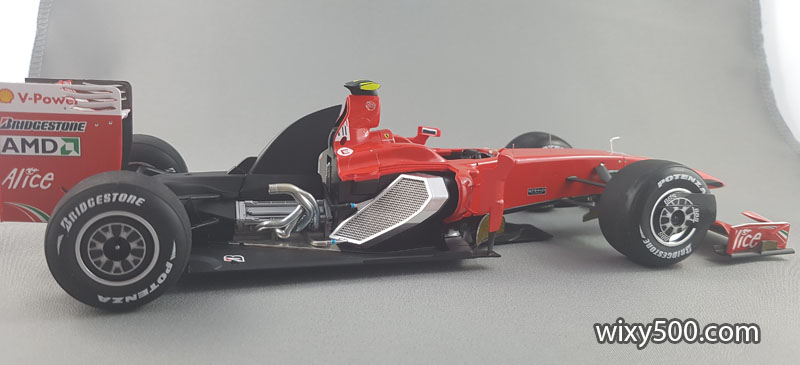
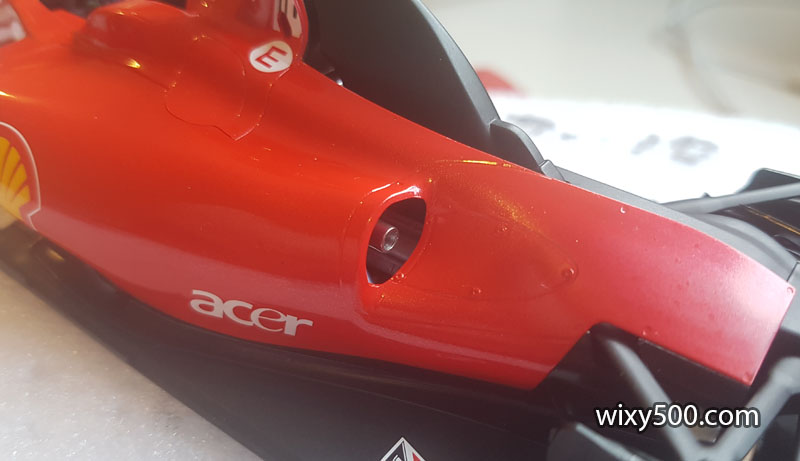
This is model #59 in Tamiya’s 1:20 Grand Prix series. From an engineering perspective, Tamiya did an excellent job on the fit on this model. The panel gaps are fine and everything pretty much lined up as it should during assembly. In fact, the near perfect fit has been a bit of an issue, damaging the paintwork when fitting or removing the sidepod covers.
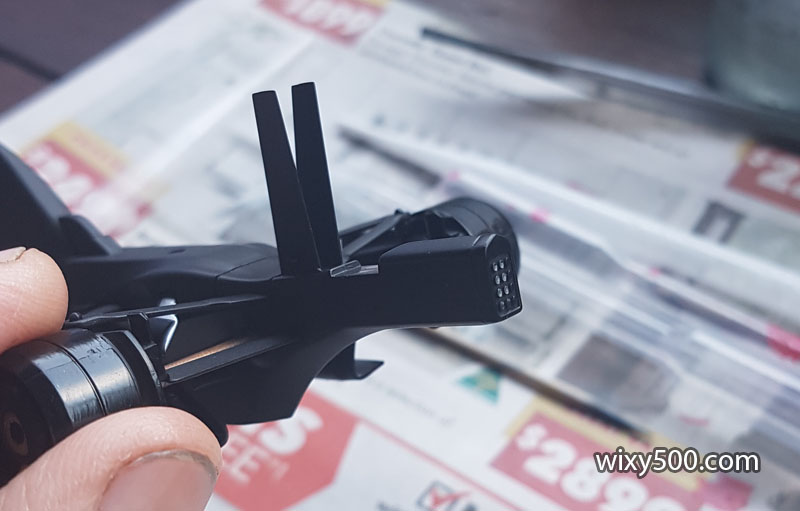
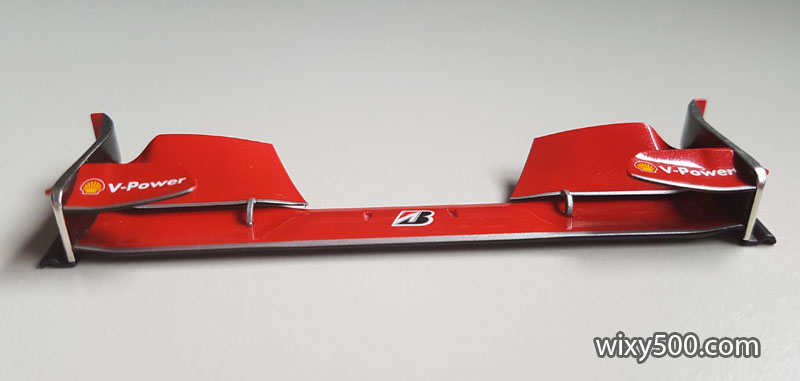
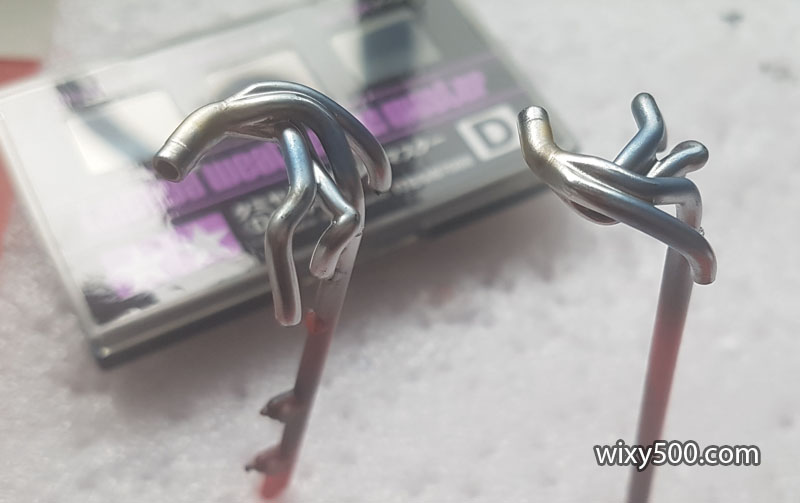
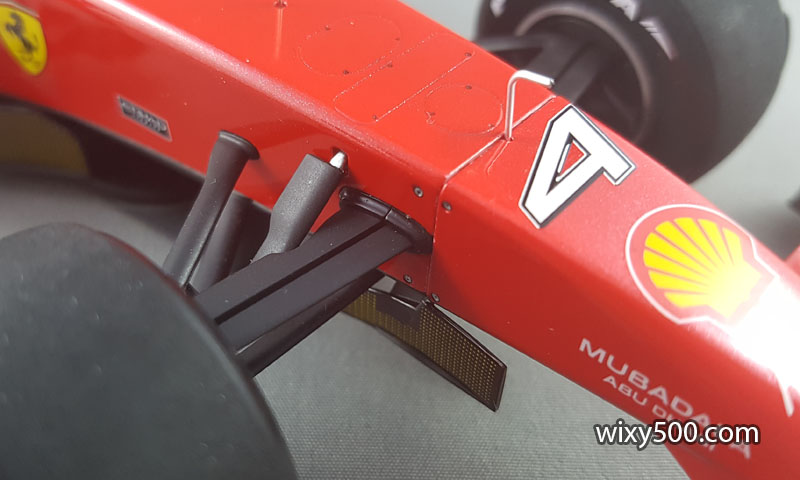
I found some of this build quite fiddly and fragile. There are a number of parts that have a very small surface area for glue to fix the pieces together, such as the small winglets on the front wing and turning vanes under the nose. The huge front wing, for example, is held in place by two small prongs with quite small surface area for the glue.
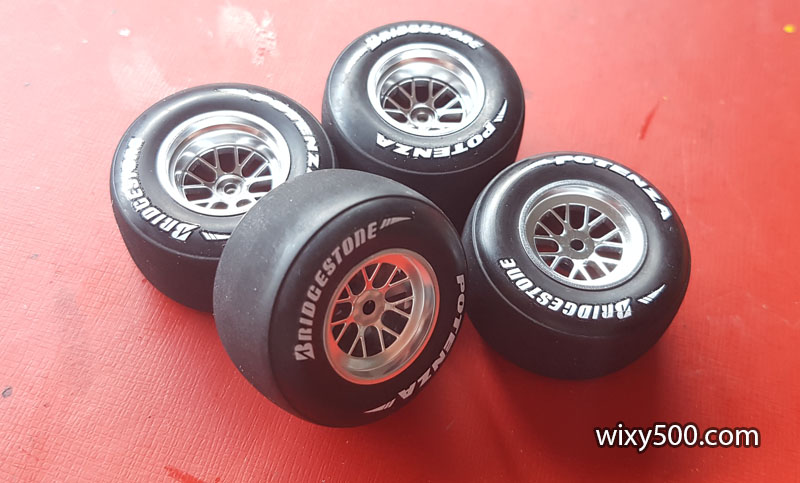
The kit comes with markings for regular drivers Kimi Raikkonen (#4) and Felipe Mass (#3). Giancarlo Fisichella and Luca Badoer also raced the F60 after Massa was injured at the Hungarian GP, but there are no decals for either – most likely because in-season development saw the car specification change so much by then that building this kit for those drivers would be inaccurate.
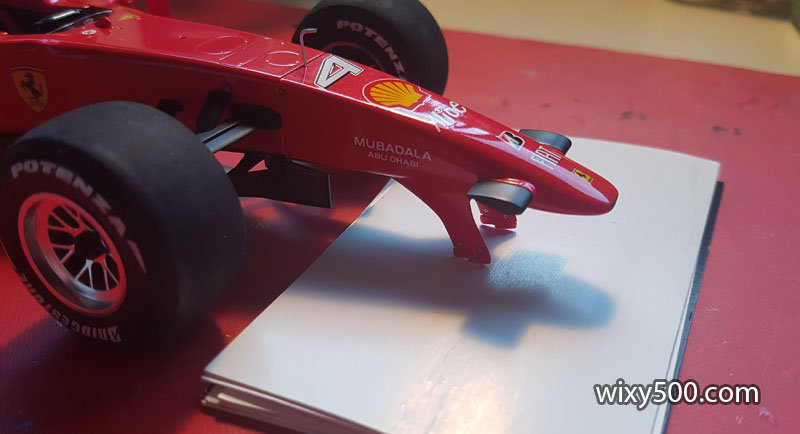
Having said that, the car never raced as illustrated on the box! From what I can tell, the kit most closely matches the configuration ran at the Australian Grand Prix – with the exception of the sponsorship markings on the engine cover and rear wing which Tamiya did not bother to include.
The Build
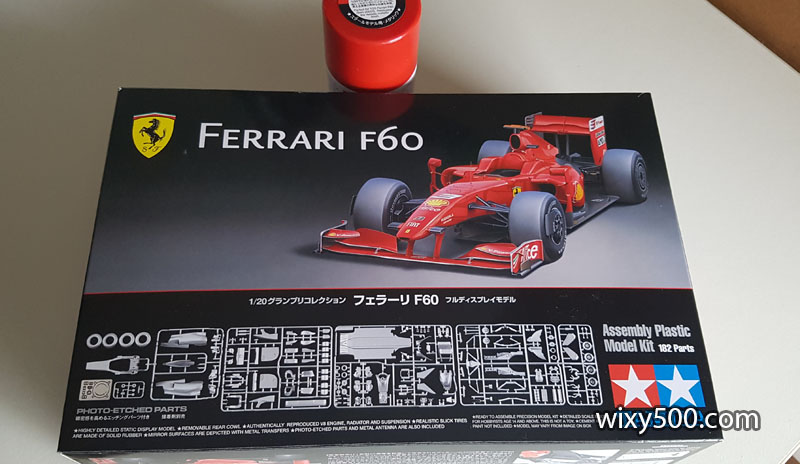
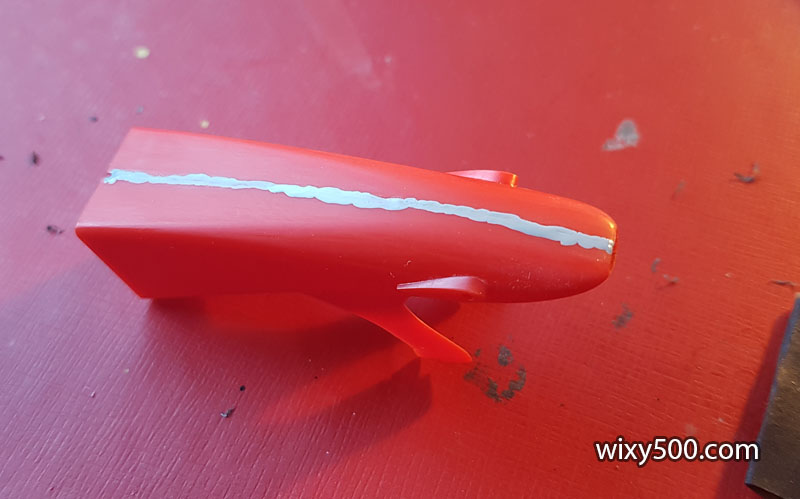
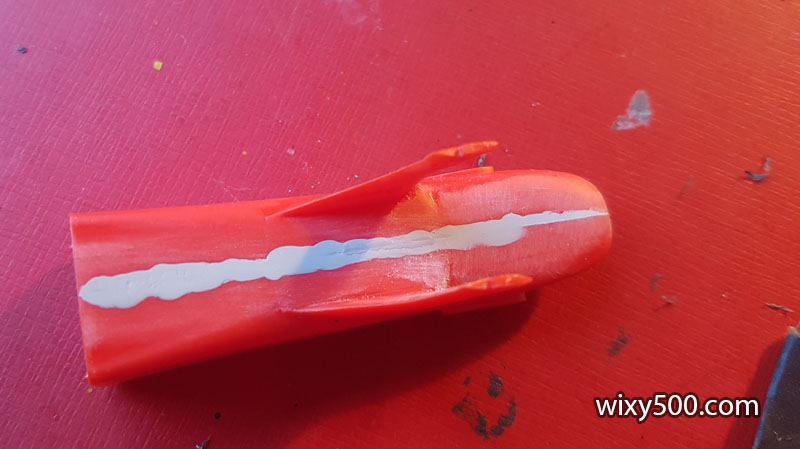
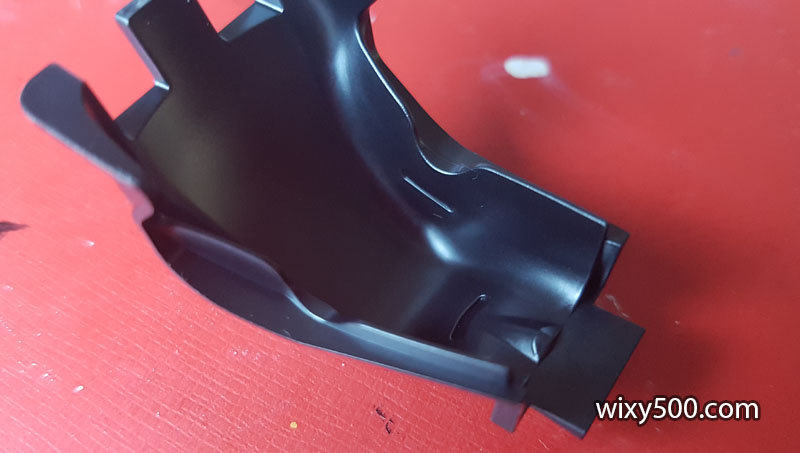
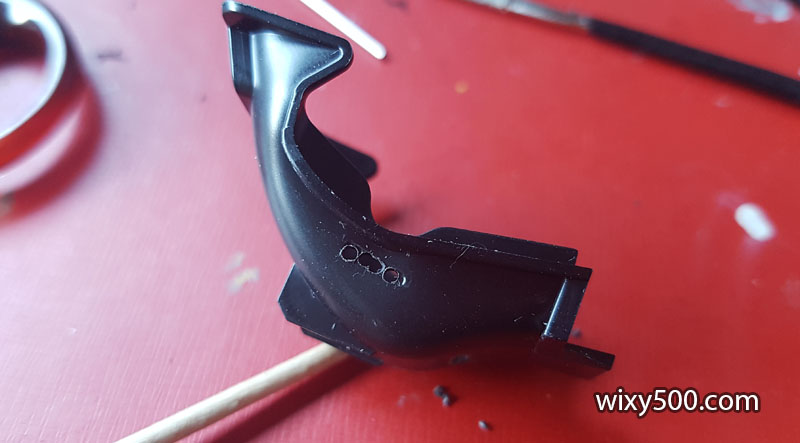
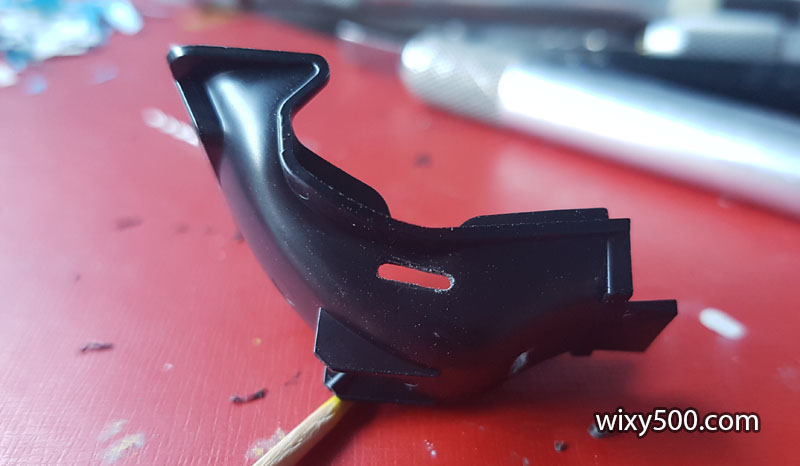
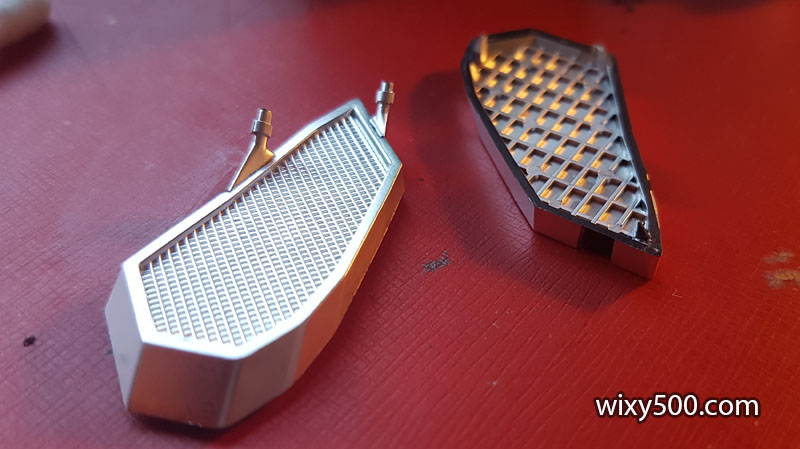
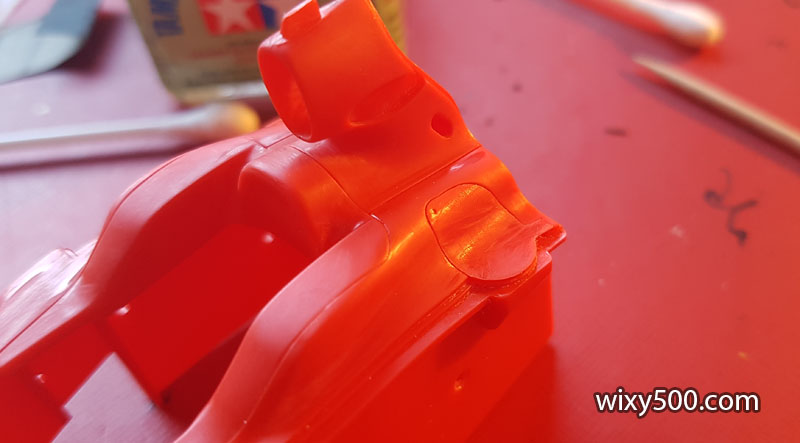
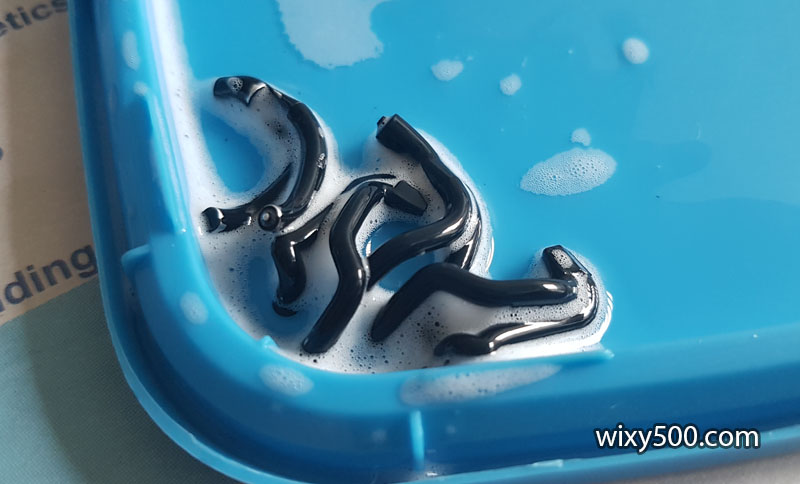
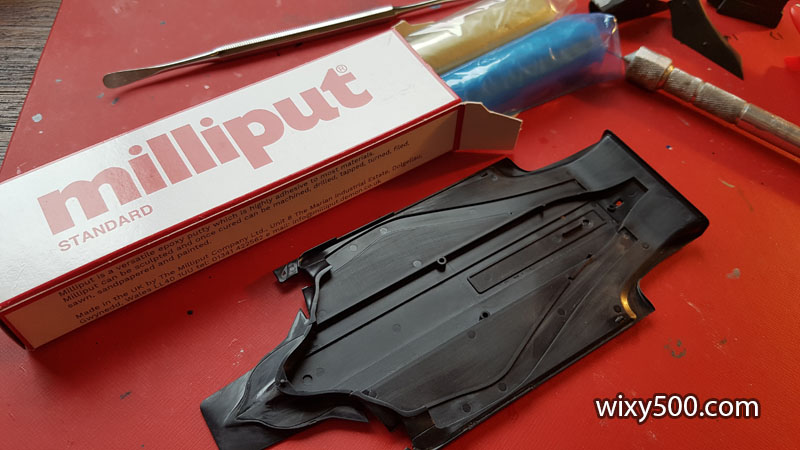
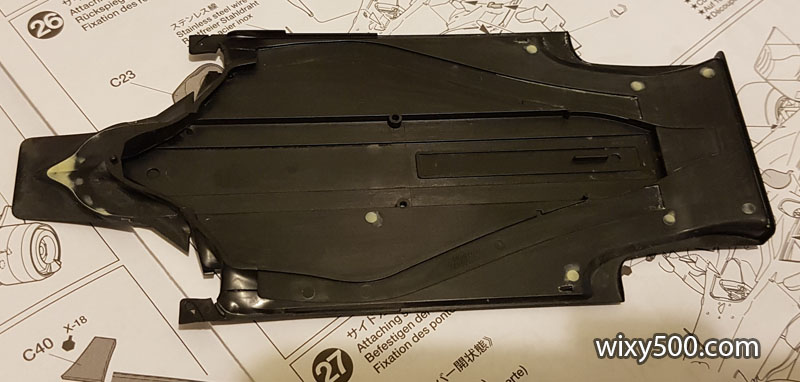
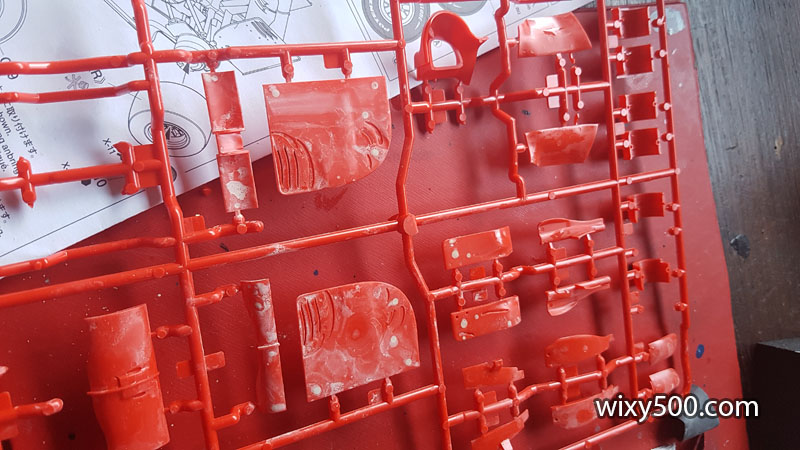
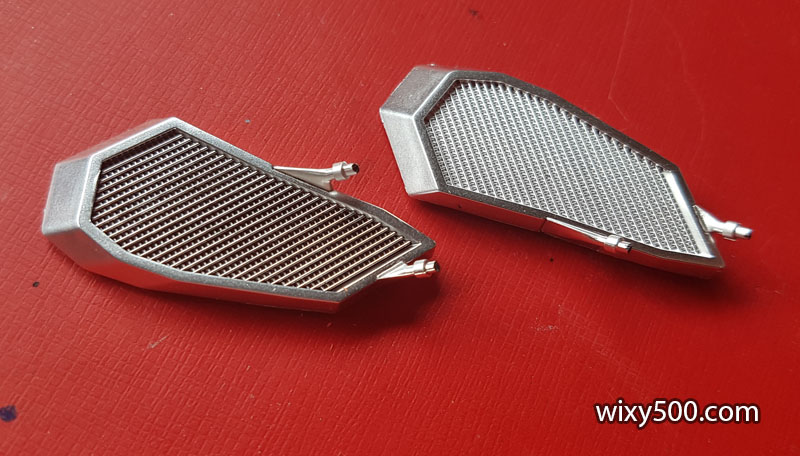
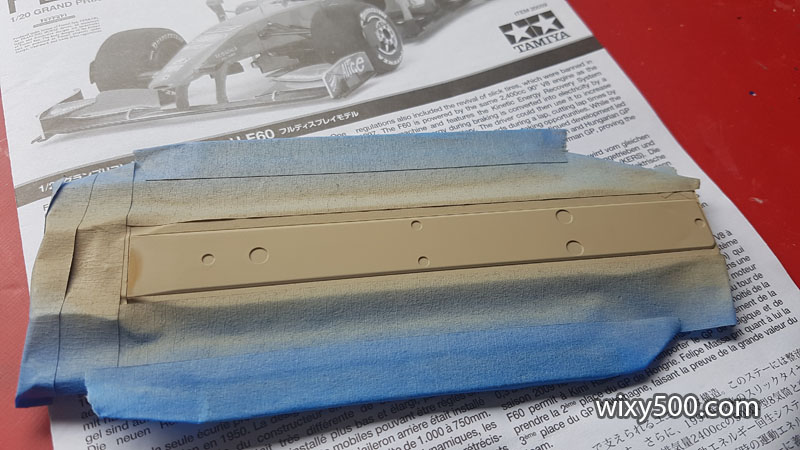
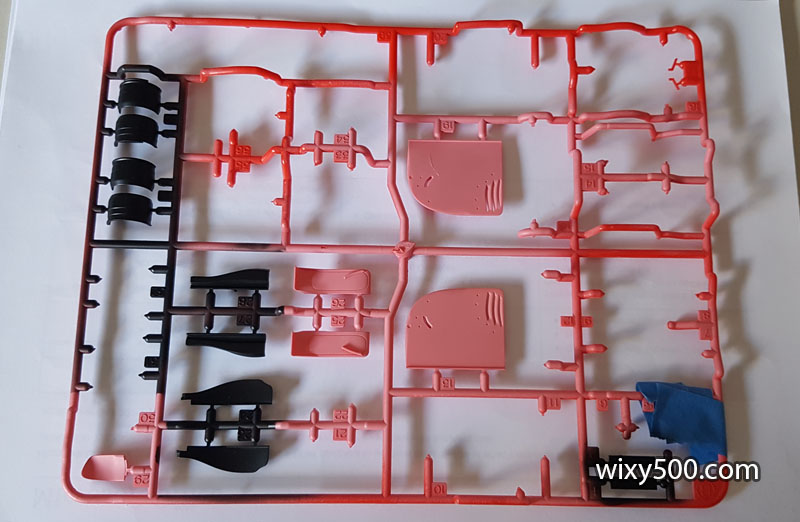
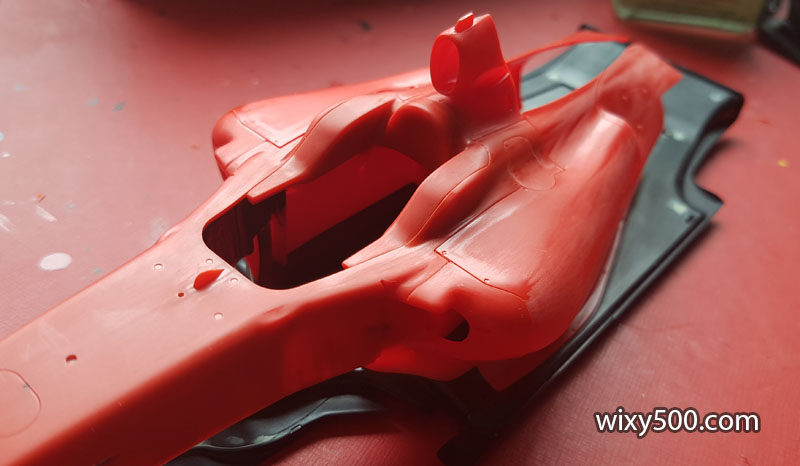
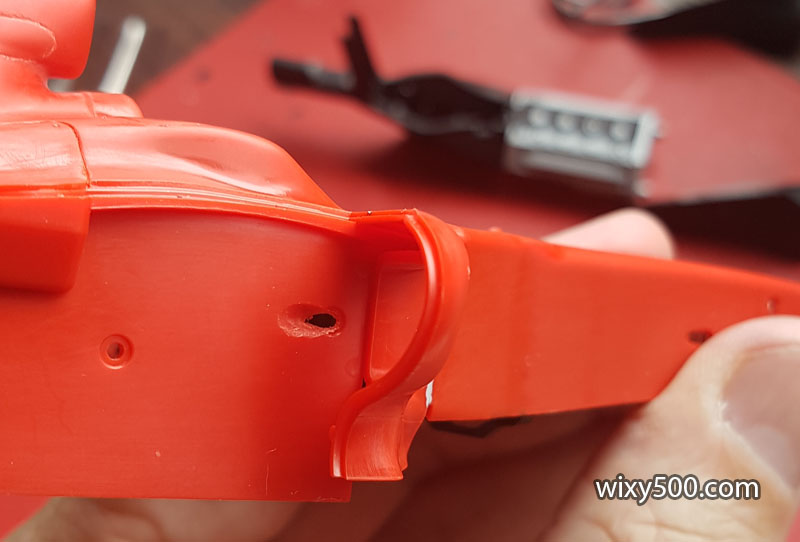
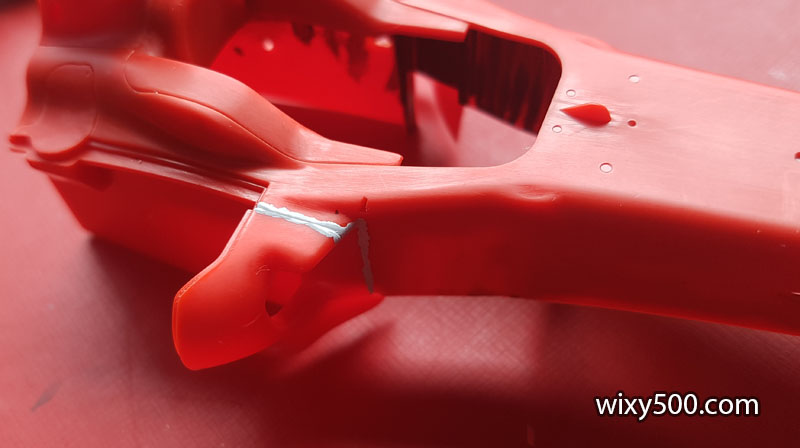
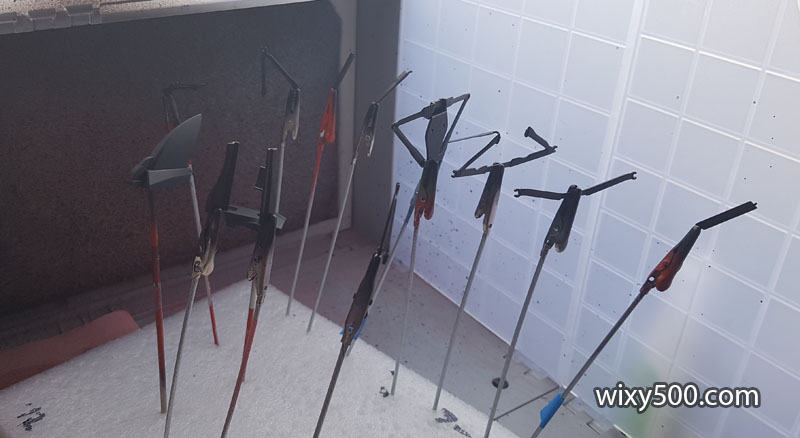
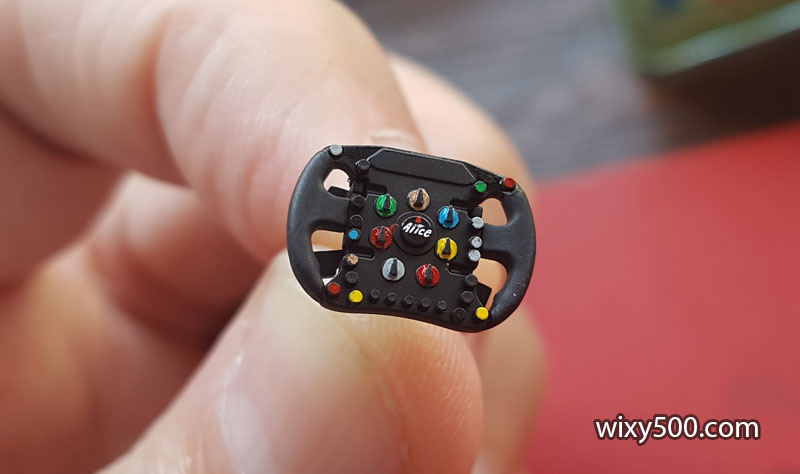
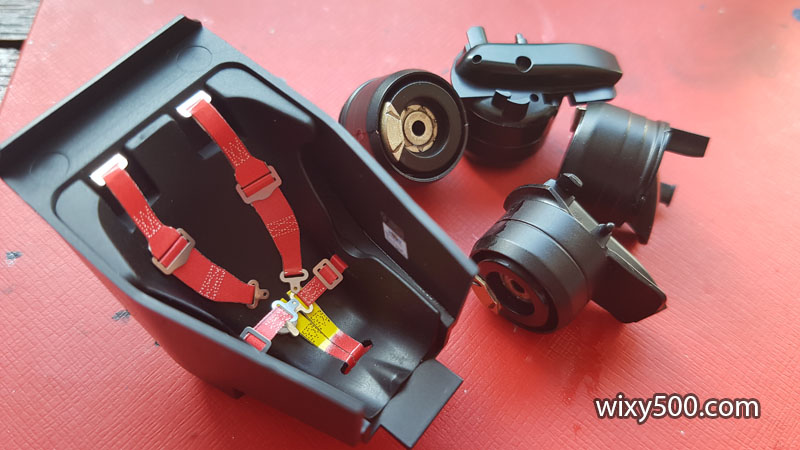
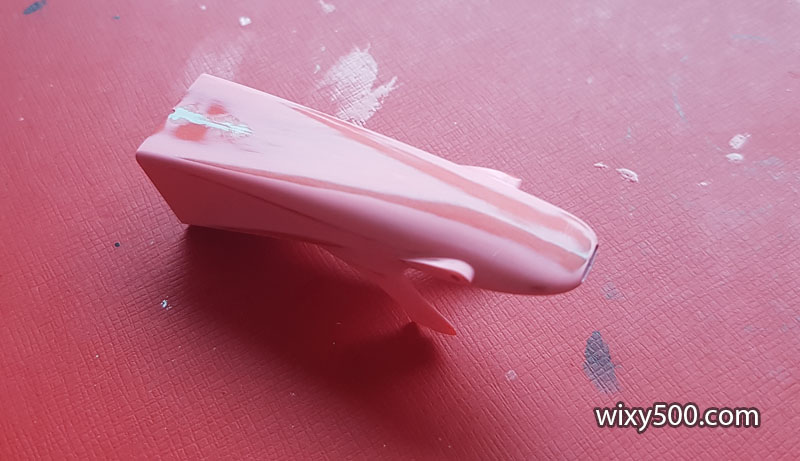
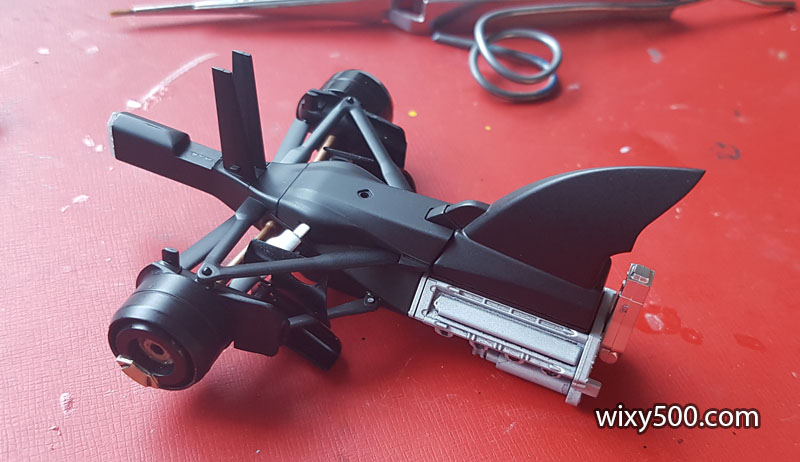
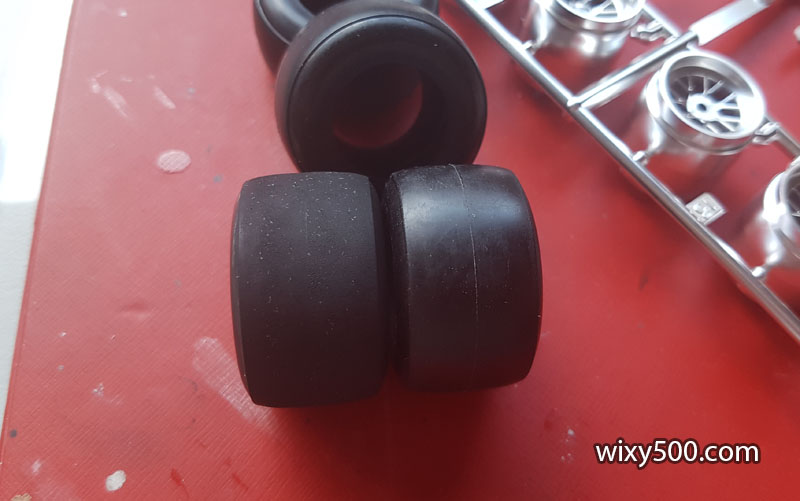
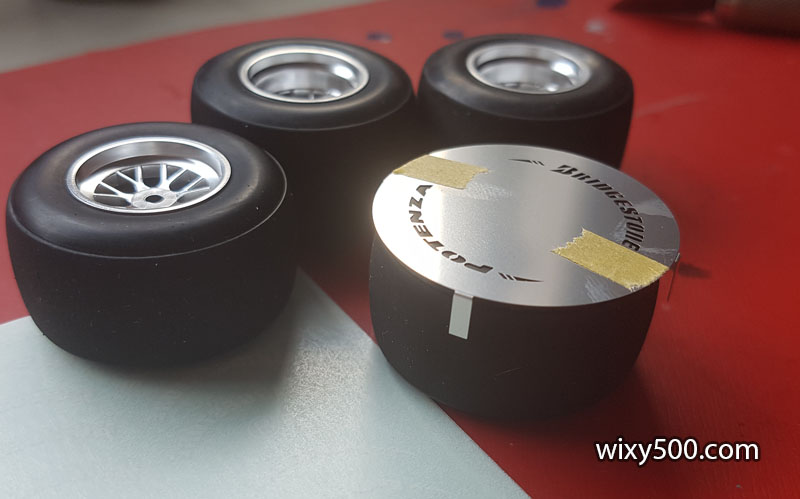
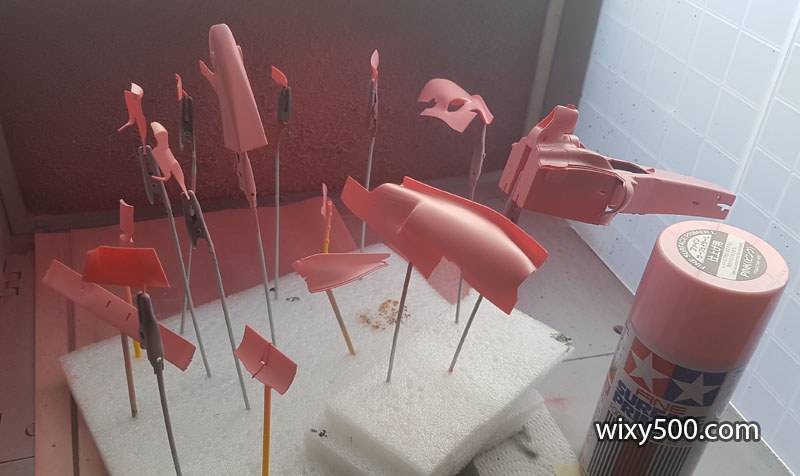
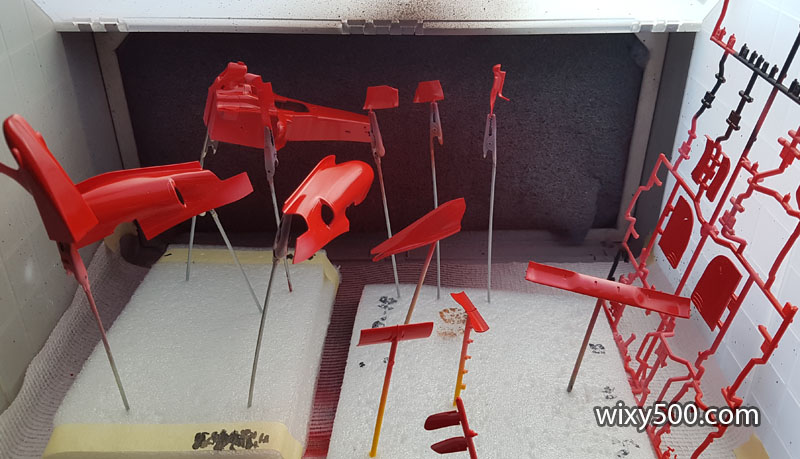
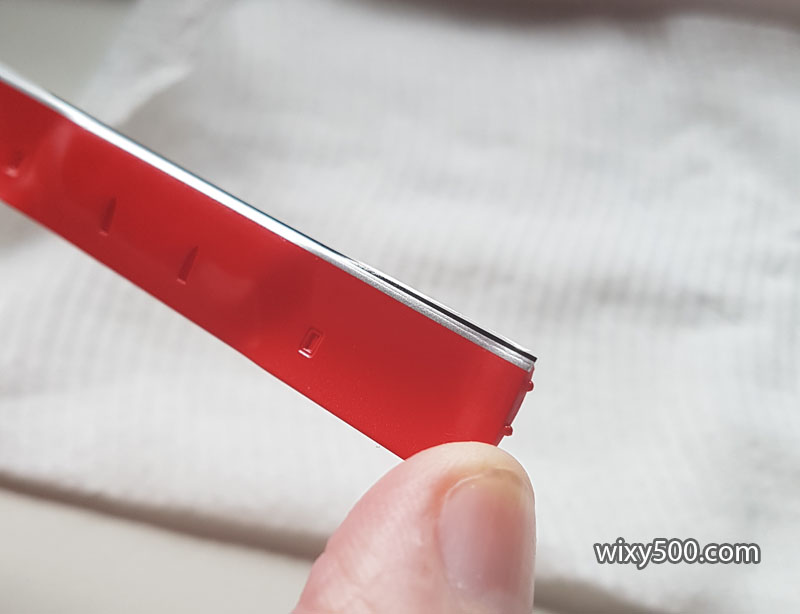
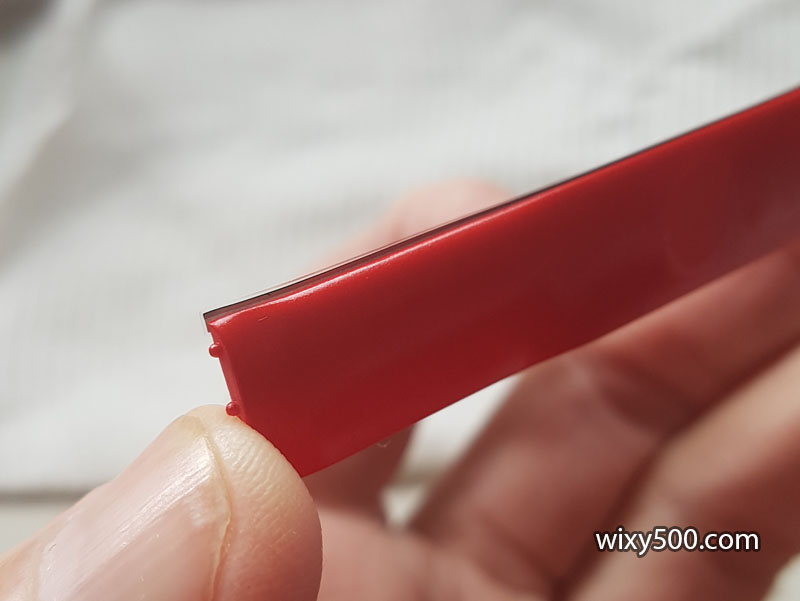
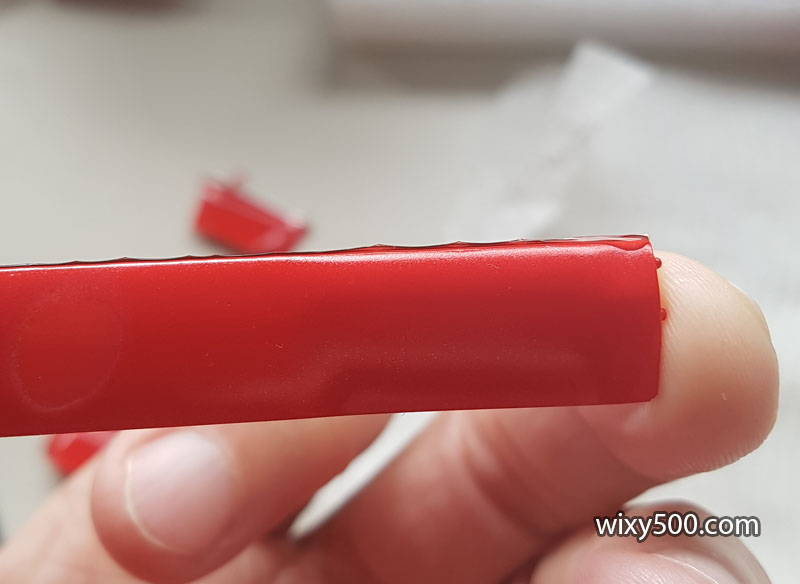
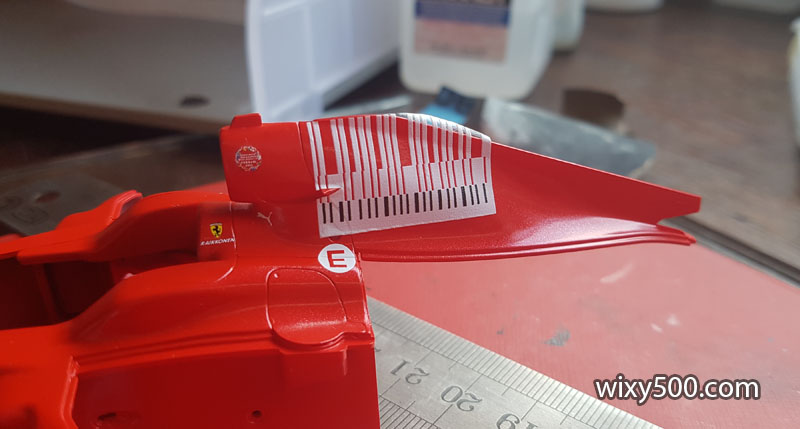
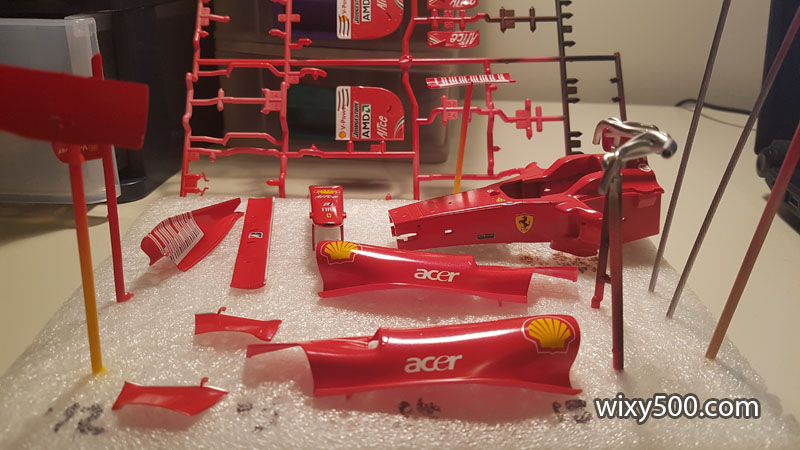
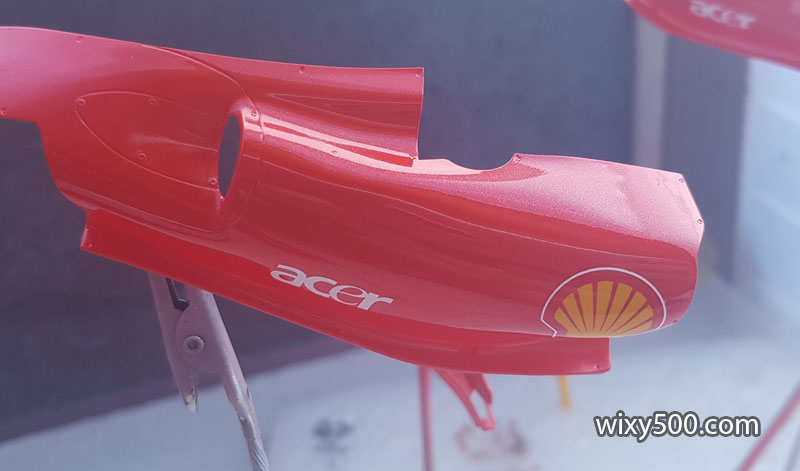
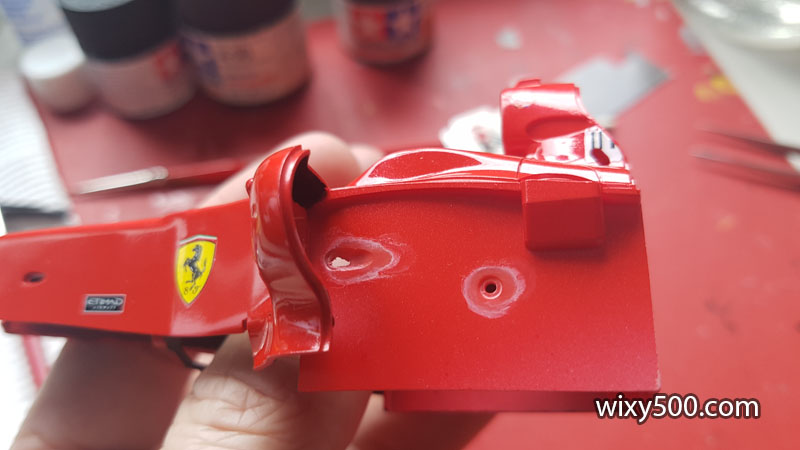
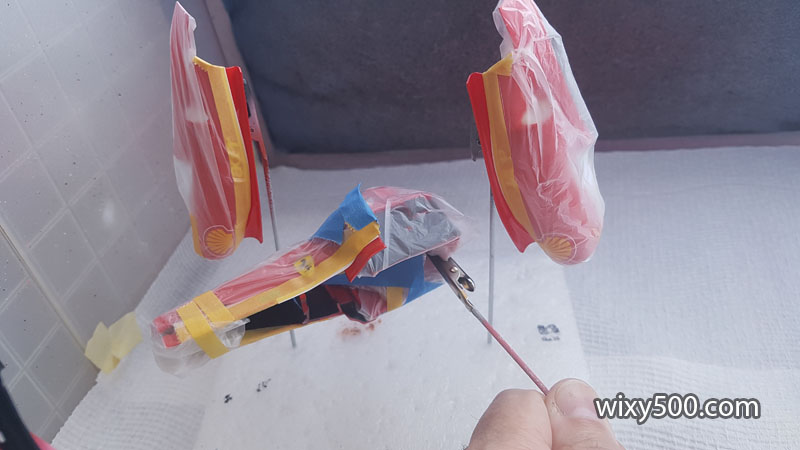
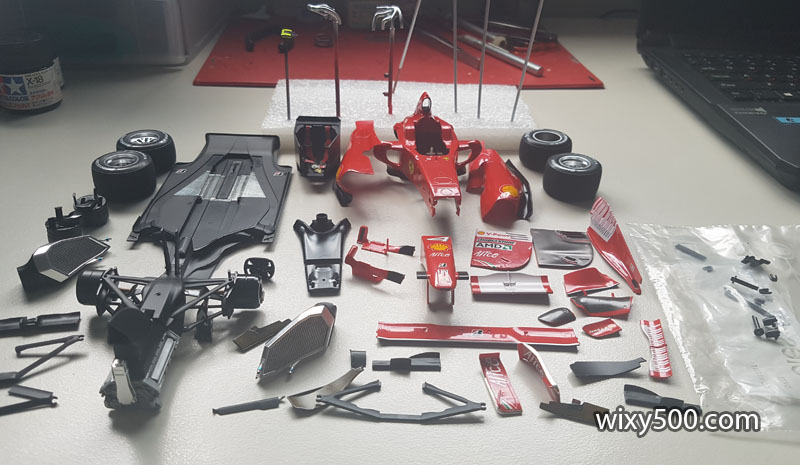
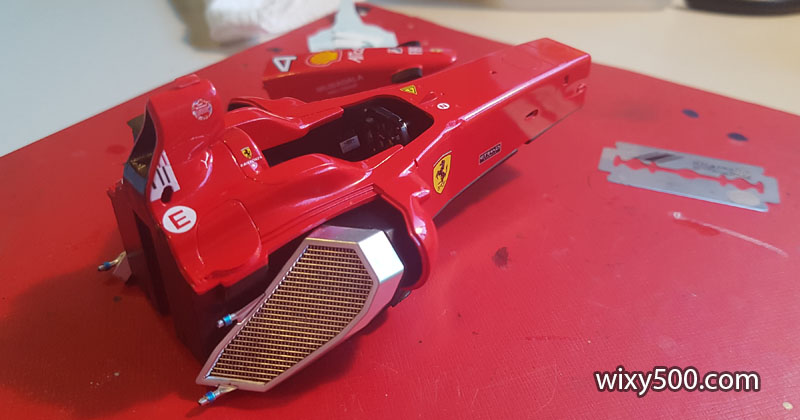
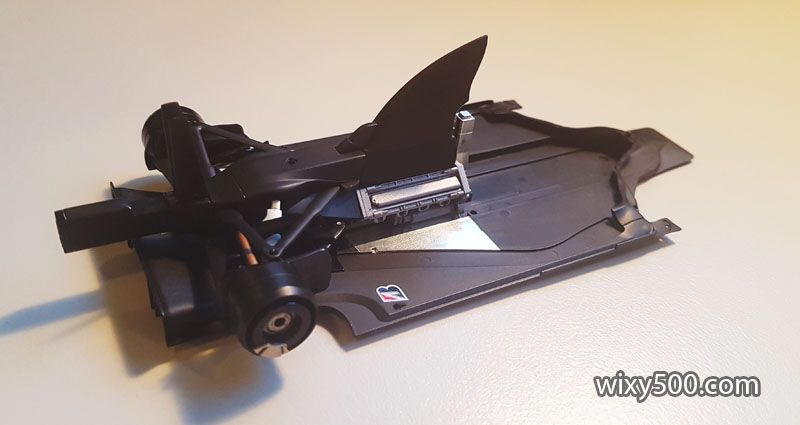
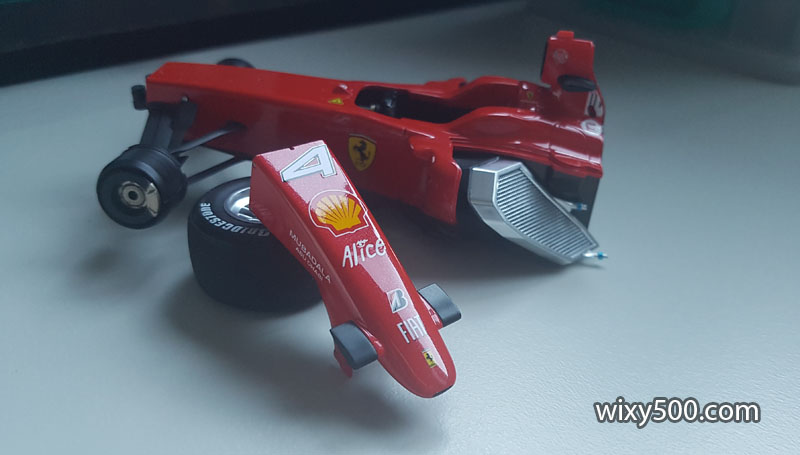
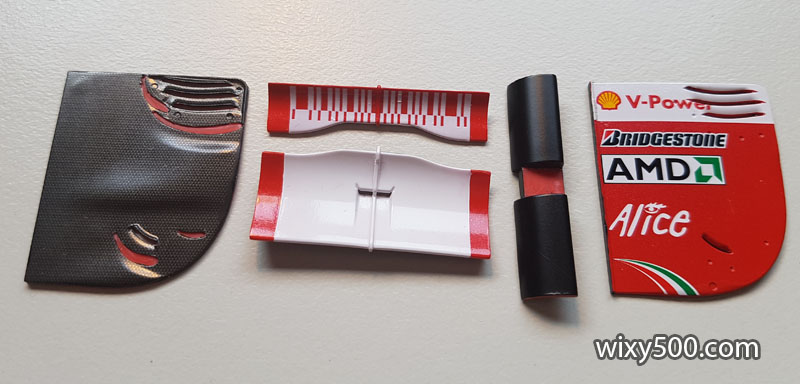
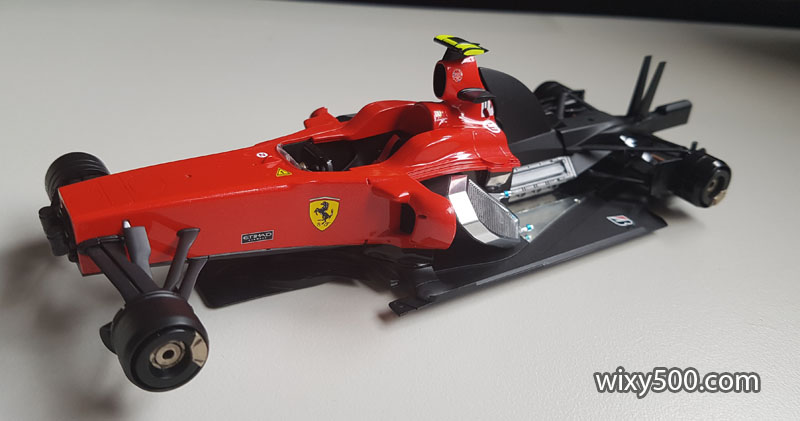
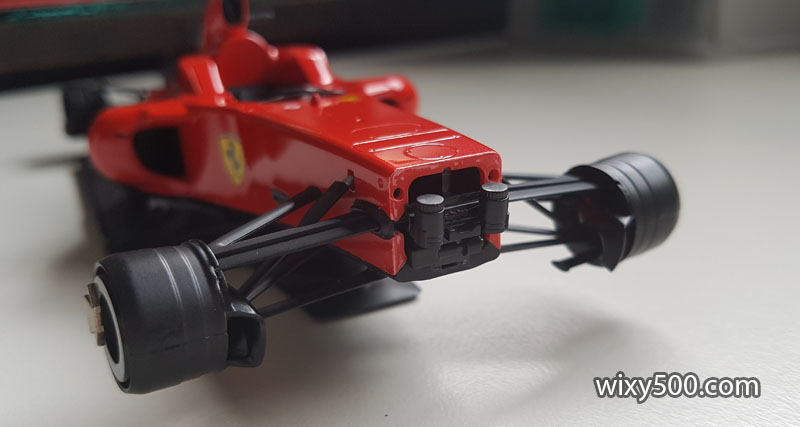
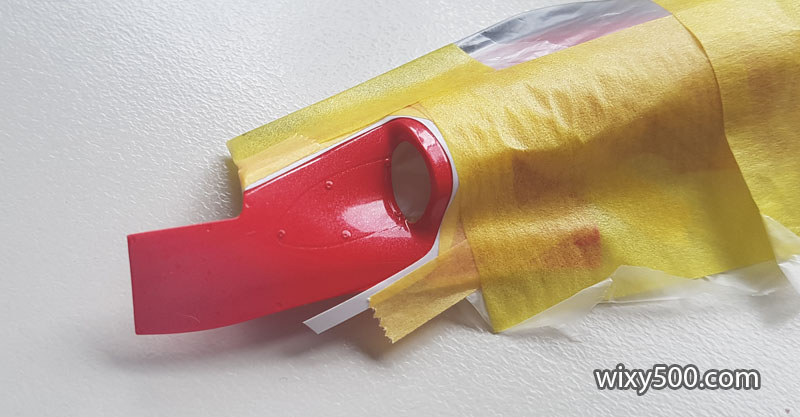
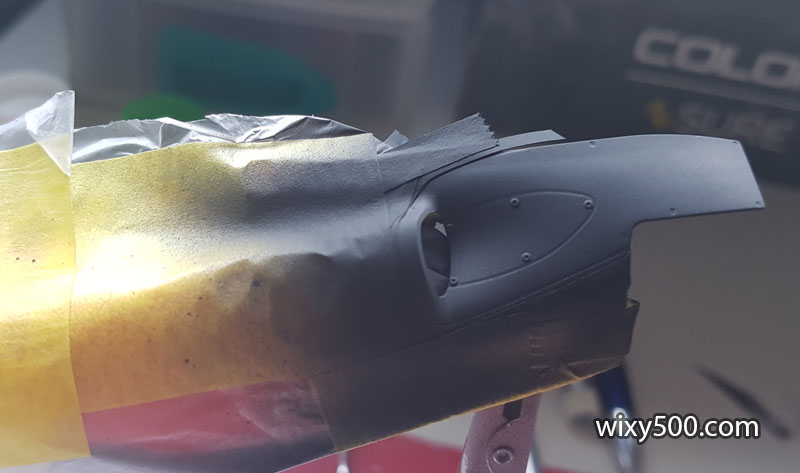
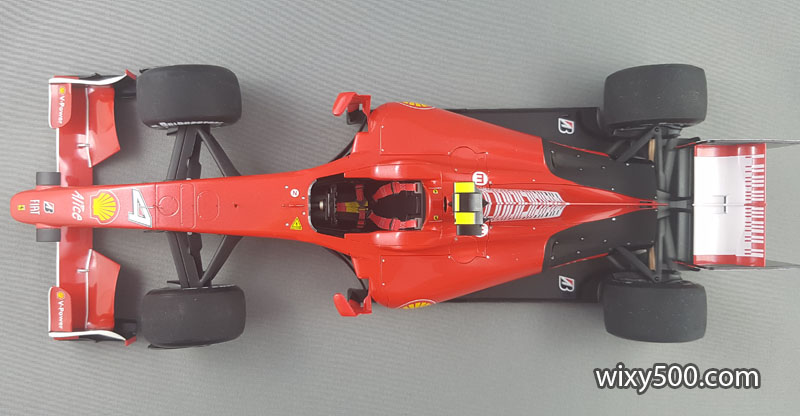
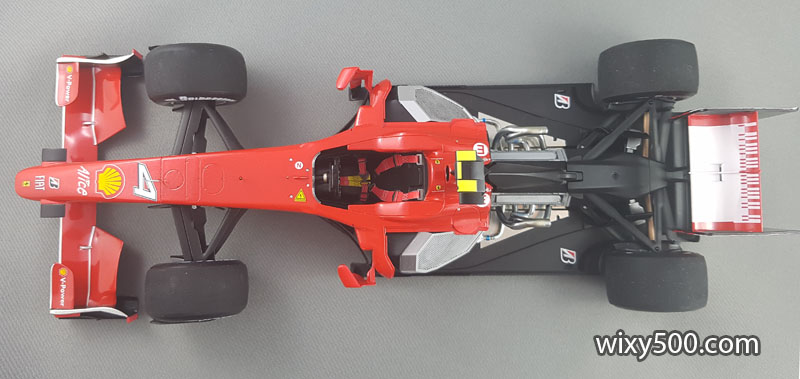
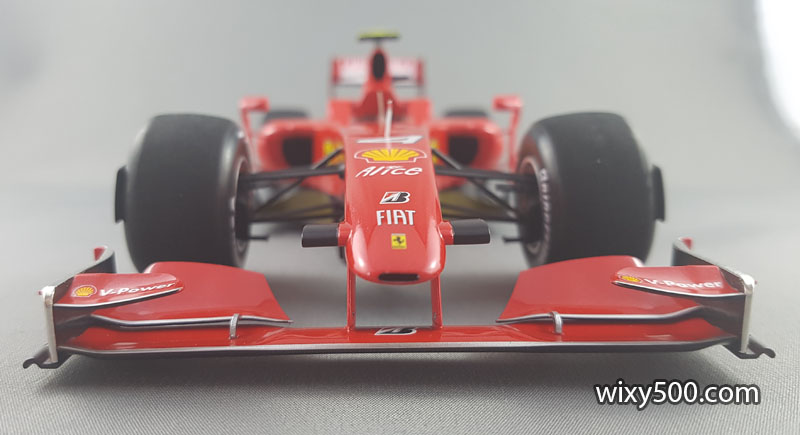
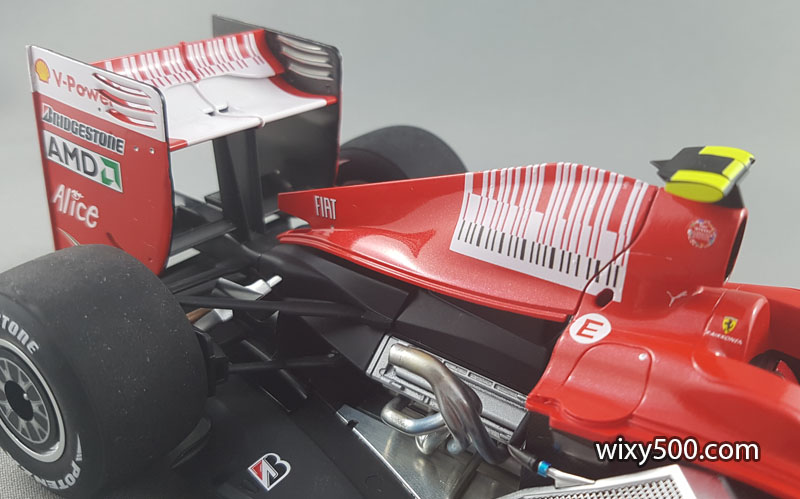
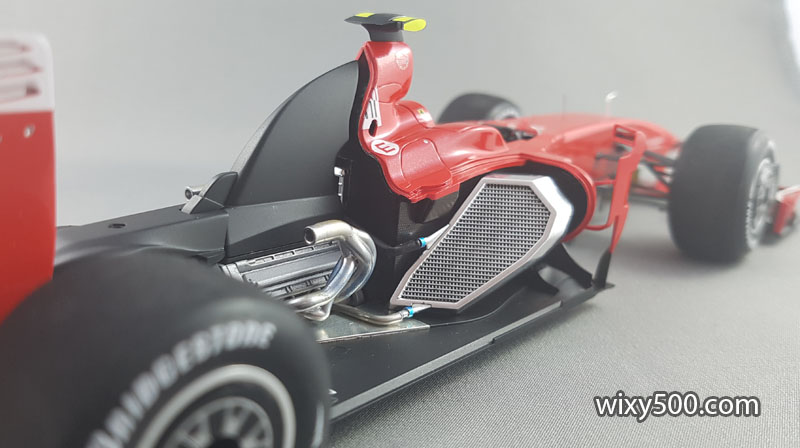
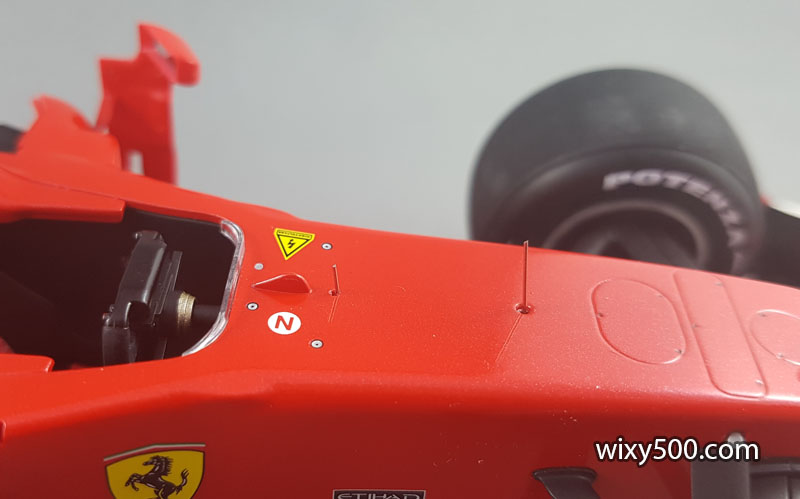
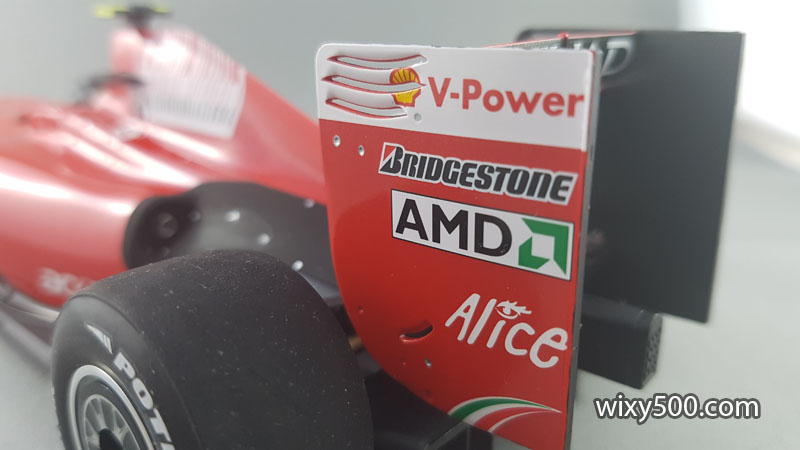
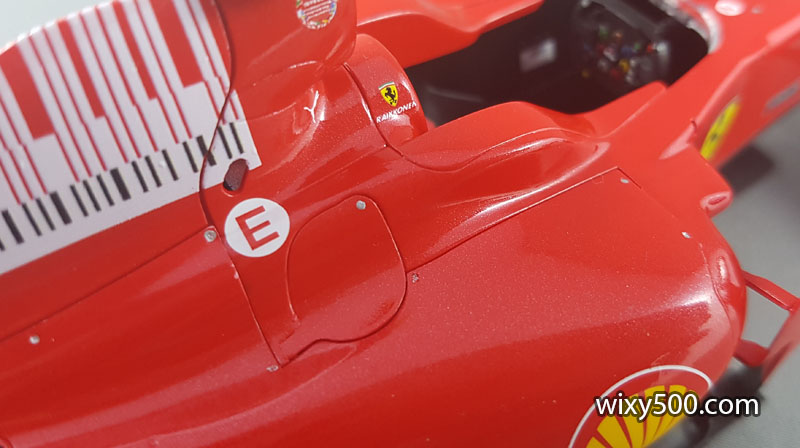
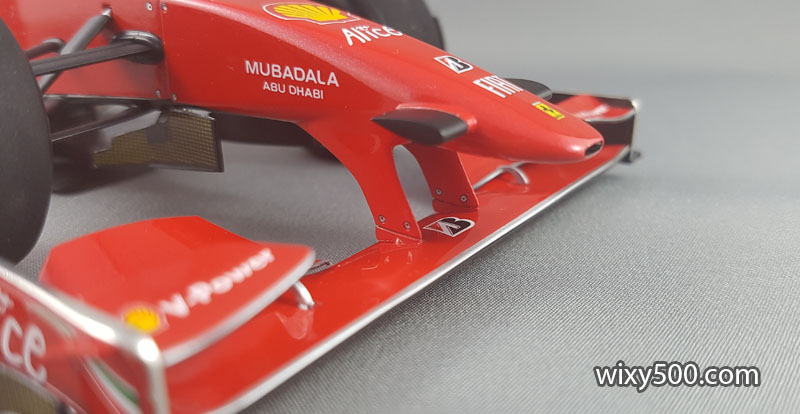
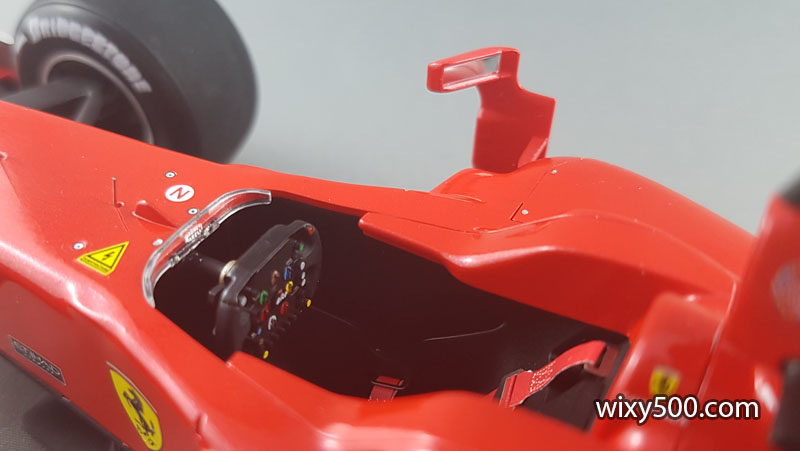
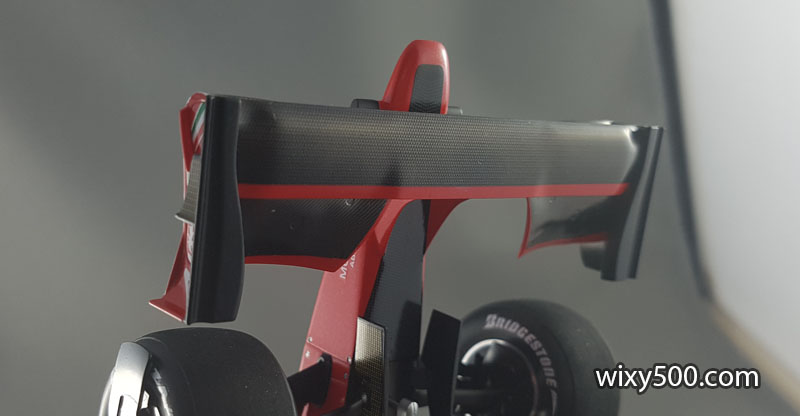
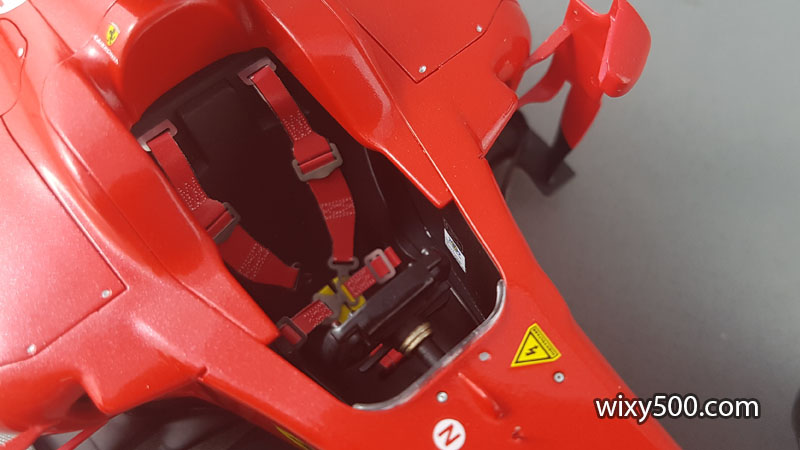
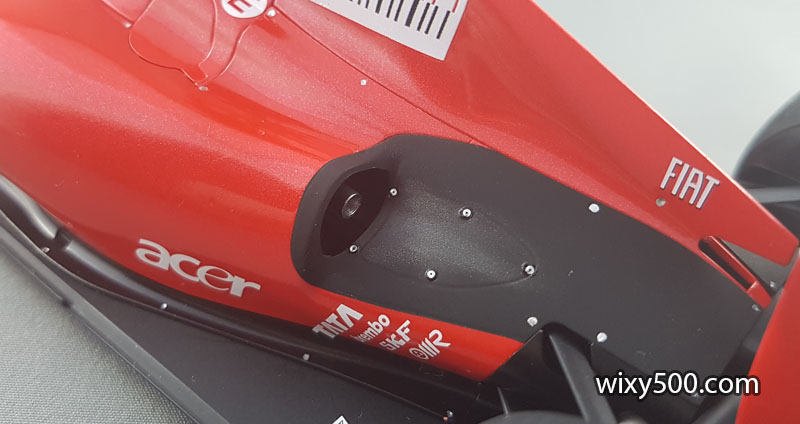
Tamiya kit #20059, Ferrari F60 in 1:20 scale. It’s an officially licensed Ferrari product. I also bought a can of TS-85 “Bright Mica Red” which was formulated specifically for this kit to replicate the metallic finish that Ferrari used in 2009.182 parts plus decals. Let the build commence!First job is cleaning up the parts; identifying and removing mold lines, gluing any parts that can be assembled prior to paint and gently rubbing back each piece ready for primer. The monocoque had some fairly heavy lines on the top edge corners.The long nose cone is two pieces that need to be joined and the seam filled. Instead of Tamiya putty, I used their brush-on grey primer for the first time.Progress on the underside of the noseThe kit has two solutions for seat belts: 1. a one-piece decal that includes belts & buckles that can be applied to the stock seat, or 2. photo etch buckles and sticker material to replicate the belts, which need to be threaded through the buckles. This second option is what I went for, which required three sections of the seat to be removed to allow the belts to pass through.A pin-drill is used to remove much of the materialThen a hobby knife to remove excess plastic, and a small file to finish off the shaping.The radiators are plated in an aluminium-type finish, which I was happy to retain (in many older kits, the plated parts are way too shiny). This plating has to be scraped off wherever plastic cement is to be used, such as the hose fittings and the edges where they will attached to the sidepod ducting. The kit can be built with the fuel filler flaps open and nozzle/coupling detail is included in the kit. However, I like my models to be displayed race-ready, so just glued the flaps in the closed position. The fit of the parts here is amazing, possibly the best I’ve seen in a plastic kit of this type. The kit exhausts looked very ‘toyish’ – plated silver but with noticeable mold lines. The plating comes off easily within a minute of being hit with a little household-strength bathroom mould remover.I’d heard good stories about this Milliput stuff, so decided to try it out on some of the circular pin marks on the floor. It’s a 2-part epoxy product that is supposed to not shrink. This is the floor after filling and sanding some of the marks that will still be visible once assembled.A lot of parts needed preparation on front and back surfaces. With all these front and rear wing pieces, it’s easier to do the prep while the parts are still on the sprue,Radiator with a black wash (left) Vs radiator as it comes in the kit (right).First paint to go down was on the underbody plank.After prep, wing end-plates, barge boards and a few other parts that are difficult to mount for spraying stay on the sprue to receive primer, colour and even decals.Test fitting some of the main bodywork parts to the floor. Here’s a Top Tip if you ever build this kit – don’t do what the instructions say! Tamiya want the radiators to be fitted to the monocoque before the rounded sidepod openings are fitted. Thing is, that leaves some noticeable joins on the outer bodywork that don’t exist on the real car. However, if the sidepod openings are fitted first (which they are, above) the radiators don’t fit. My solution? Elongate the front hole to enable the radiator assembly to be slid in at a later point in the build 🙂With the radiator intakes glued in place, the join lines across the top and down the side can be filled before painting.Batch of semi-gloss black parts, mostly suspension pieces. Steering wheel with hand painted rotary switches and buttons. Rubber-coloured paint is used for the hand grips.Fine tweezers and a steady hand are required to thread the belts through those photo-etch buckles!. The four uprights with brakes and shrouds, however, most of this is covered when the wheels go on.Multiple fills, sprays and rub-backs were required to get the two-piece nose to look like one piece. It was the only part of the model where the fit required some work.The engine, gearbox and rear suspension looks rather bland – there’s just not the interesting detail on modern F1 engines like there was in the past. This area could have been tarted up with some carbon fibre decal, but I didn’t have any at this stage of the build.I almost left the tyres in this kit as they came, with the mold release and molding seam intact (right), but decided to give them a buff to give a roaded look (left). These are the rears.The kit comes with a photo-etch masking template to spray the Pirelli branding on the tyre sidewalls. However, the sidewall of these tyres is quite rounded, meaning the template does not seal against the rubber, producing a fuzzy edge on the lettering. That might look ok on a 70s or early 80s car, but not a 2009 model.Therefore I reverted to the kit’s decals. Kit rims are very well done with nice plating to simulate an alloy look. Unfortunately, most of the rim detail gets hidden by the wheel covers this car ran.Primer on the body parts.Rear crash structure, wing mounting and rain light.All up, I used four coats of TS85 Bright Mica Red – one mist coat and one light coat a couple of minutes later, then wait a few days, light sand to remove a couple of dust particles followed by another light coat then heavier application for the final coat.The leading edge of all the front wing elements required a narrow silver and black decal to be wrapped around – a really difficult feat. So, I applied the decal and got the initial positioning and alignment correct first……with the decal over-stepping the leading edge. I let this completely dry in position……then hit it with decal softener to get it to wrap around the edges and settle on the underside.Tamiya did not include the ‘Phillip Morris’ decoration for the engine cover or rear wing. I sourced some aftermarket decals for the job. To get them positioned required the engine cover be temporarily held in place with masking tape.Unfortunately, the aftermarket decals proved to be a little inaccurate and required trimming.There’s not a huge amount of decoration on this car and Tamiya’s decals (by Cartograf) go on really well – though getting the big Shell pectens to settle on the curved sidepods was quite a task.I normally use Tamiya’s TS13 clear, but know from (bad) experience it melts the decals from Patto’s Place (where I sourced the aftermarket barcodes). After testing with some scrap decal, I used Mr Hobby TopCoat, thinned with a bit of Tamiya lacquer thinner. This is the result.Lacquer thinner on a cotton bud is used to remove paint from the mounting points for the radiator ducting.Masking the lower edges of the sidepod covers and monocoque for semi-gloss black.Aftermarket carbon fibre decals (Scale Motorsport brand) finally arrived, so I decided to use this material on various surfaces of the build, starting with the flanks and rear of the tub. The decal comes as one large sheet, so I used masking tape to create templates to fit the area, then placed that on the decal material and cut out the shape. As the other side of the car is a mirror image, I then placed the same template on the reverse-side of the decal sheet and cut that out too. I used this technique for all the inner and undersides of the front and rear wing components, so it was a time consuming job.Most of the parts and sub-assemblies prepped and painted, ready for the final buildup to commence.After cutting away carbon fibre decal material from the mounting holes, my trick worked perfectly – the radiators and ducting slipped in nicely on both sides 🙂The engine/gearbox/rear suspension assembly glued to the floor tray. Care must be taken at this point to ensure the bodywork that fits inside the suspension arms (hard to see here because it’s black) seats correctly on the floor. I dummy-fitted the engine cover and sidepod covers while the glue was drying to ensure it was all sitting at the right angle.Despite the completed nose cone being ready to fit to the chassis, I didn’t want to fix it in place until the chassis was glued to the floor and all wheels were on, just in case I needed to tweak the angle if there were any alignment or ride height issues later in the build.The front wing is complex to build and fragile. It’s made of 9 individual pieces, 23 decal applications, multiple coats of primer, colour & clear, plus sand, polish & touchups. No wonder it takes so long to build these things!Rear wing parts. A lot of the work on these, particularly the two end plates, was done while the parts were still on the sprue. From L to R, the inner end-plate shows carbon decal with cutouts to expose raw plastic for the cement to glue the wing elements in place. The upper wing element has a decal for the white barcode whereas the white on the main element is masked and sprayed. Both have carbon decals on the underside. Main support beam is semi-gloss black with the paint removed for the gluing surfaces. One large decal provides all the decoration for the outer surfaces of the end-plates, which have been cleared and lightly polished. Softener was required to get decals to conform to the louvre cutouts.Starting to take shape now with the chassis and engine mounted to the floor.Tamiya include parts for the steering rack and brake fluid reservoirs so that the model can be displayed sans nose cone and bear some resemblance to the real thing. My build is race-ready with the nose attached, so I didn’t bother painting these parts.After stripping the plating, the exhausts were assembled, gaps filled, primed and sprayed gloss black, followed by Alclad polished aluminum. I was originally going to try some airbrush techniques to replicate the colour changes that happen to F1 exhaust pipes once the engine has been run. However, I’ve had some of Tamiya’s ‘Weatherine Master’ compounds sitting around for a while, so decided to try them instead. Brushing on a mixture of burnt blue, burnt red and gun metal achieved the effect seen here.After gluing the exhaust assembly in place, I fitted the bodywork cover to ensure the pipe sat in the centre of the air outlet vent.Fitting fiddly turning vanes and supports to the chassis was a pain. I cut up some blocks of foam to support the model so I could work on the underside without it teetering on (and probably damaging!) the rollover hoop camera.Rear wing done and the various aero turning vanes and mirrors fitted, which were very difficult to get in place and glued without messing up the paintwork.Once the wheels are attached the moment of truth comes when the model is placed on a glass plate to check it’s square and flat. Thankfully, it was! A stack of business cards is perfect for supporting the nosecone as the glue cures.Masking for the final spray paint on this model, the rear of the sidepod covers, x2.Matt black for the heat shield area behind the exhaust outlet.Done!Overhead, clothes on.Overhead, clothes off.When putting the bodywork on, the top engine cover must be fitted before the side-pod covers.Suspension wishbones are all semi-gloss black. On the real car, they are carbon fibre but my after market CF sheet arrived after I’d painted these, and I think the weave would be a little too course and out of scale for these narrow parts anyway. The small black shrouds encasing the upper wishbone and steering arm were fiddly to fit. I used white glue (Kristal Klear) for that job.In retrospect, I could probably have been a bit more aggressive with the discoloration on the exhaust pipes. The model does not include any coolant pipes to connect the radiator to the engine, so I made some up and pointed them in the general direction of where they needed to got. The top pipe is from some flexible tube, the bottom one is a piece of solder.Small antennae is cut from wire provided in the kit and CA glued in place. I drilled a small hole in the plastic to help locate the wire. With the precision engineered into the fit of the rest of the kit, I have no idea why Tamiya dropped the ball big time here. The top of the engine air intake should be sealed against the back of the roll-hoop.This image clearly illustrates the tight fit of all the bodywork parts (and a small paint chip :O )Front wing and mounting. The circular fittings at the bottom of the pylons are decals.Mirror material is a reflective mirror sticker provided in the kit.Aftermarket carbon fibre decals under the front wingI’m glad I went to the extra effort of fitting the sidepod intakes and filling the gap to make it all appear one-piece like the real car.I used a little weathering compound to stain the exhaust outlet shielding. My model v Tamiya box art. I actually prefer how the car is depicted on the box (and the kit instructions) with the red engine cover and rear wing. However, it never raced like that, so my version with the white and barcodes is more accurate.