Paul Weel’s 2000 AU Falcon Conversion

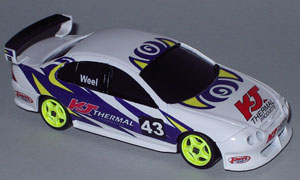
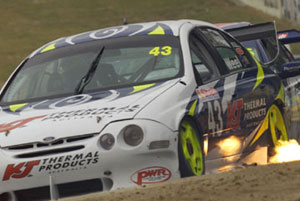
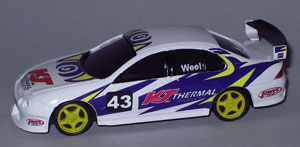
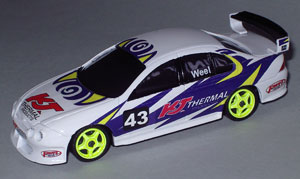
Paul Weel’s KJ Thermal AU Falcon from the 2000 season was the subject for this conversion

Paul Weel at the wheel
The donor was a John Bowe Cat/B AU from 2000. Classics made 10,000 of them. How production quantities have changed over the years...
The donor was a John Bowe Cat/B AU from 2000. Classics made 10,000 of them. How production quantities have changed over the years…
Rather than completely strip back to bare metal, I decided to experiment and just rub back the original paint before a quick coat of primer prior to the top colour.
Dry-fit after the first coat of final colour. For this one I used Tamiya TS26 white sprayed though a small air bush. I hadn't started on the wheels yet which need to be a fluro-lime/yellow colour.
Dry-fit after the first coat of final colour. For this one I used Tamiya TS26 white sprayed though a small air bush. I hadn’t started on the wheels yet which need to be a fluro-lime/yellow colour.

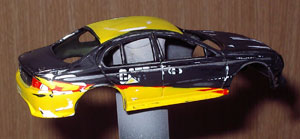
Here’s a tip – whenever you receive your decals, check them against the actual model! I bought these ones from Patto’s Place well over a year ago. When it was time to decal the model, I cut the first one (the black windscreen sun-strip) and it was fine. Then I moved onto the multi-coloured decal on the bonnet at the base of the windscreen. Cut it out, placed it on the bonnet to check and – Oh Dear! The curvature was way out!

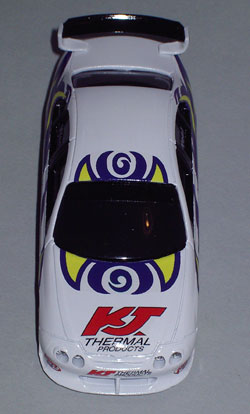
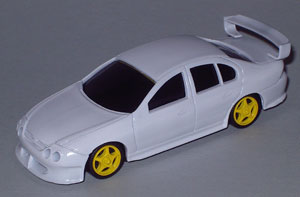
I don’t know what AU Falcon Patto has based this set on (a slot car, perhaps?), but they don’t fit any of the Classic Carlectables AUs; not the early casting, the “second generation” casting or the last one that had all the interior detail. This was a massive disappointment. When I purchased the decals I realised they were not totally complete (missing the Shell Series above the race number, the windscreen number, Ford badge on the splitter, minor sponsors on lower side skirts, series decals in rear quarter window, roof number etc) but I figured they would at least fit the car.

Anyway, on with the show… The instructions recommended a coat of clear to strengthen the decal. I snipped a bit of clear film off the sheet and tried applying it to an old donor model, but it disintegrated while sliding it off the backing sheet! I therefore gave TWO coats of clear instead of the recommended one. This did strengthen the decals, but meant I had difficulty getting them to follow some of the body curves. This is where the decals in Tamiya kits are excellent. They’re rather tough and with gentle manipulation they can be subtley stretched and snuggle down on complex curves and bumps (like bolt and rivel heads) with a little decal softener (I use Mr Mark Softer from Gunze Sangyo – great stuff!).

Part way through decal application. The side decoration is one large decal - but it does not fit the body shape of the Classic's AU! The black window edges have been painted by hand.
Part way through decal application. The side decoration is one large decal – but it does not fit the body shape of Classic’s AU! The black window edges have been painted by hand.
After applying the bonnet and roof decals, I knew these ones were quite brittle and will not stretch like you can do with Tamiya decals. The only solution was to cut each side decal into 3 parts and make them overlap in places, then fill the gaps with a paint brush by hand later.


Left side after the 3 parts were applied. I used Tamiya X-16 Purple to fill in the gaps such as behind the number, the fine lines around the wheel arches and sections of the c-pillar. The wheel inserts have been painted with a custom mix of paints that didnt look too bad, but they had a matt finish and weren't fluro. Only days after messing around getting the rims to not look too bad, I found a fluro yellow paint in a hobby shop...
Left side after the 3 parts were applied. I used Tamiya X-16 Purple to fill in the gaps such as behind the number, the fine lines around the wheel arches and sections of the c-pillar. The wheel inserts have been painted with a custom mix of paints that didnt look too bad, but they had a matt finish and weren’t fluro. Only days after messing around getting the rims to not look too bad, I found a fluro yellow paint in a hobby shop…
The finished piece with new wheel inserts of the correct colour and the gaps in the purple filled in. Unfortunately the rims now show up the lack of brightness in the decals.

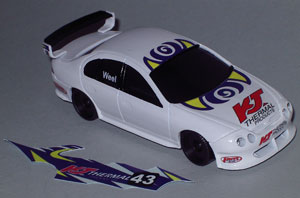
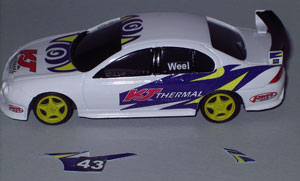
If I did a Wixy500 rating on this as a commercial offering, I’d bag it out big time. It’s built on the old bare-basics Classics casting, the decals are incomplete and my application has resulted in several tears and crinkles. But sitting in the cabinet with the other cars from 2000, it is far from out of place.

And it means I now have another race car in my collection that the commercial operators never produced 🙂

IMGP3295

IMGP3303

Leave a Comment