Having previously built Salvinos’ 1979 Daytona 500 winner (Richard Petty’s STP Oldsmobile, full build HERE), I ended up with the 1980 winner, Buddy Baker’s “Gray Ghost”.
The Car
This car earned its “Gray Ghost” nickname due to the colour scheme. It’s said that rivals would not notice it coming up behind in the rear-view mirror as the car blended with the track surface.
Having qualified fastest, Baker led 143 of the 200 laps on his way to winning the 1980 Daytona 500. He broke the fastest ever average speed for the race (177.602 mph), a record that still stands today. After nearly 20 years of trying, it was Baker’s first and only victory in the race. He died from lung cancer in 2015, aged 74.
Full telecast on YouTube, below.
The Kit
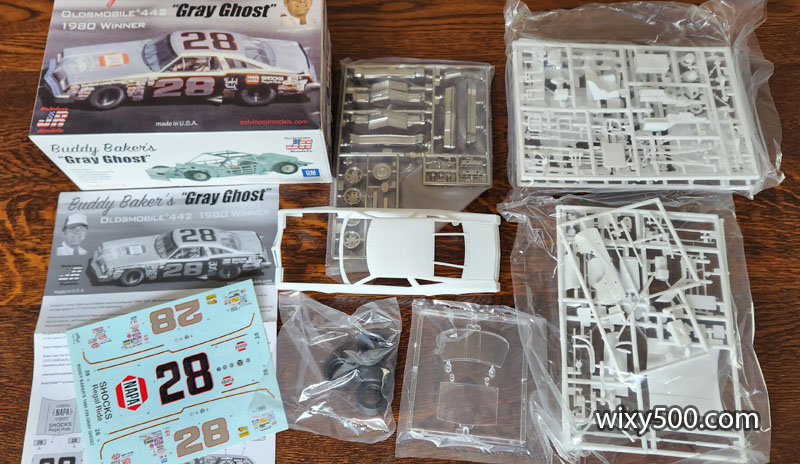
I believe this was the very first kit from Salvinos JR Models back in 2018. I hadn’t seen it around for some time, but one popped up at my local hobby shop so, being a ‘500 winner, I decided to grab it.
Unboxed – around 130 parts, quite a few of which don’t get used. Moulded in white plastic, the kit also includes a chrome and a clear sprue, rubber tyres, decals and instructions.
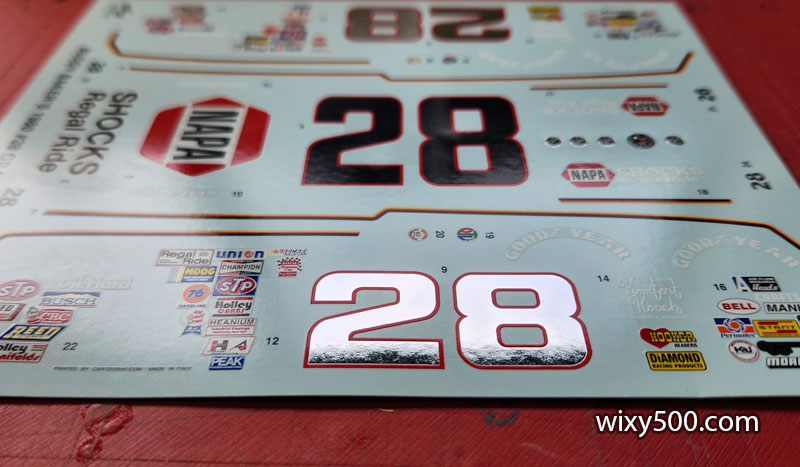
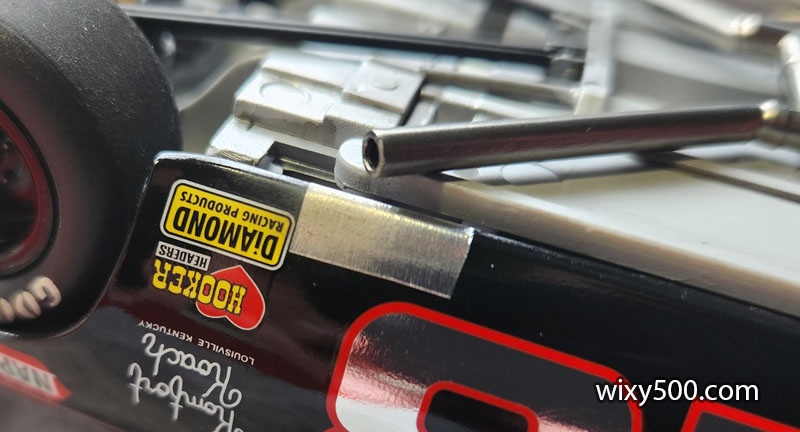
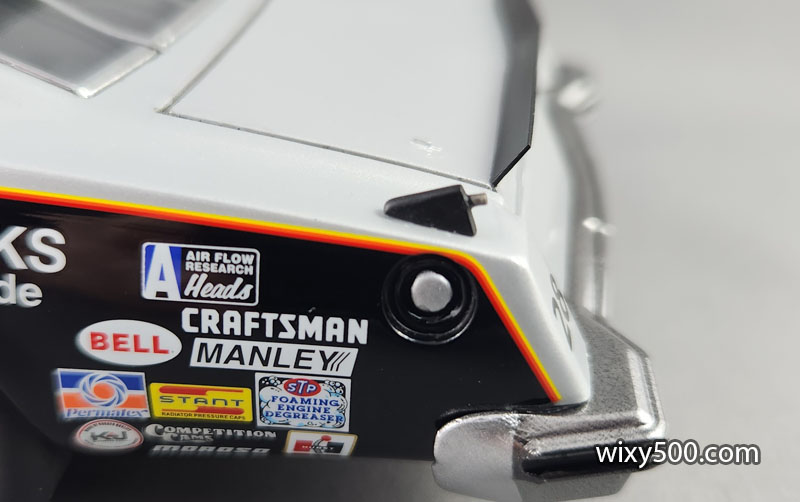
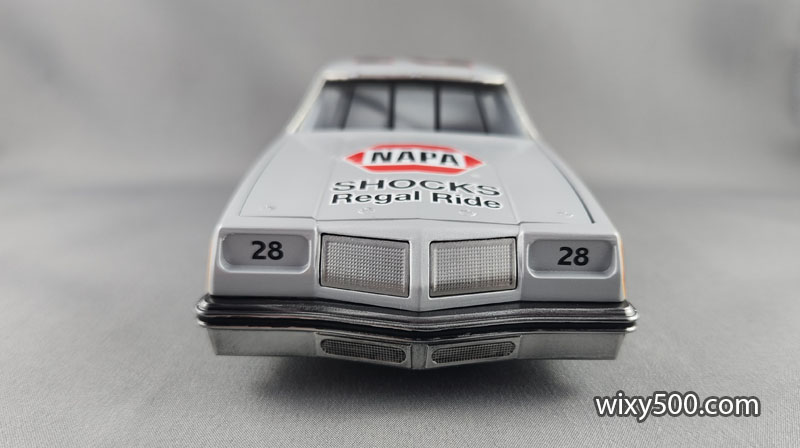
Decals are by Cartograph in Italy. The number 28s for the doors are a mirror/chrome decal, the effect also used on the surrounds of the gauges for the dashboard which is a nice touch. .
The Build
With inadequate reference material for the engine, interior or underside, I decided to take a pretty generic approach with the inside of this model (just like Salvinos had done with the casting).
However, for the outside appearance, I thought there were a few things I could do to make it a little more accurate to the real car on the box.
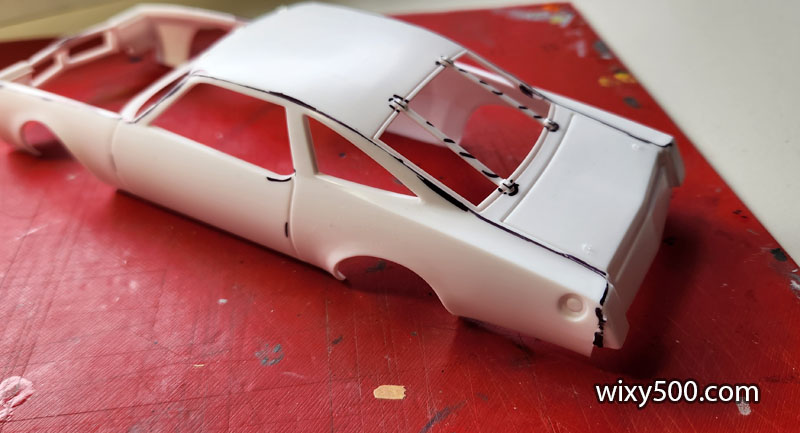
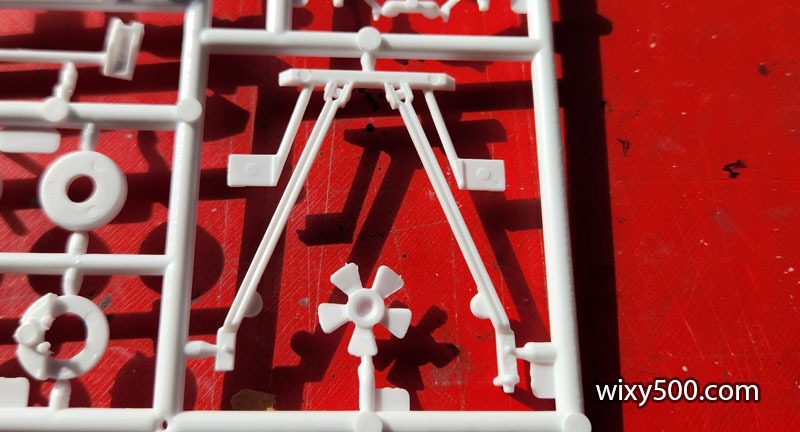
First step, marking up the mould lines and flash that needs to be removed – including the overly-thick rear window retaining straps.
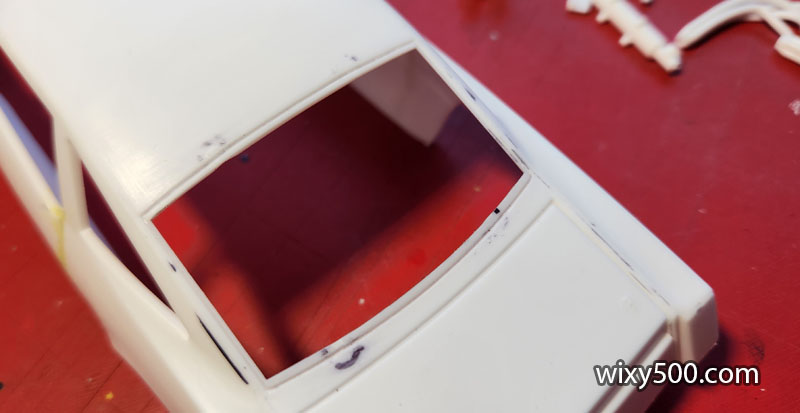
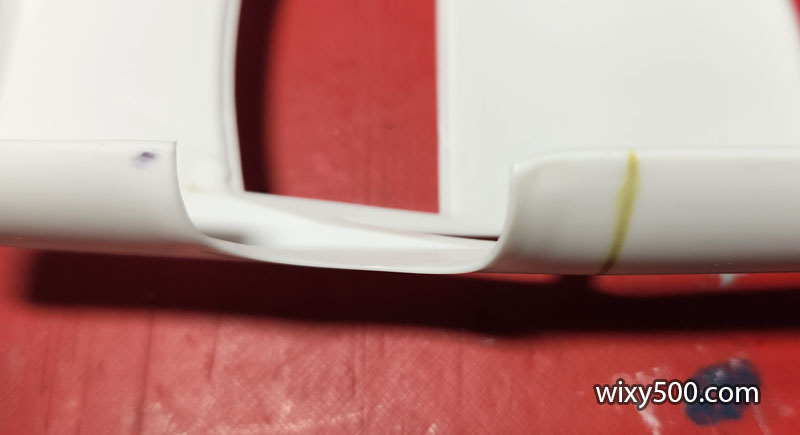
The huge panel gaps for doors will be filled. These cars did have separate panels, but they were very tight fit to help the aerodynamics and the gap almost unnoticeable in photos.
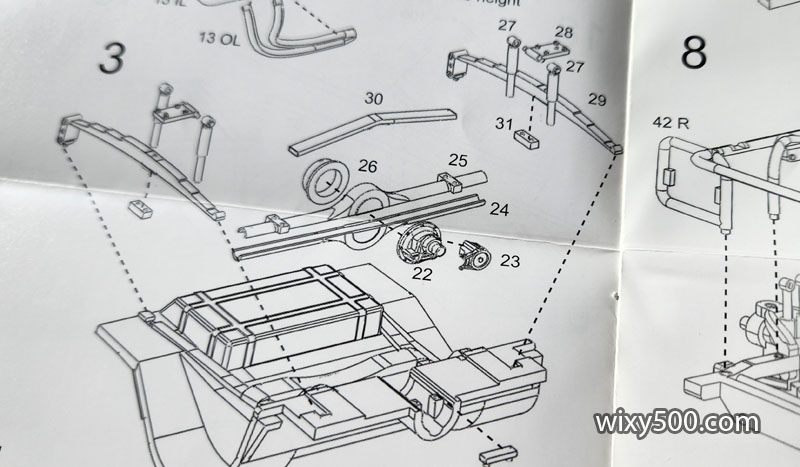
The 1979 Petty car I built previously had coil springs and trailing arms for the rear suspension, so I thought it bizarre that this kit of a later model version (1980) had leaf springs (and torsion bars for the front). A bit of research suggests this car actually had coil springs at all four corners and the Salvinos JR instructions are wrong.
Fortunately, Salvinos provide lots of different parts in these kits so the same sprues can be used across a range of kits. As such, this kit included the required trailing arms etc, so I just built the suspension as per the Richard Petty STP kit.
I didn’t bother to cut the fuel cell and battery from the sprue as once the model is assembled, they cannot be seen.
Rear window retaining safety straps were cut out and the channel around the trim re-scribed.
For this build, I decided to do a lot more “batching”. Instead of religiously following the instructions step by step, all the parts came off their sprues and had the mould lines and any flash removed. Then, parts that were going to be painted the same colour were assembled, eg the majority of the engine, the rear end, extractors etc.
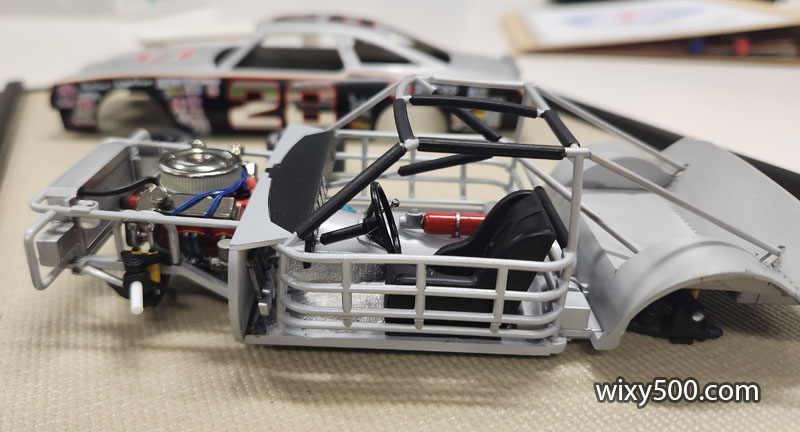
This was also true for the chassis. Here, the roll cage and firewall are glued into place on the main floor.
Then the back half of the floor is glued in place, followed by the rear firewall and bar work.
Bar work around the front of the chassis glued in place. The top bars of the roll cage have been left off to allow access to the cockpit later in the build.
I used Milliput in the door gaps. Once hardened it’s sanded smooth.
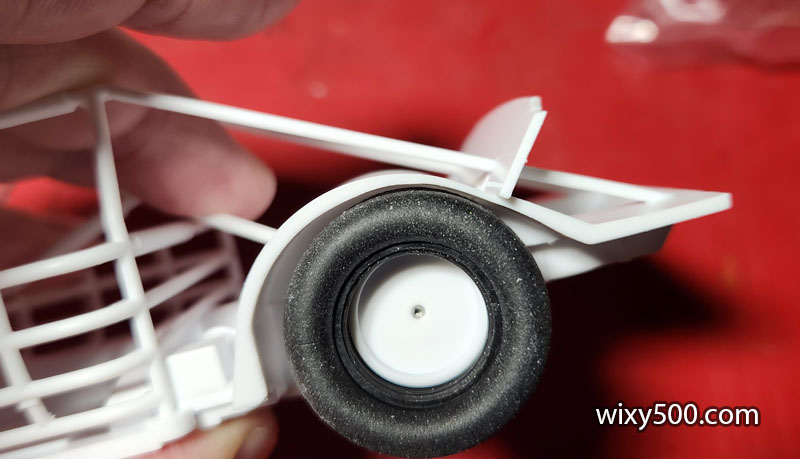
The bodywork was thinned around all four wheel arches (by carefully scraping with a hobby knife) to make them a little more representative of sheet metal compared to the thick moulding of the kit. This also allows some room for the tyres sit up closer to the body.
When the Salvinos Oldsmobile kit is assembled according to the instructions, it calls for two spacers between the diff and trailing arms to set the rear ride height. Problem is, that makes the rear tyres foul on the inner guards. In the previous Petty build, I cut the top of the tyre down to make it fit. But on this one I’ve been able to pre-plan and make room for the wheel by thinning the inside upper-rear section of the wheel wells.
And now the rear tyres fit 🙂
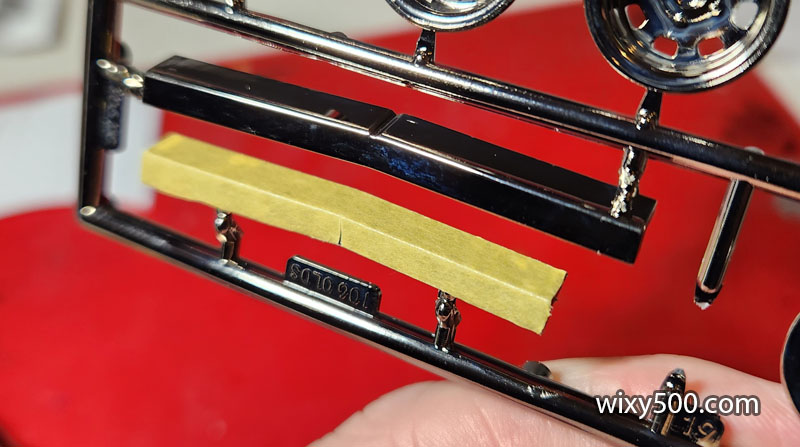
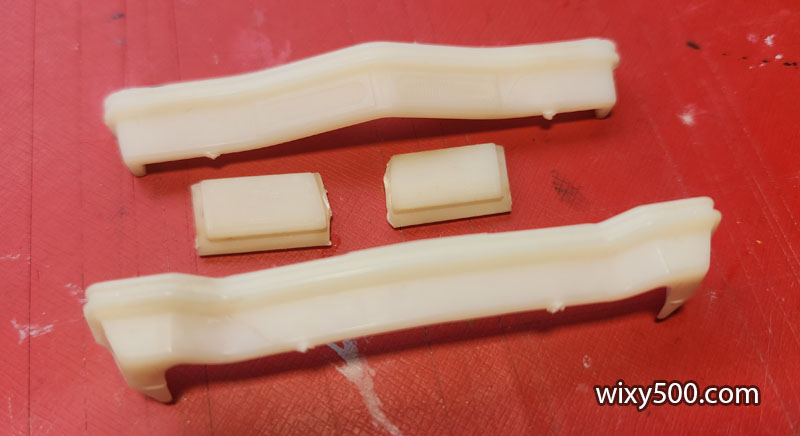
For the Petty Oldsmobile build, I made a paper rear spoiler to use as a template to create a more realistic version from thin plastic. This time, I simply applied masking tape to the kit’s original part and trimmed around the edge.
Then laid the tape down on sheet styrene material and cut it out
A line was scribed to allow the fold and the bottom part split so it can conform to the contour of the trunk lid.
Then glued in place. In hindsight, this should not have been attached until the end of the build. It got damaged (in fact, it tore along the scribe line and fell off!) due to being bumped and getting caught on things.
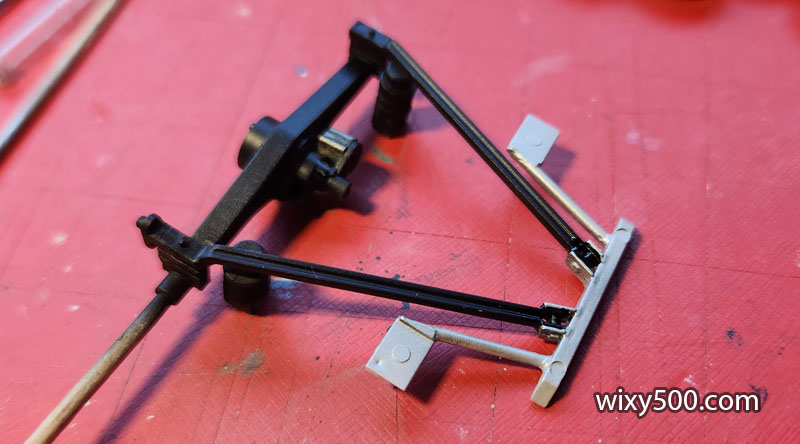
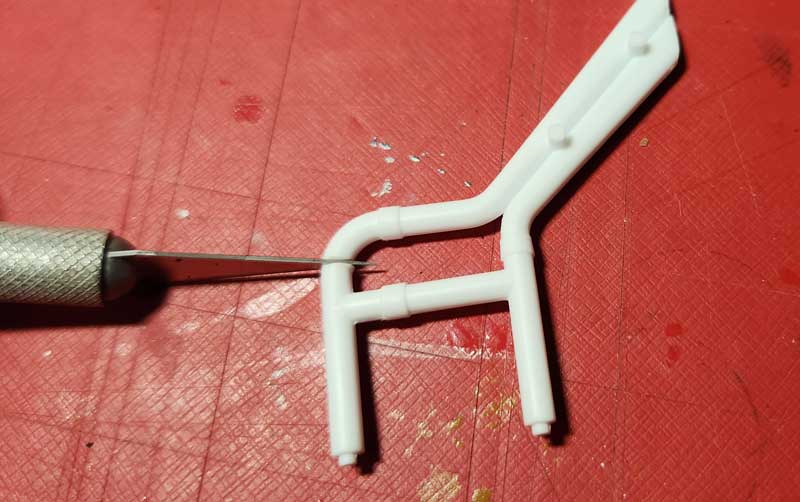
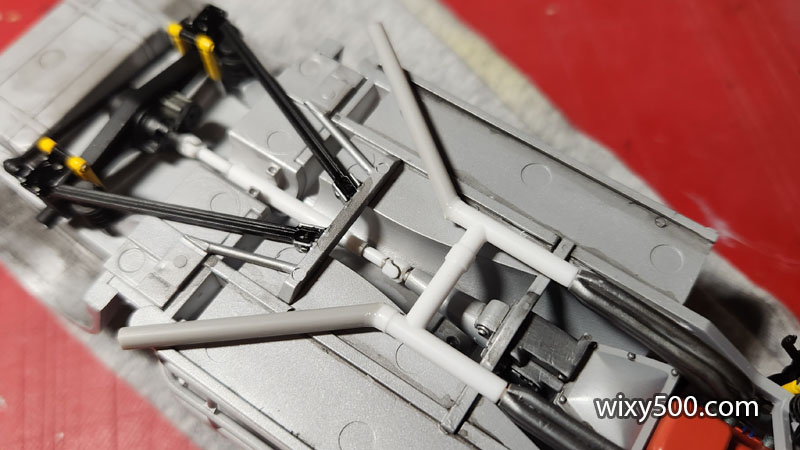
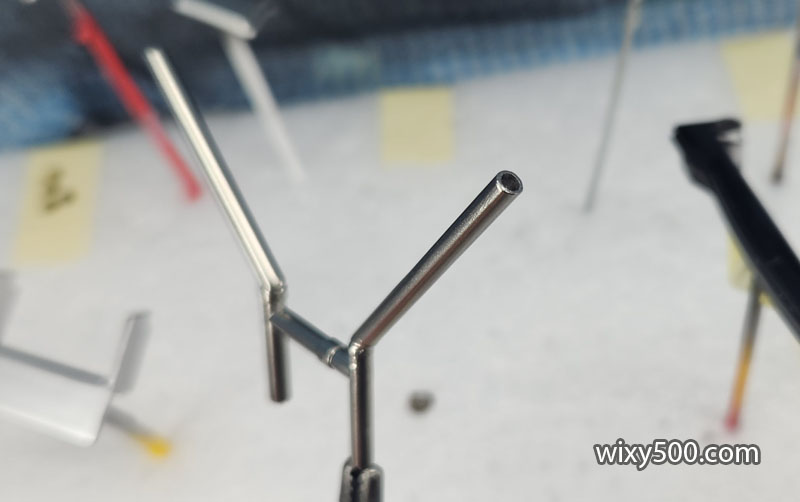
The Panhard rod does not fit to the chassis rail and requires material to be removed
Like this.
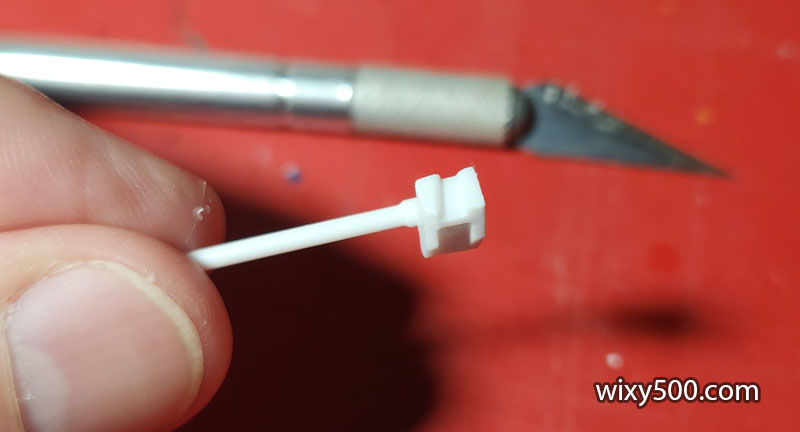
The Gray Ghost had a unique fuel tank breather/overflow that stuck up out of the left quarter panel. The kit does not include this, so I made one myself. It’s several pieces of Evergreen layered up to get the thickness, then cut and filed to shape. A small hole was drilled for a piece of rod to insert to represent the overflow outlet.
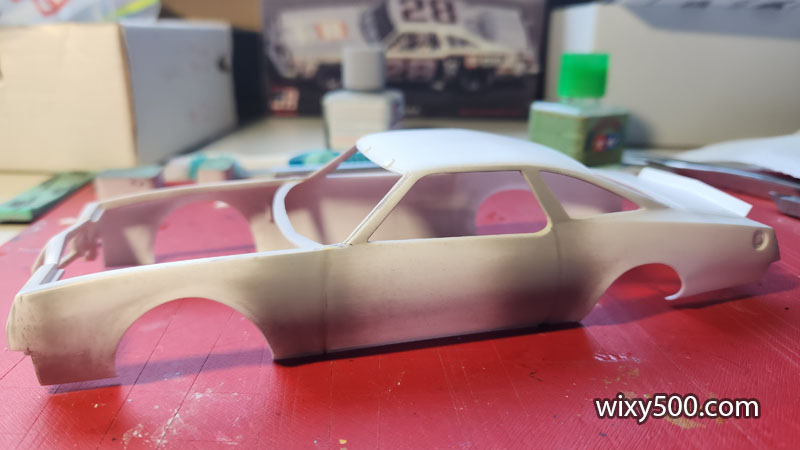
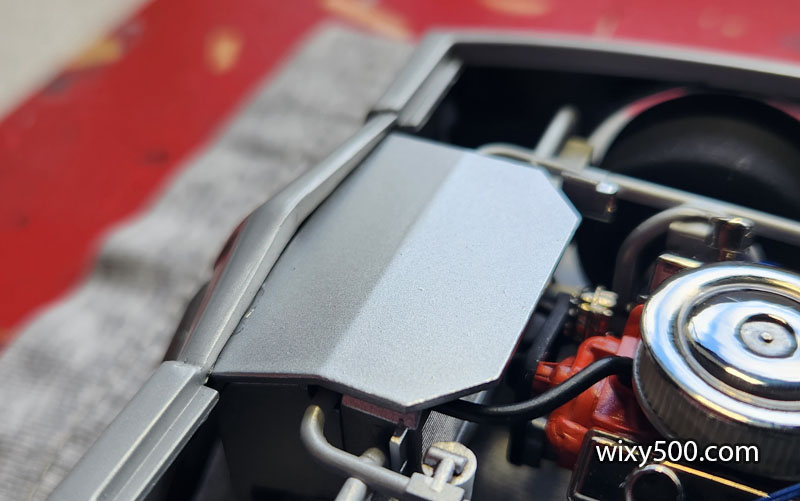
Work continues on prepping the body, grey primer used to help spot unevenness.
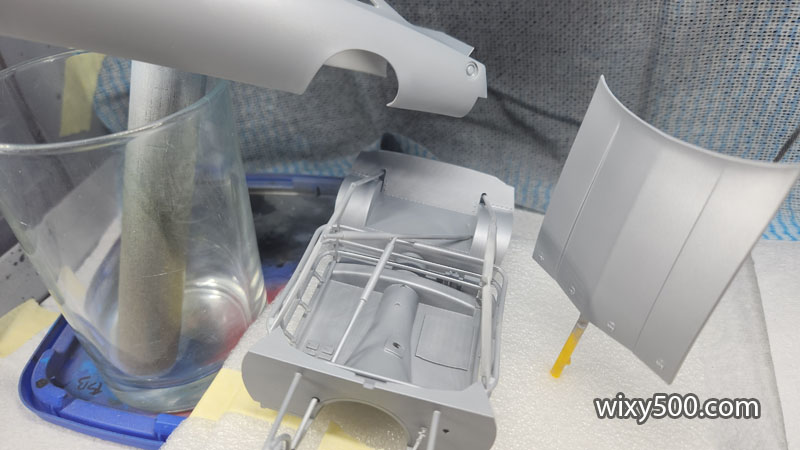
Big batch of parts, ready for primer – grey primer for the Oldsmobile, white primer for the Honda F1 that was being built at the same time.
The kit includes two different types of wheel rim. The shape that better suits this build are chrome plated, however the wheels are black on the real car. At this point in the build I had yet to work out how to strip Salvinos chrome, so hit the rims with Tamiya grey primer so they could be painted.
After primer.
Various parts in gloss black – the rims (inner and outer halves) and radiator, plus a cowling for the F1 Honda build.
Each wheel half after paint. What appear to be finger prints in the wheel backs (top row) is actually cast in the plastic but I didn’t bother to correct this as it will not really be visible.
There was plenty of Zero Paints ‘Sauber C9 Mica Silver’ left over from the Le Mans winner build (see that build, with weathering and damage, HERE), so I decided to use that. It gives a matte finish that doesn’t look dissimilar to the grey primer, but comes to life once some clear goes on.
Rear end was assembled and sprayed semi-gloss black. The trailing arms are masked off here so the chassis components can be painted Zero silver.
Then detail painting with a brush to finish off the mount area plus the oil pump and drive belt. I have not bothered to fill the ejection pin marks in the underside of this build.
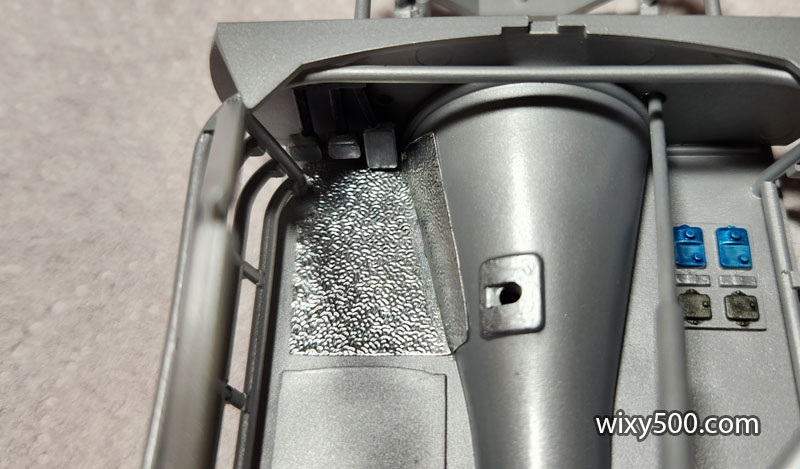
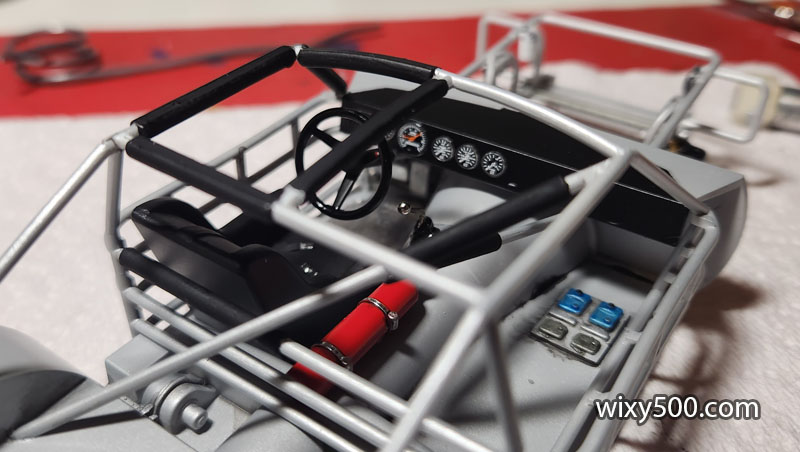
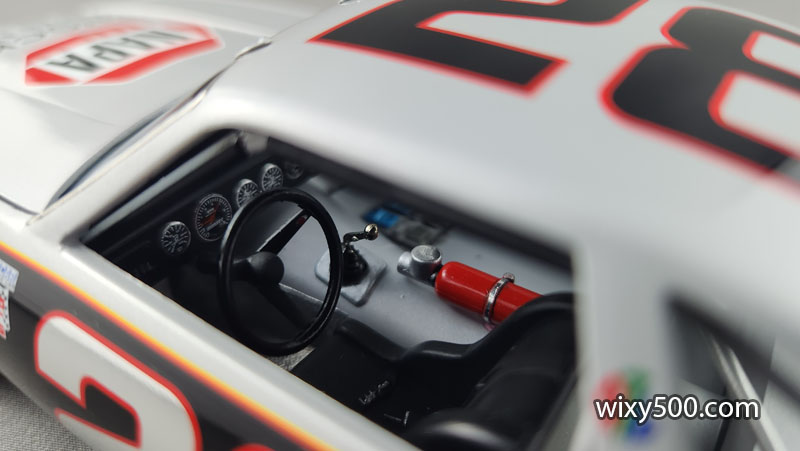
I had read about modellers using the textured foil from a pack of cigarettes for heat shielding. I don’t smoke and wasn’t going to buy a pack of ciggies just to get the foil, so used the sealing foil from a tub of butter! Here it’s cut and bent to approximate shape to be used as a cockpit/foot matt.
Then glued in place with a little Kristal Klear. This pic really shows how unrealistically massive the Salvinos transmission tunnel is – the clutch pedal is behind the roll cage bar…
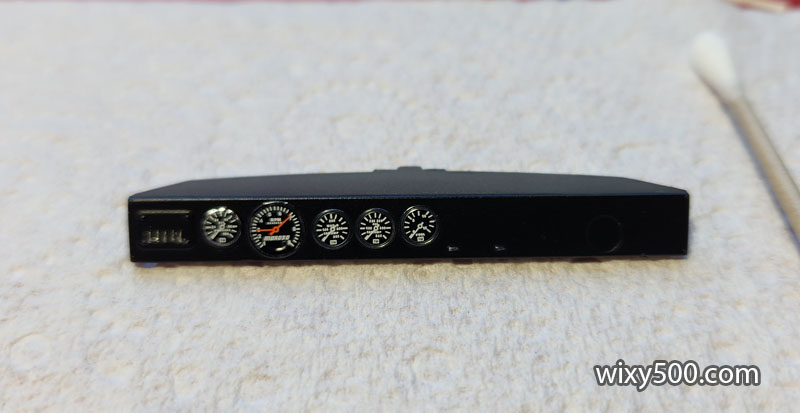
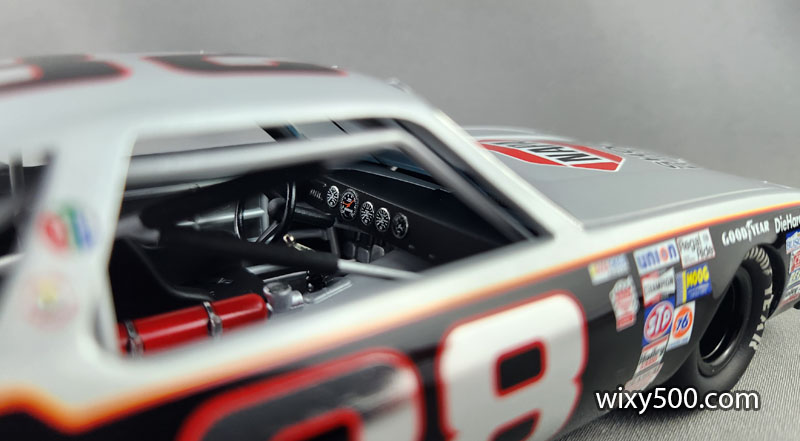
Dashboard was sprayed semi-gloss black, then decals for the gauges. Switches are picked out with chrome paint on a toothpick. But there is a mistake here – the top surface of the dash should be silver body colour, not black.
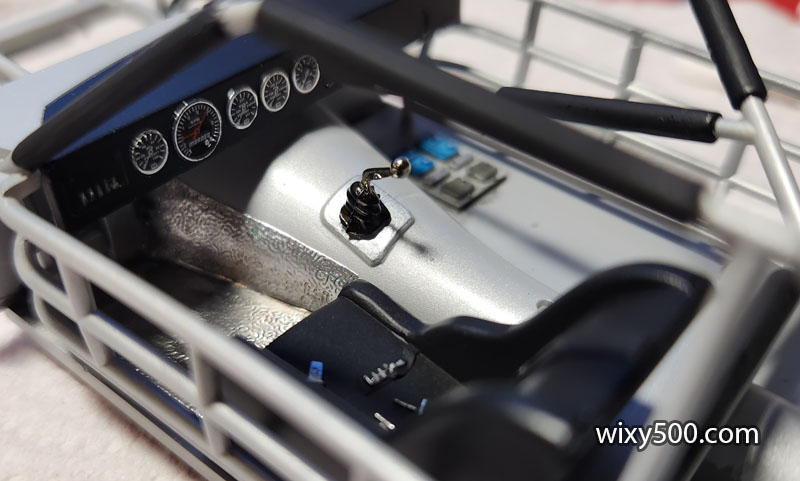
The cockpit coming together. The chrome edges on the gauge decals really stand out nicely at this angle. Hard to see here, but I’ve used some wash on the heat shield, then pressed/scuffed the foil to give a used appearance for where the driver’s feet would be moving. Roll bar padding is brush painted flat black. Seat is stock kit item with the belt buckles picked out in chrome.
Trailing arms and diff fitted (as opposed to the leaf springs the kit instructions call for). Look at all those ejection pin marks – there’s more dots here than on a Dalmatian!
Rear shocks added plus some oil stains around the underbody and leading face of the fuel tank. This car was several years old when it won the ‘500, so it would not have been pristine. As with the Petty STP build, I have no idea if the colours here are correct as the kit instructions give no clue and I’ve not been able to source period-correct photos of this area.
I added a push-to-speak radio button with a dab of paint.
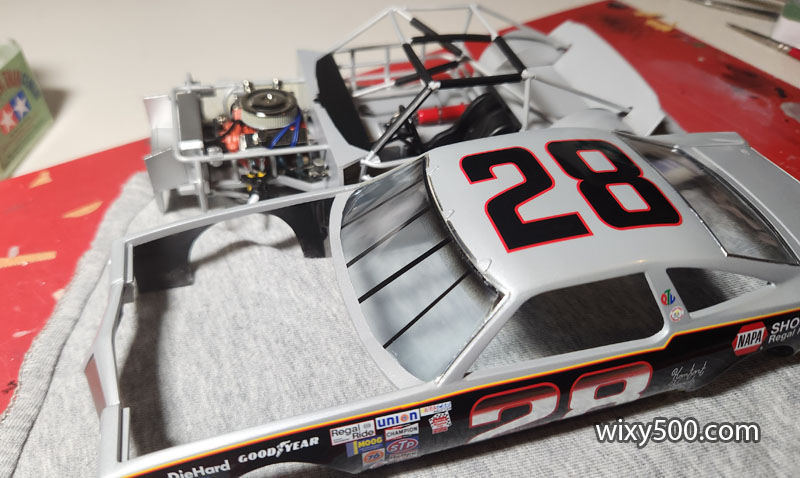
With the internals now fitted, the top of the roll cage was glued in place.
Front shocks in and starting to fit out the rest of the front suspension and steering.
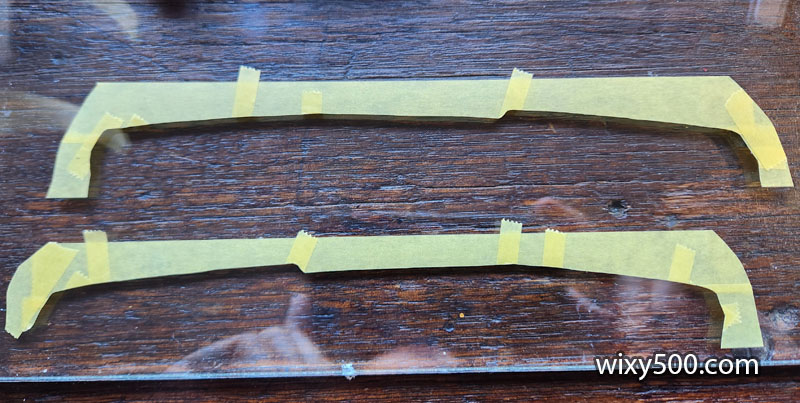
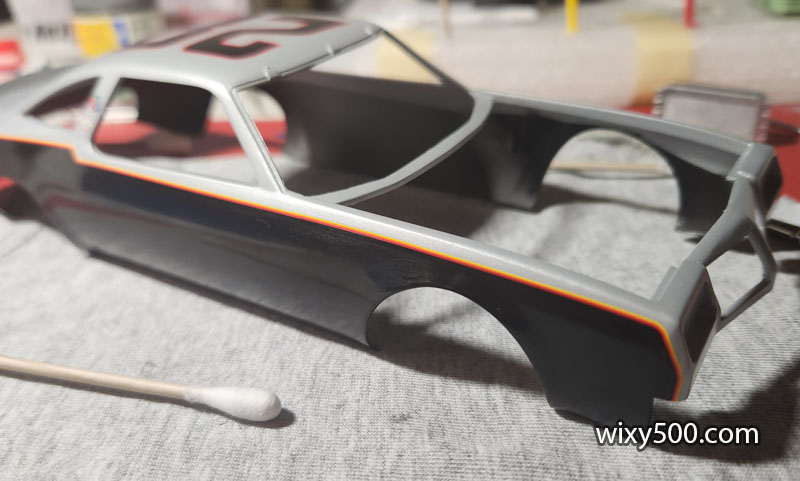
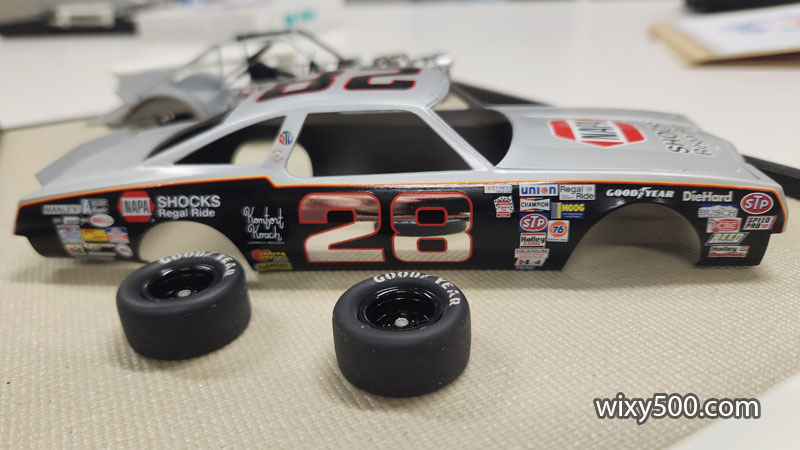
The multi-colour strip that separates the black and silver of the body colour is a multi-piece decal. After printing a copy of the decal sheet, I cut out the stripes and tape them to the body to get the fit right, effectively creating a paper template to create a painting mask.
This paper template is then placed on masking tape that’s on a sheet of glass. Carefully cutting along the edge of the paper creates the edge for the mask.
Then peel off the unwanted pieces and presto, the painting masks remain, ready to apply to the body.
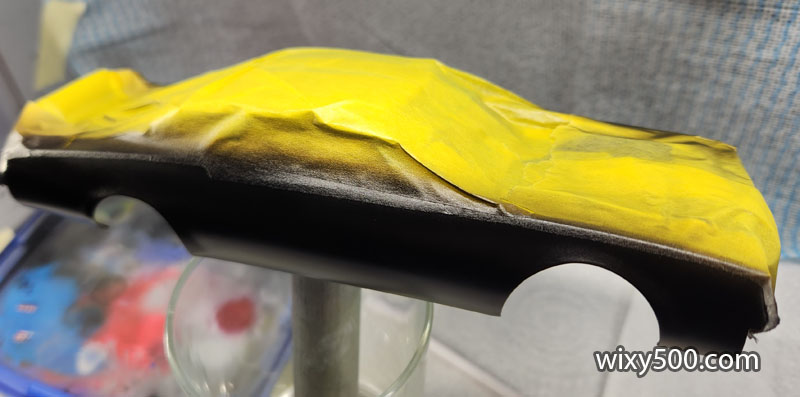
Getting the mask lined up is a bit of a pain, but once in place, the rest of the silver body gets covered up.
Including the inside to prevent black overspray from leaking into the window openings.
The black is SMS PL30 Jet Black gloss.
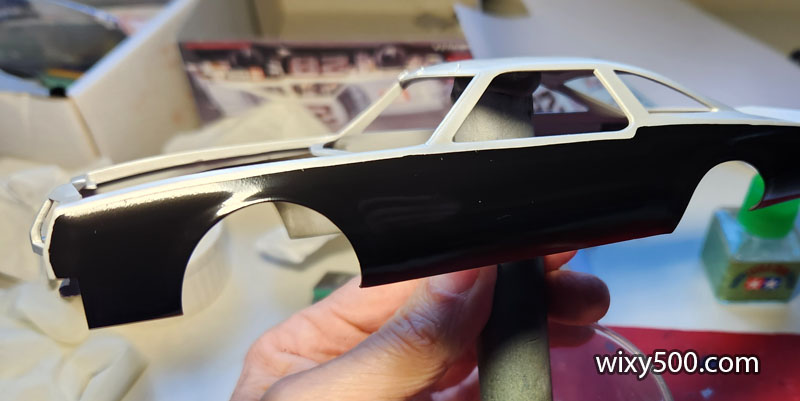
After the masking was removed. The black was then wet sanded to smoothen out the edge of the mask and remove some orange peel.
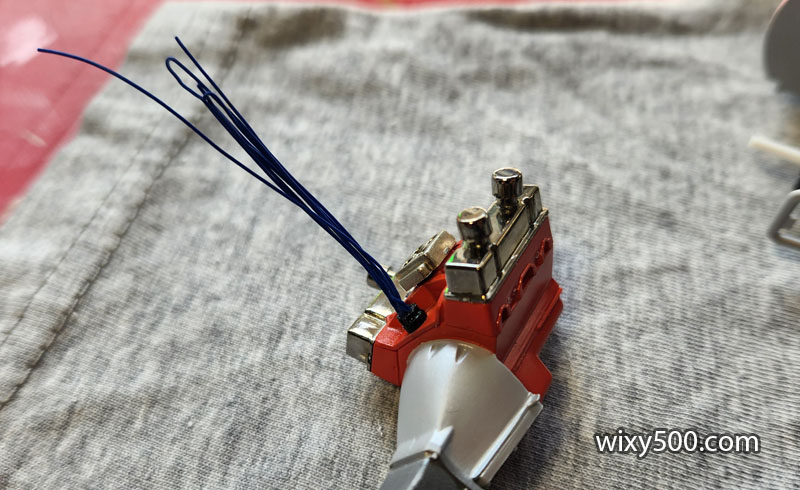
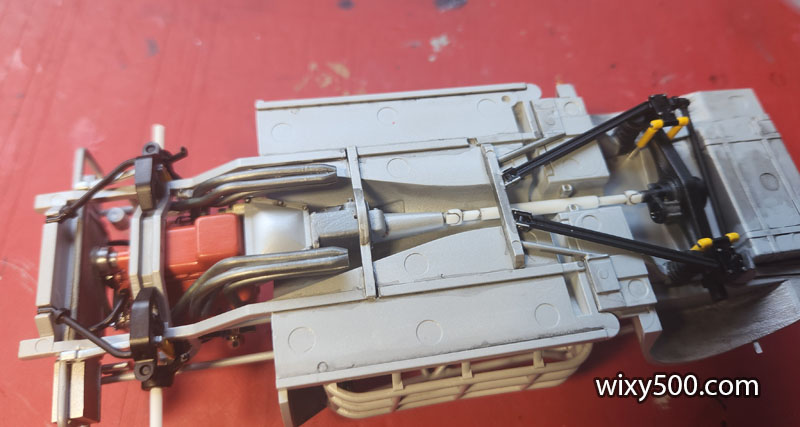
The instructions give no instruction for the engine colour and I could not find a suitable period photo, so decided to go with my version of ‘GM engine red’, an eye-balled mix of Tamiya TS12 Orange with a dash of TS8 red.
Engine block and gearbox after masking removed
Can you spot the difference between the tyres on the left and the ones on the right? The two on the left have received a light mist of Tamiya Smoke to take some of the brightness out of the white Goodyear markings. Once all four were smoked, the sidewalls got a coat of SMS Flat Clear to take the shine off.
Once the tyres were done, the rim halves were inserted to complete each wheel. The metallic colour behind the rim is to simulate a brake rotor (which doesn’t exist).
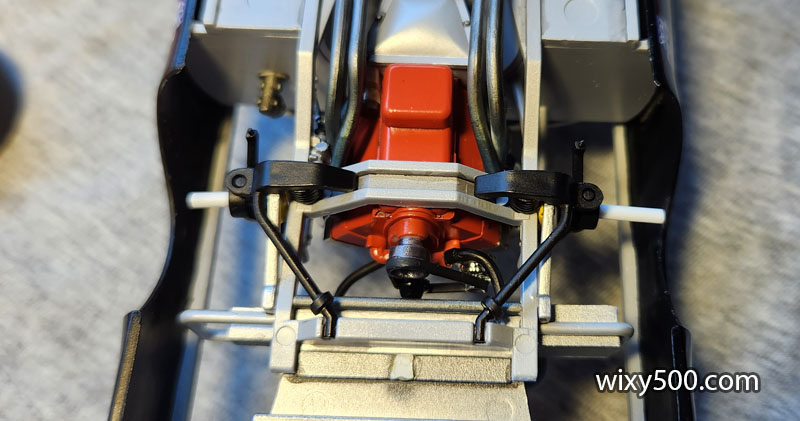
Lower control arms, uprights and front axles in place. I used the longer axles provided in the kit (intended for the Monte Carlo?) as the shorter ones the instructions call for are not really long enough to get the wheel offset I want.
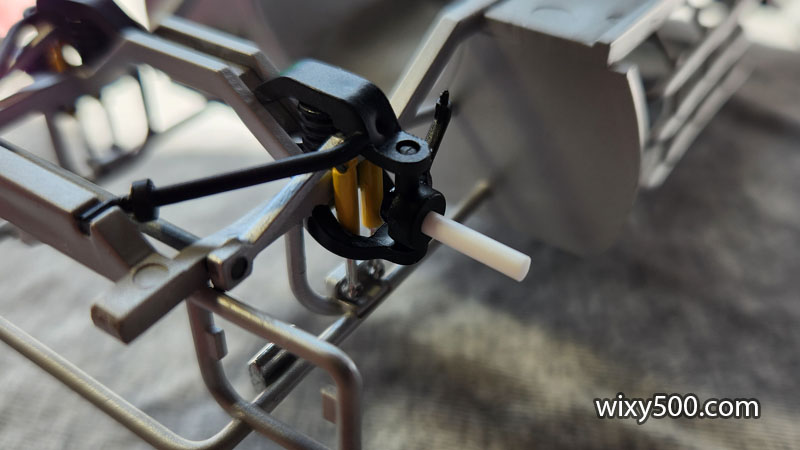
Decided to throw some basic ignition leads at this one. I cut down and drilled the kit’s distributor to take 8 leads and glued them in place.
Then inserted them in holes I drilled in the cylinder heads. No idea if this is accurate, but it’s now ready for some wash and the extractors to go on.
Engine in. Extractors received some clear blue and yellow for heat stains (not really visible here), plus wash.
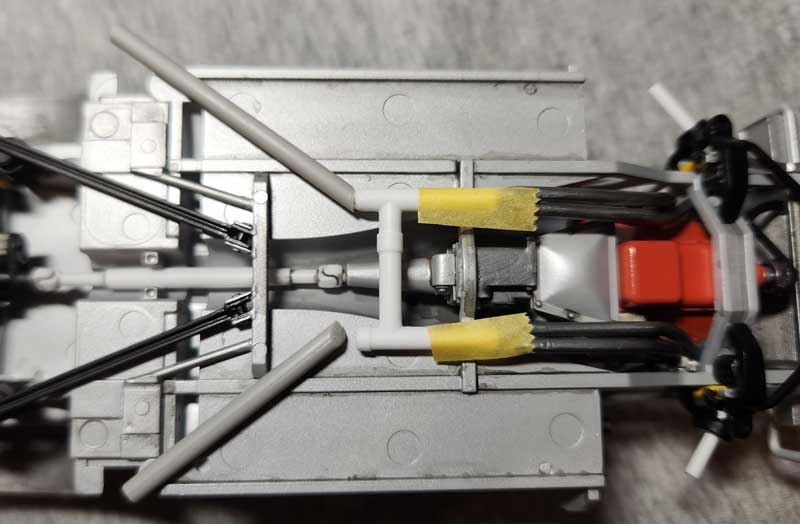
The radiator does not fit, so the edges have to be cut down so it can slide it.
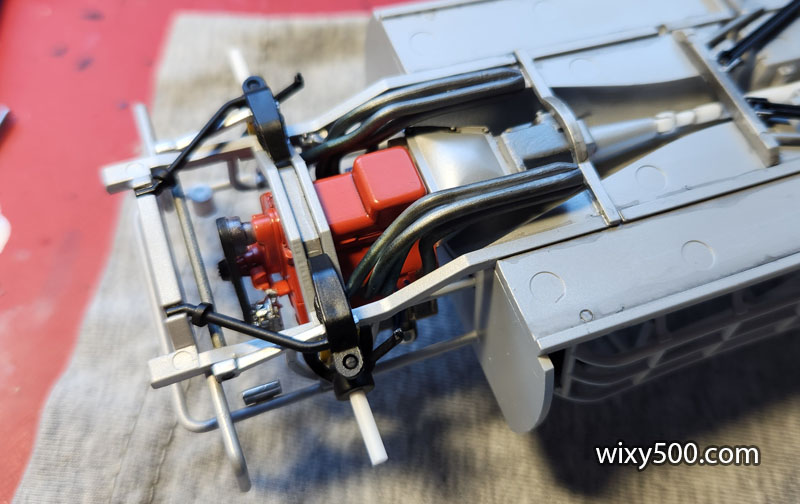
Radiator and water pipes are in and other than the inlet ducting, the chassis is mostly done. I don’t put the wheels on until the body has been fitted in place.
First decals are the coloured stripes that separate the silver and black, plus the big number 28 on the roof.
The decals are nice and opaque and went down really well. After the problems with the Petty/STP decals bubbling up, I planned to give this one the best part of a week to dry before any clear got near it (turns out, life gets in the way and it was about a month before the clear!)
Above & Below: I took the chassis, body and wheels along to my local model club meeting where members do a “show and tell” of their works in progress, new kits and completed builds.
See, you CAN strip the Salvinos JR chrome! Soaked the bumpers and grill in hydrochloric acid for the best part of a week and this is the result. I could now clean up the mould lines and sprue gates properly!
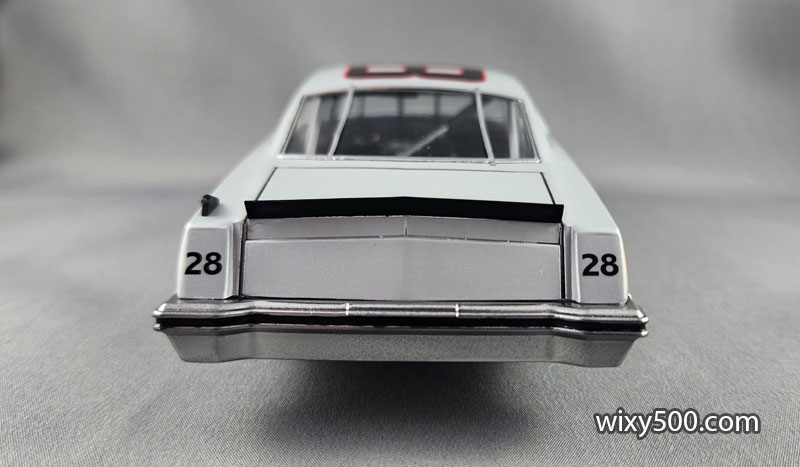
All that’s needed to finish the underside is the rest of the exhaust system. But what the kit provides (twin-dump out of the left side only) is totally wrong. This car had a single pipe exiting each side.
So, the kit pipes are cut up…
I used a panel line scriber to split the tailpipes in the event I could re-use them, one for each side. But they’re not really the right shape.
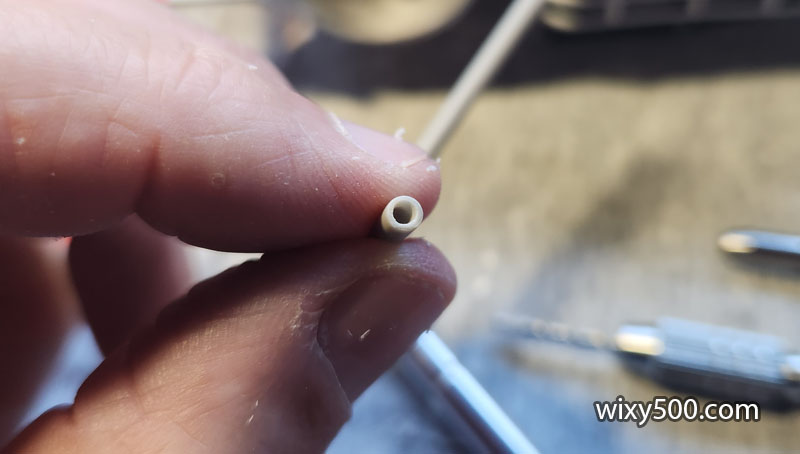
I made new tailpipes from scrap sprue. This is test fitting to get the angles correct so the pipes exit at the correct location. This layout is almost certainly not what was under the real car!
The tips of the sprue material was carefully drilled out to make them hollow.
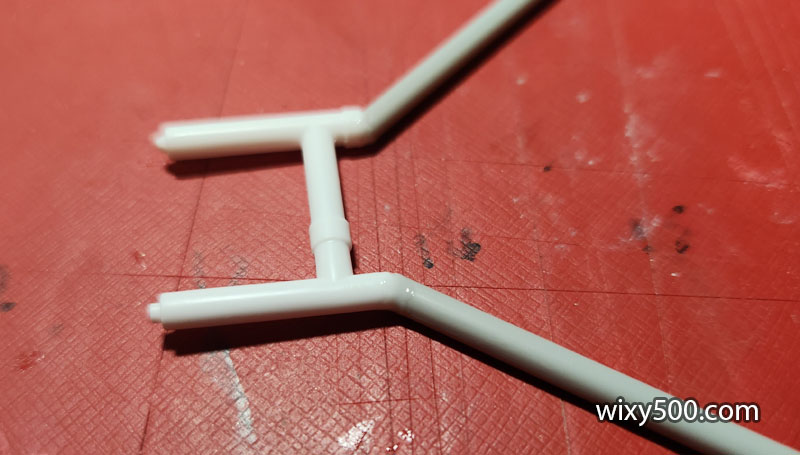
Once glued in place at the right angles, I used Sprue Goo to fill the gaps and help hold it all together.
Test fitting to check it all lines up before paint.
Finally, the last batch of primer for this model, all for parts that required a metallic finish.
There are two moulded-in raised sections in the front windscreen to replicate the intrusion straps. I masked these to paint them black, but also masked an extra two on the sides to be a little closer to the real car.
SMS Jet Black over components that are to be black, or prepping them for metallic colours.
After masking removed. The thinner ones I created are closer to scale, but in combination with the over-size kit straps, this part now looks odd :/
Front and rear windshields. The front has a very fine coat of thinned Clear Blue as photos of the real car indicate this was a tinted windshield. Top shaded banner was sprayed. It doesn’t look too bad here, but up close the shade is rather coarse. Perhaps I should have fitted the smaller needle?
SMS Stainless Steel over SMS Jet Black for the exhausts came up ok.
After spraying gloss black, the rear bumper was masked up to paint the tapered leading edge aluminium. This was then masked off and the rest of the part hit with chrome paint (Green Stuff World ‘Chrome Metal’). I forgot to take a photo, but the Green Stuff World looked fantastic straight out of the airbrush. After a few minutes however, it dulled a bit. I can only assume I put it on too heavy and it reacted with the black underneath (see pics later in the build).
Applying Bare Metal Foil for the front window trim.
Rear window trim done in foil.
Front and rear windows fitted. In the preparation stage, the front window did fit properly, but after paint (and several months in between) something has changed shape. The rear window still fitted fine, but the front has not seated fully across the top of the roofline. This is the last pic before the body went over the chassis.
As mentioned previously, I fitted the longer front stub axles but these then had to be cut back a bit (left of pic) for the wheels to fit.
Rear axle is cut in half, then each half inserted into a rear wheel. Without cutting the axle, the wheels would be spaced too narrow under the car.
I’m not sure how other builders mount the Oldsmobile body, but I jam the inlet duct under the nosecone cowl (requires a little trimming of the plastic) and use a dab of CA glue to hold it there.
The modified exhaust fitted and all wheels glued in place.
Wheels tucked inside the fender line.
The real car had a metal shield on the body at the exhaust outlet. I used a small piece of BareMetal Foil, then gave part of it a light dusting of weathering powder.
This is what happens when you don’t pay attention… The oil cooler is made of two parts, but I mixed them up and put the thicker piece closest to the wheel. This meant there was not enough clearance for the front tyre so the edge of the cooler had to be trimmed back.
The bumpers do not have any positive fixing points to the body, so Kristal Klear is used to hold in place. It might be overkill, but I’ve spread it out to increase the surface area for the glue to take hold.
Thin strips of aluminium are cut from a Coke can to fabricate new rear window straps.
The reverse side of the straps are Coke-red and, due to the undulations in the material (difficult to flatten out!), sanding wasn’t really getting rid of the red.
So a little Tamiya LP Mica Silver was applied.
The straps were cut to length and CA glued in place. Panel-line wash has been put around all window trim and the trunk.
Scratch-built fuel breather was attached with Kristal Klear
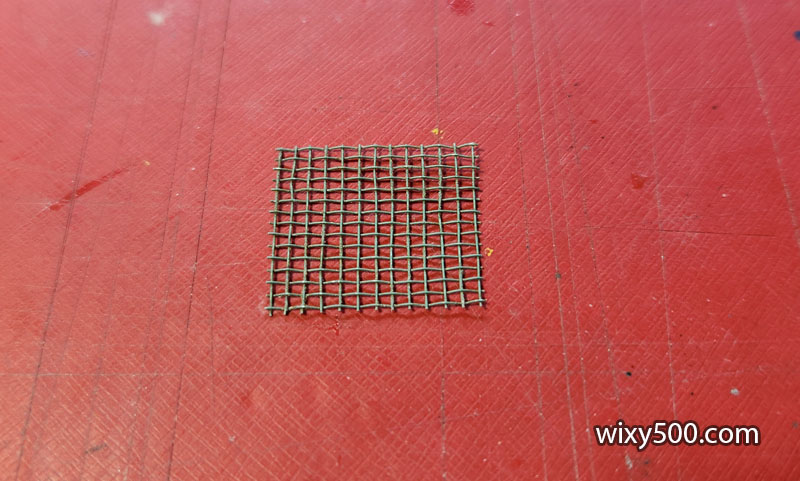
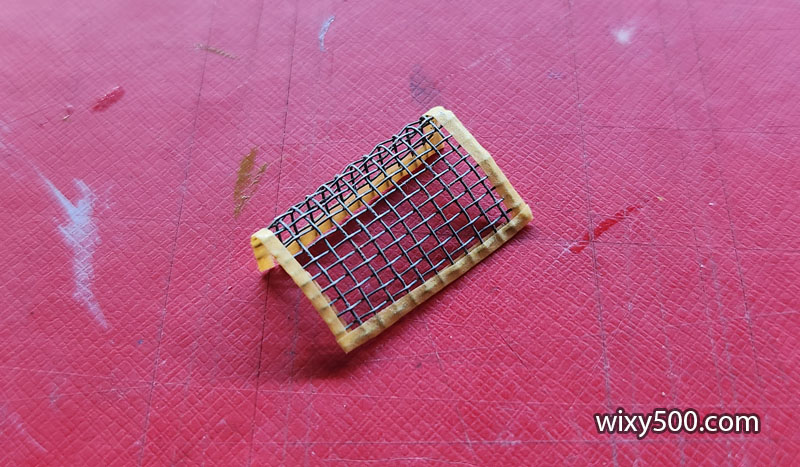
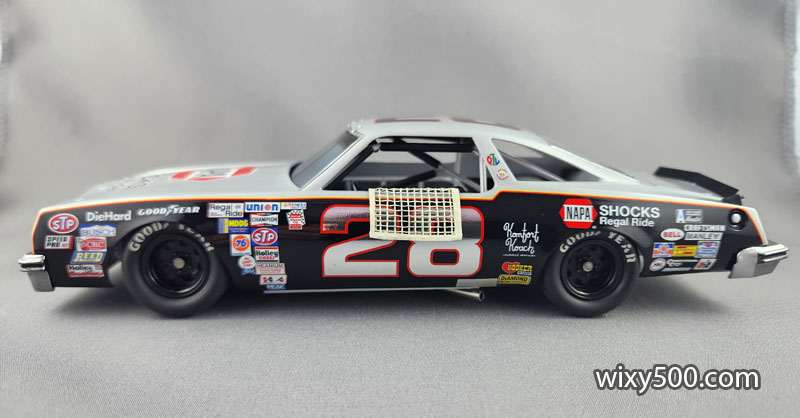
Scratch-built window net: 1 – cut out a small piece of wire door mesh
2 – run some Tamiya tape around the edges
3 – bend the piece so it can drape over the driver’s side door 4 – (no pic) paint it. I used Flat White with a dab of Deck Tan mixed in
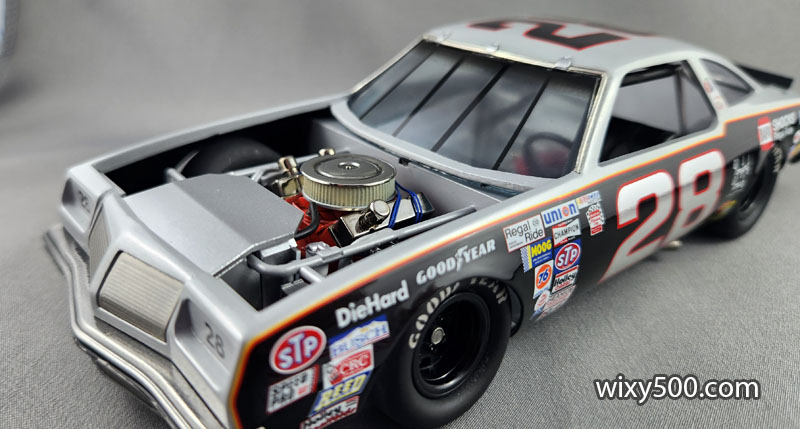
Model can be displayed with or without the bonnet and/or window net.
Conclusion
Overall, this kit went together much more easily than my previous build of a Salvinos JR Oldsmobile. Of course, being the same mould, it’s got all the same issues and inaccuracies, but the experienced helped a lot.
The changes I made (eg, modified exhaust, not using the kit window net, re-positioning the wheels, scratch-built rear spoiler, window straps, heat shields, fuel breather outlet, window net) all made for a better looking model and most weren’t too much trouble. The only proper “after market” product was the blue spark plug lead from Top Studio.
Unfortunately, I made some errors – the ones I’ve noticed are the colour of the dashboard top plus the oil cooler clearance. Note to self: pay more attention!
Obligatory closing shot – my build with the box art, 31/12/23.
2 thoughts on “Build Blog: Buddy’s Gray Ghost”
Very nice work, you masking tip will help a lot, Im currently working on this one once it stops raining
Are you in their Builders Club? as they now do international.
Hi Bill. No, I’m not in the Builders’ Club, otherwise I’d be accumulating too many kits that I’d never get to build. All the best with yours, hope the masking turns out ok 🙂