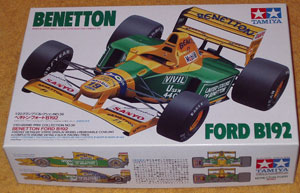
I built this from the box. Tamiya’s 1:20 scale Grand Prix range is excellent and they build into outstanding models with little effort – however this one has taken me several years to actually finish!
The kit can be built up as either Michael Schumacher or Martin Brundle’s ride from the 1992 F1 season. I decided to do the Brundle version for a few reasons; (1) everyone else probably built this as Schumi’s, and (2) I own one of Martin’s old race suits from when he drove for Brabham (it came as part of the deal when I bought and raced a Formula Vee many years ago).
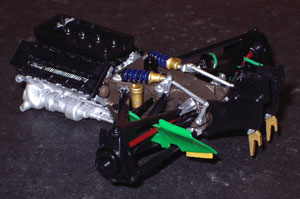
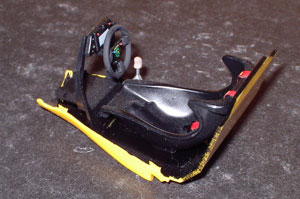
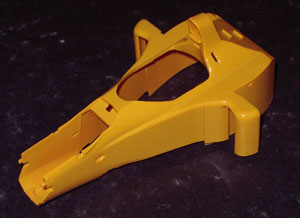
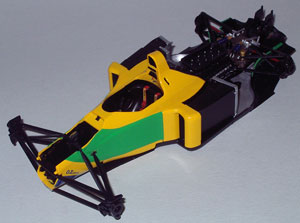
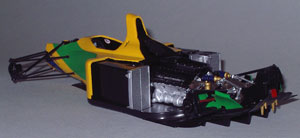
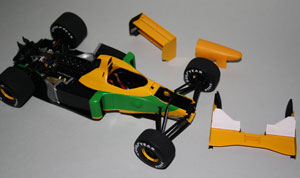
As always, great box-art on Tamiya kitsThe engine/gearbox assembly is moulded in two halves and once joined and painted, have the other parts attached. The side bodywork panels (the green bits) need to be located correctly, so I used the floor tray and engine cover (not pictured) to hold these in position while the cement cured.The cockpit assembly slides into the monocoque from underneath. As can be seen, this was one of the last GP cars to use a traditional gearstick.This is the monocoque of the B192 under construction. The radiator inlets have been attached and the structure sprayed with the ‘Chrome Yellow’ recommended by the instructions.Front suspension added, cockpit assembled and some of the primary decals placed. These photos look a little more complete than reality as the monocoque, engine/gearbox, radiators etc are just sitting on the floor tray as a test fit and not yet fixed into position.
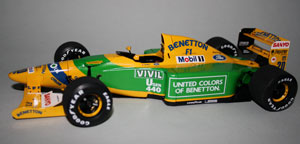
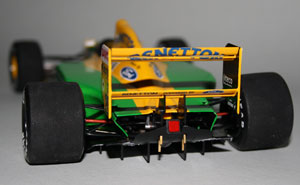
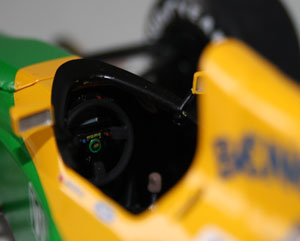
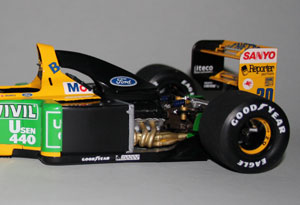
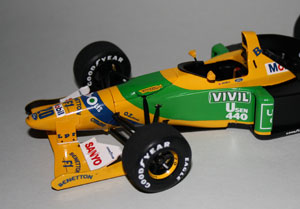
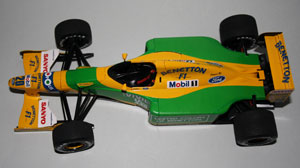
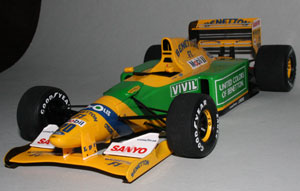
Engine and tub now glued to the floor, wheels done and fitted, plus a few more decals. Front and rear wings are effectively ready for decalling (lots of decals on this model). Nose box, engine cover (not shown) and front scuttle cover (not shown) are prepped and ready for painting.Even more decals added, and not far off final assembly. I decided to use the decals supplied in the kit rather than masking and spraying the green bits. Tamiya decals are very good, however the complex curves and large pieces mean it’s hard to get a really smooth finish. Also, the decals can stretch as they are worked into position, leading to some overlap. A better finish could be achieved by mask & spraying, but it’s a difficult (and time consuming) job due to the curves on this model.Finally, job done!And with engine cover removedRear end. I went with the supplied ‘Benetton’ decals rather than chase down Camel markings that were used in most of the races.Cockpit detail.1992 was the last year of big, wide tyres in F1 (well, not as wide as in the 70s…).Back-end detail. The big ‘United Colors of Benetton’ decals on the sidepod need to be applied with the engine cover in place, then sliced down the bodywork gap with a razor. Same with ‘Benetton’ and ‘Mobil’ on the yellow part.Front-end detail.