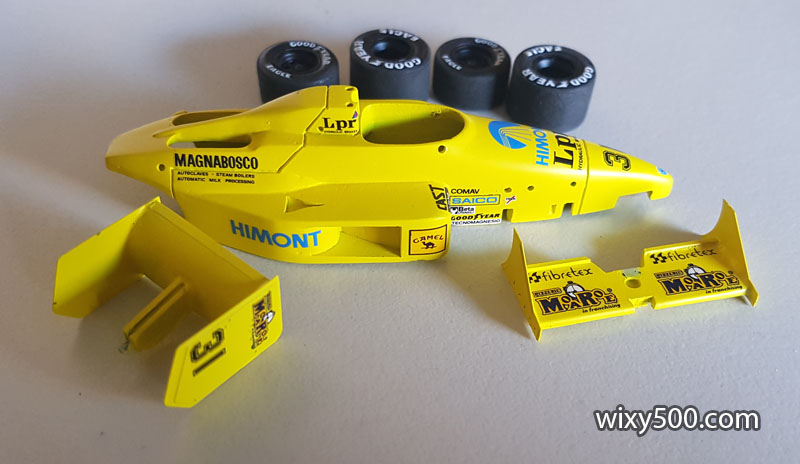
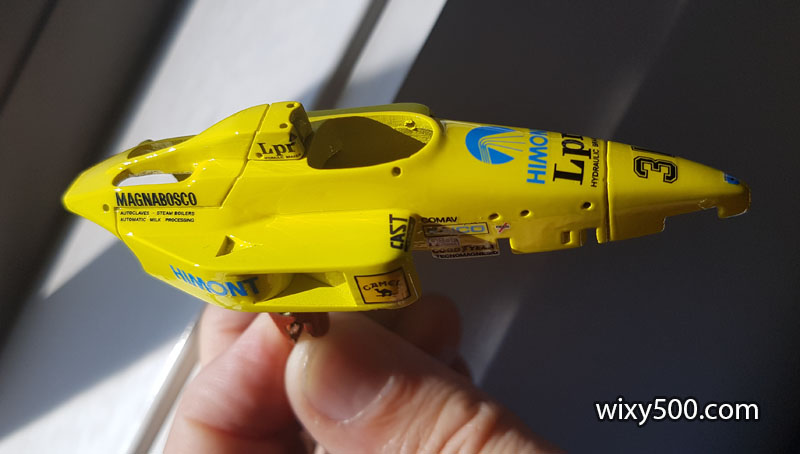
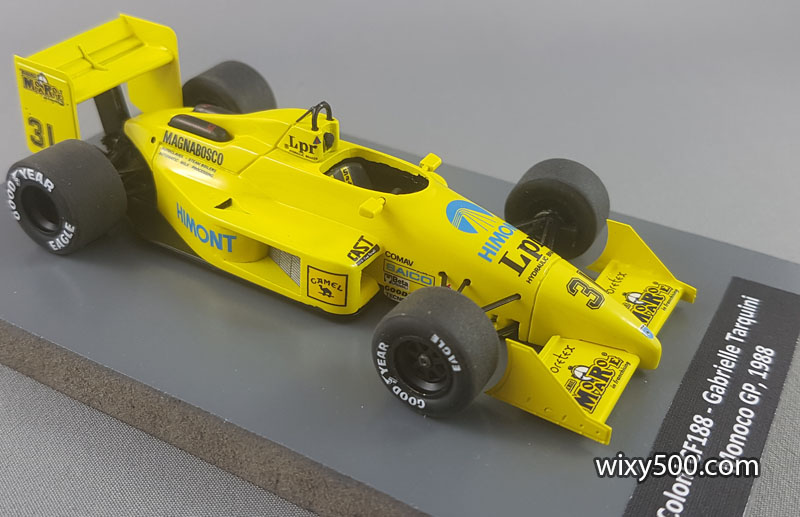
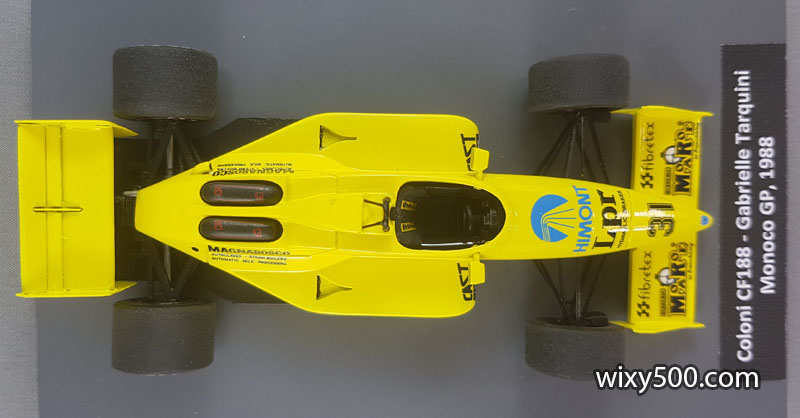
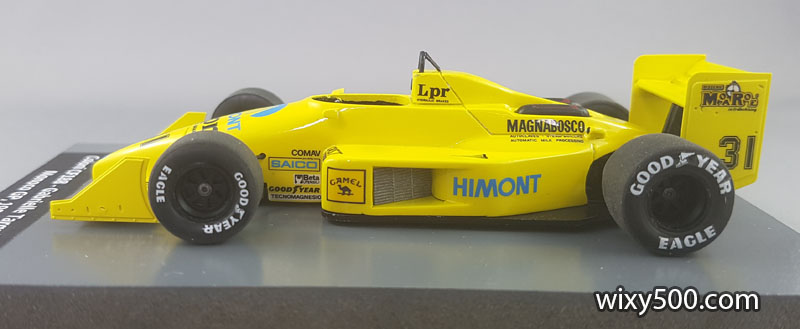
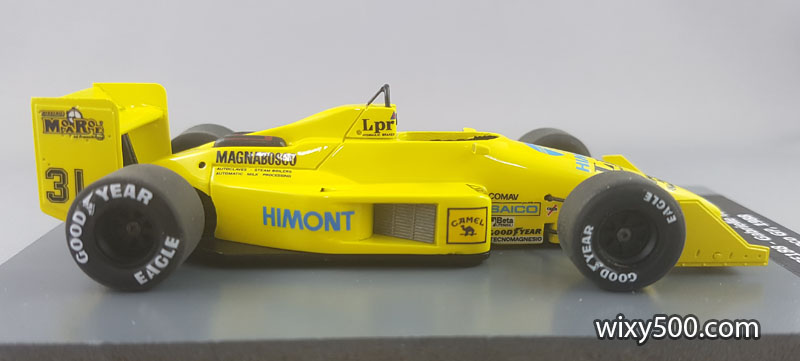
I bought this Tameo kit from a shop in Adelaide in the late 1990s. The previous owner had made a start, painting the body and floor, plus assembling the front and rear wings.
What Colour?
They’d done a decent job of the paint, but they hadn’t painted all the parts that needed to be yellow. This presented a problem. I would need to find the exact match yellow for these parts, or strip the body and start over.
After much research (the people on the F1M forum were very helpful) I found that Tameo specify paint codes from Fiat and Honda that can be used. Problem was, they were different hues of yellow (!) meaning at least one of them was wrong, and I suspected neither was accurate. To my eyes, photos in books and magazine’s hinted that the body colour had a fluro element to it.
Next step was to contact the modern incarnation of the Coloni team. Requests via email and Facebook, in both English and Italian, drew no response. They could not even bother with a “sorry, we can’t help” reply.
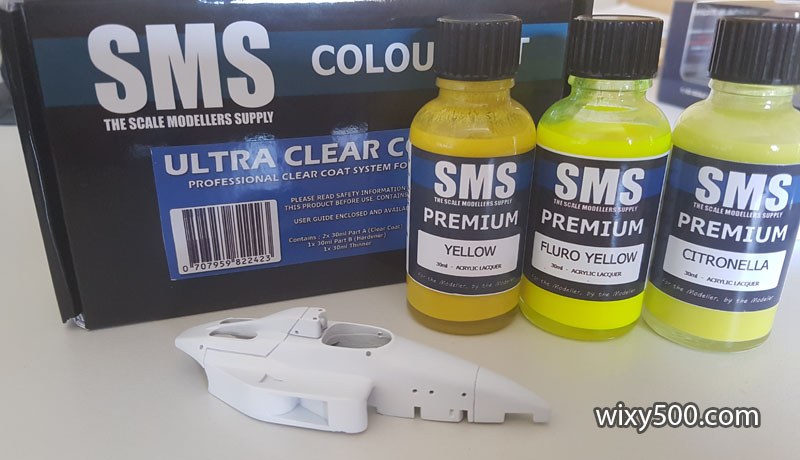
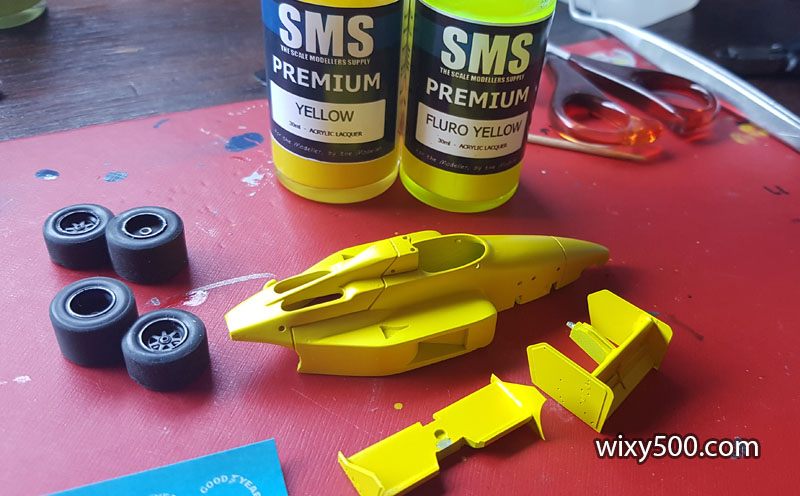
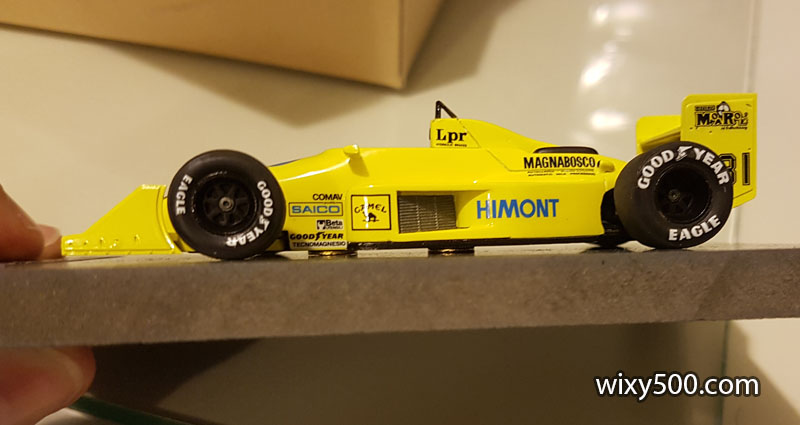
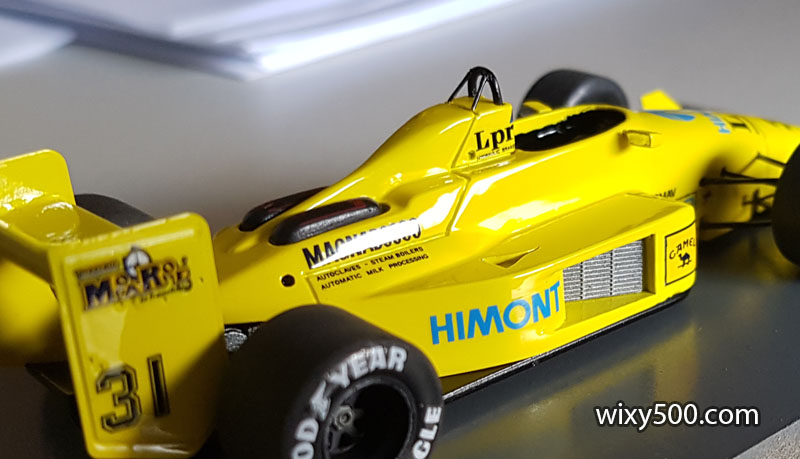
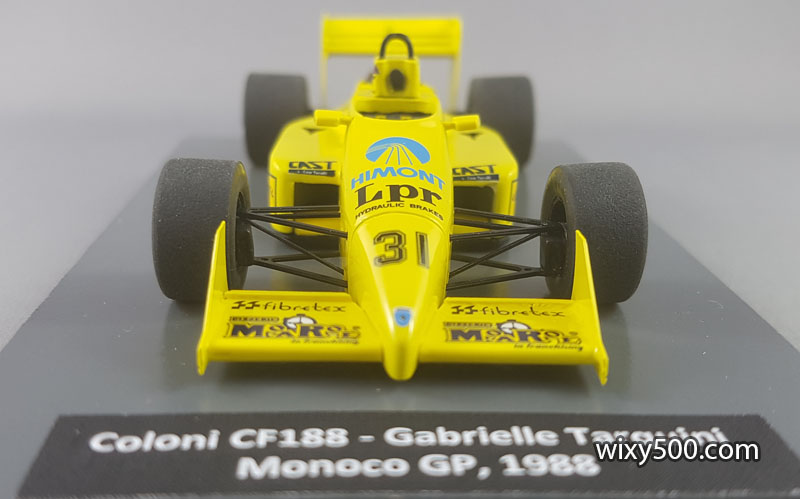
I then stumbled across the relatively new SMS range of paints at my local hobby shop and decided to try them out and do a custom mix to make the colour I thought this model should be. I reckon it turned out pretty good.
The Build
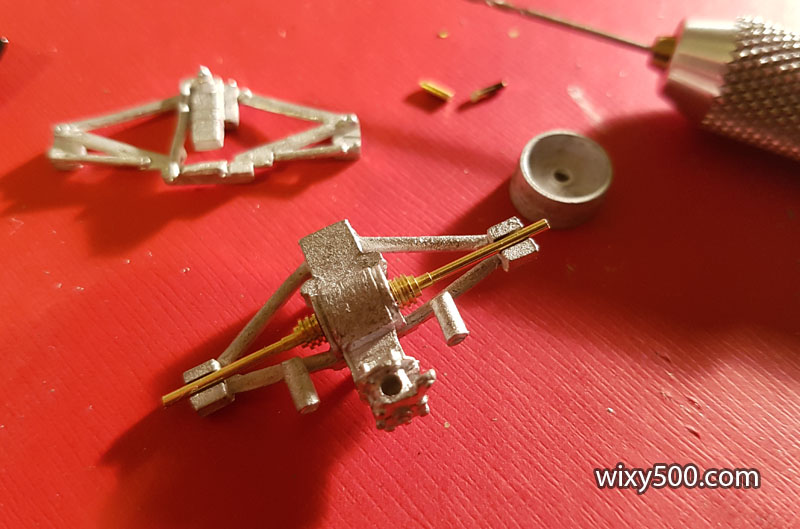
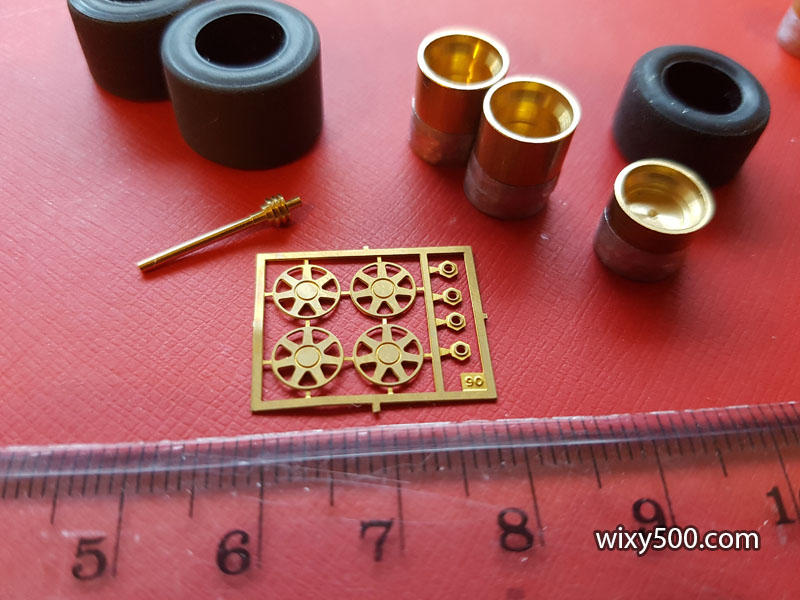
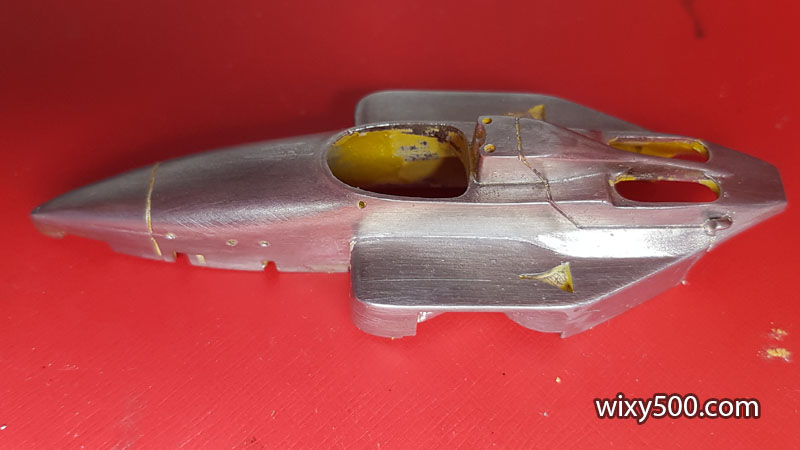
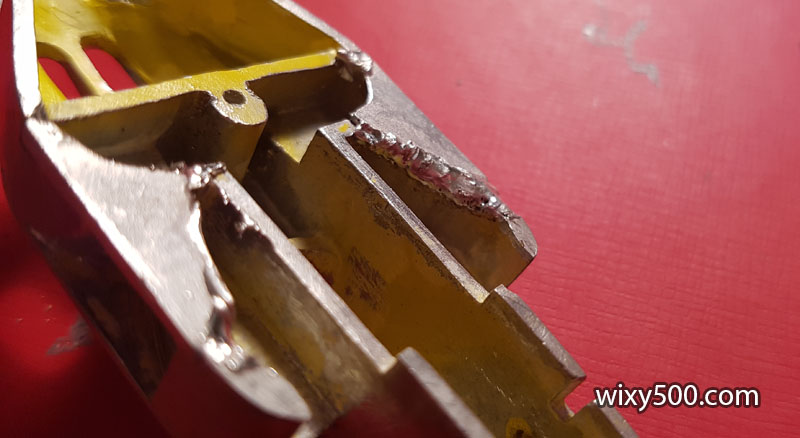
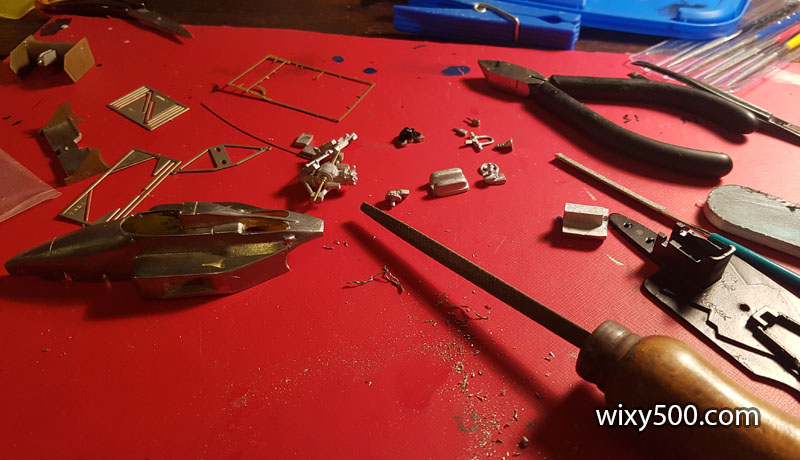
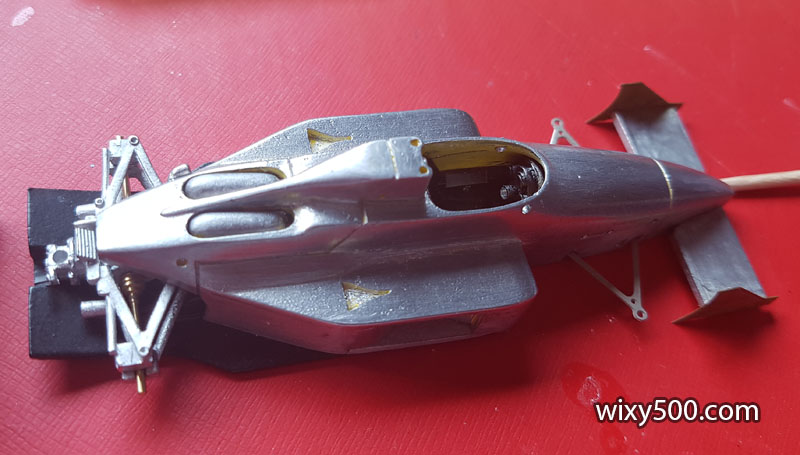
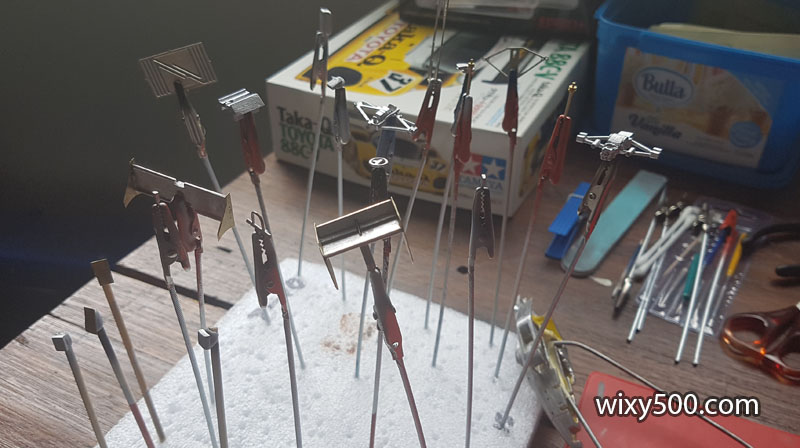
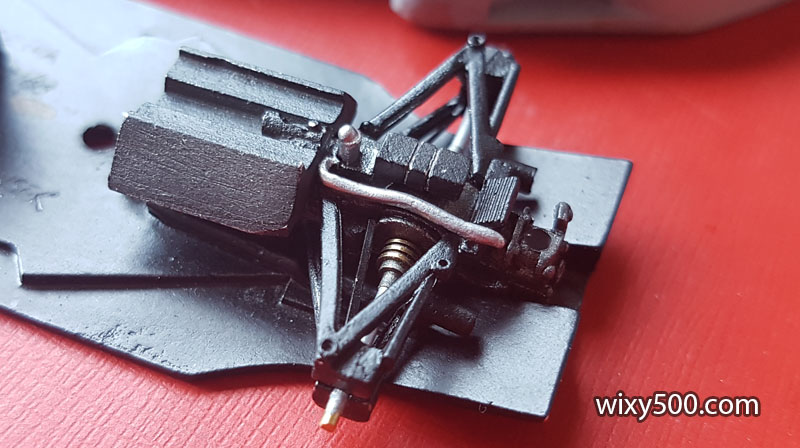
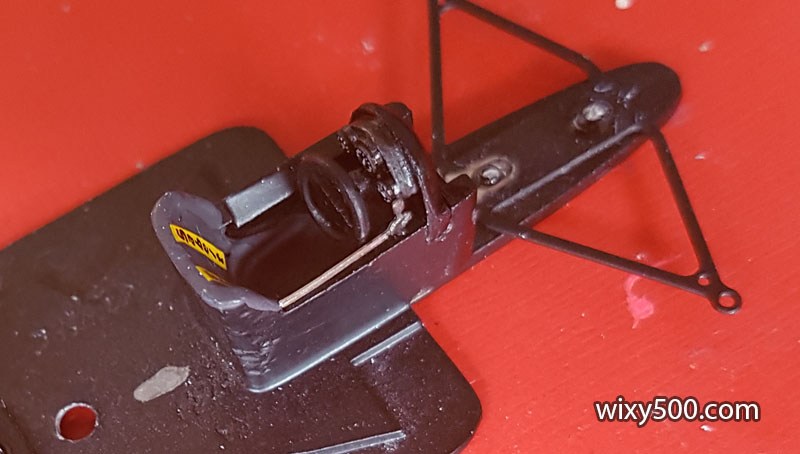
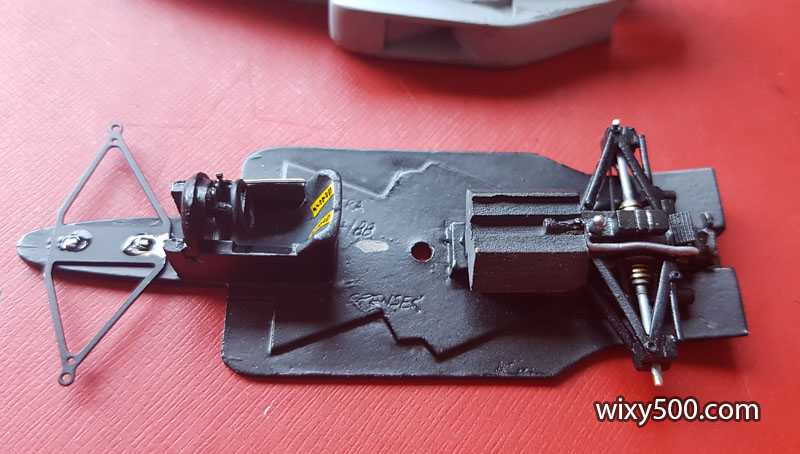
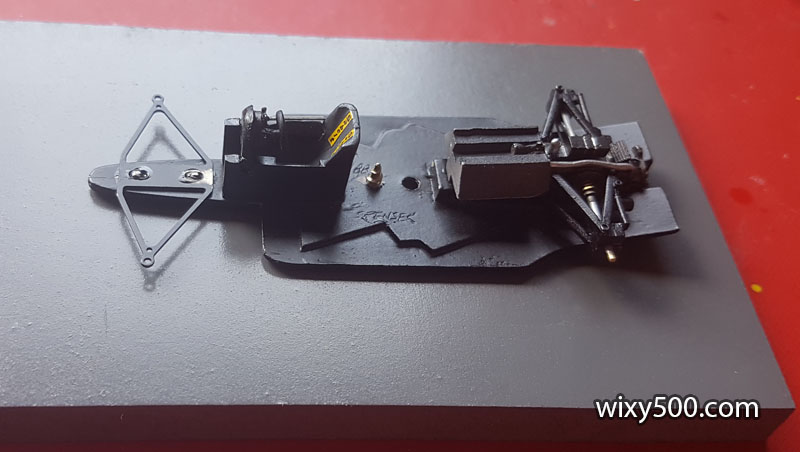
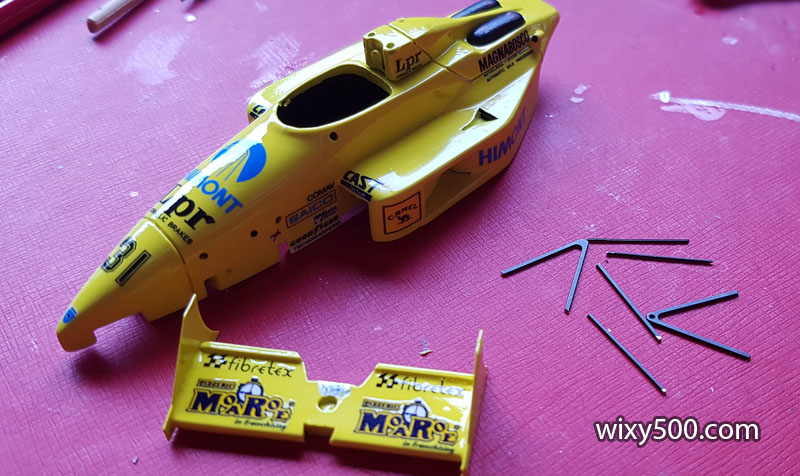
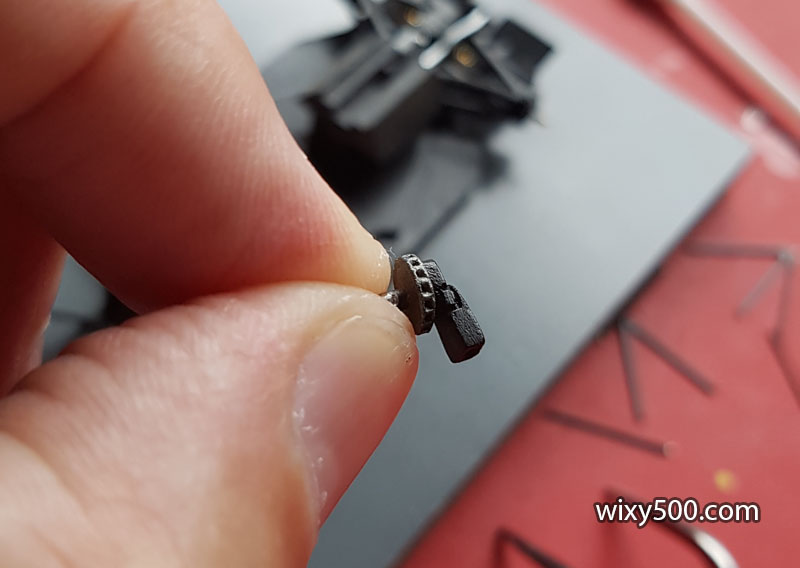
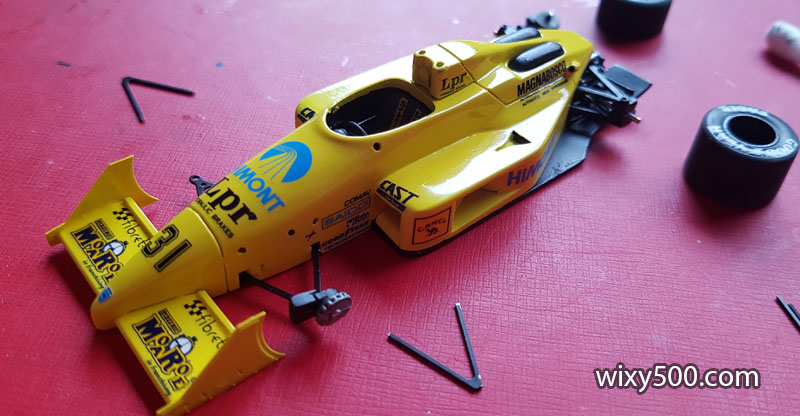
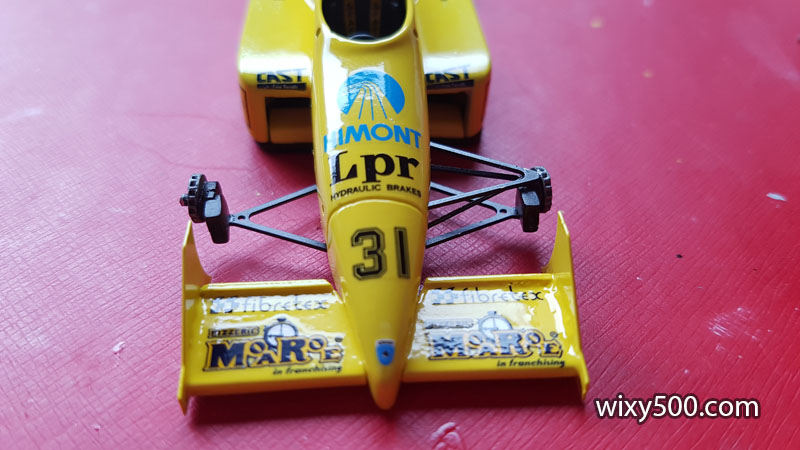
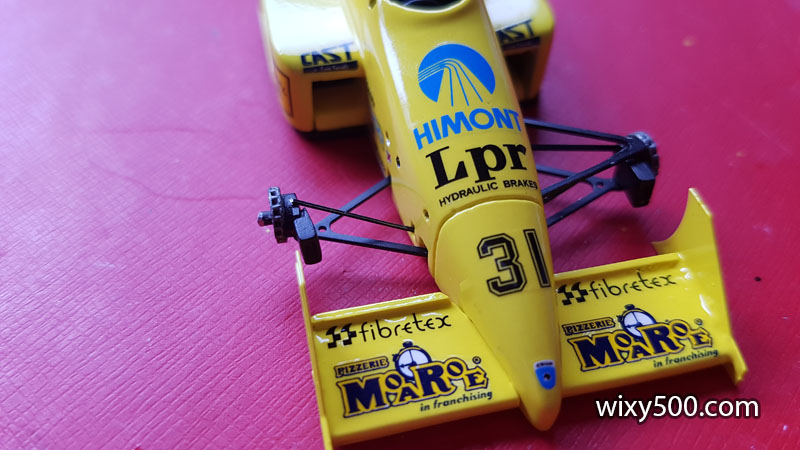
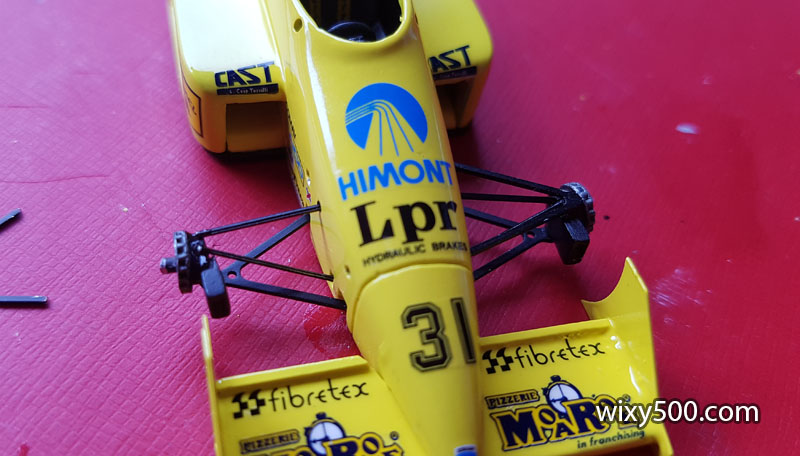
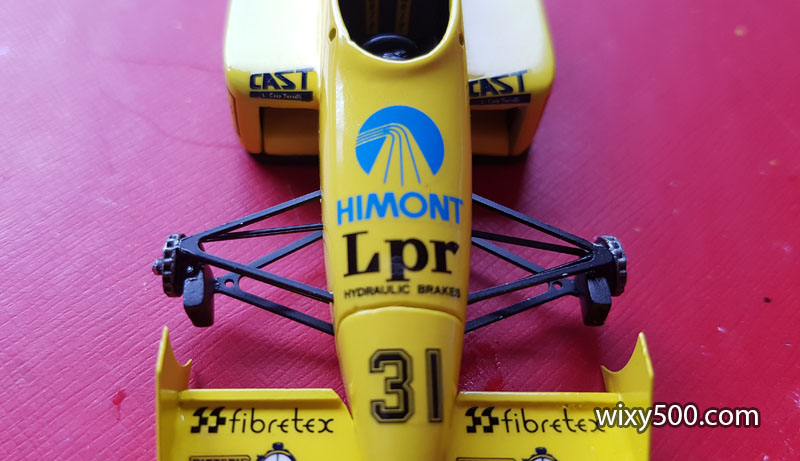
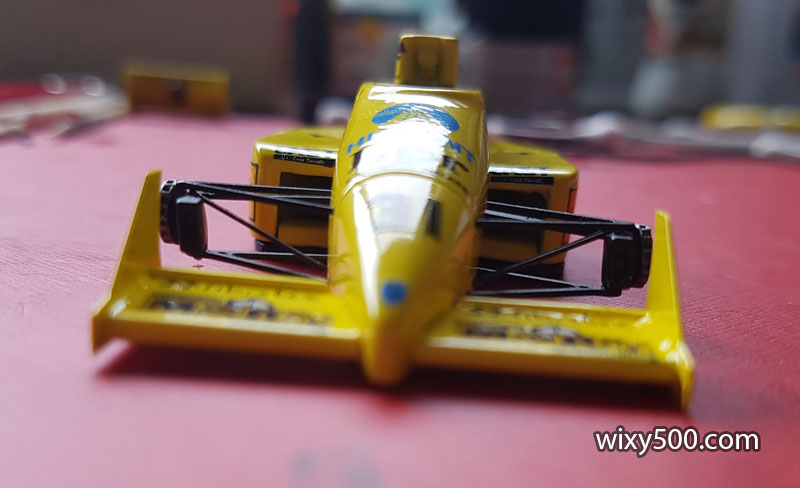
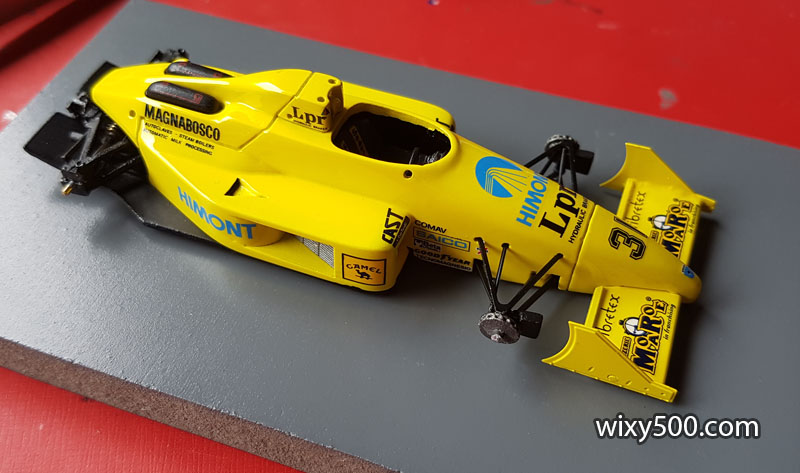
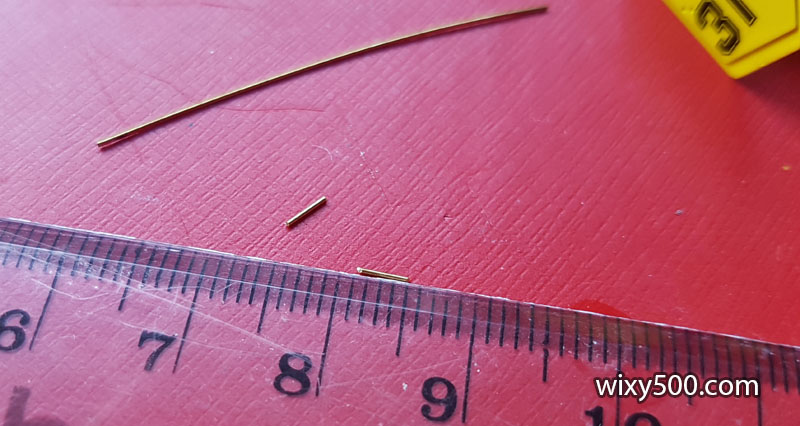
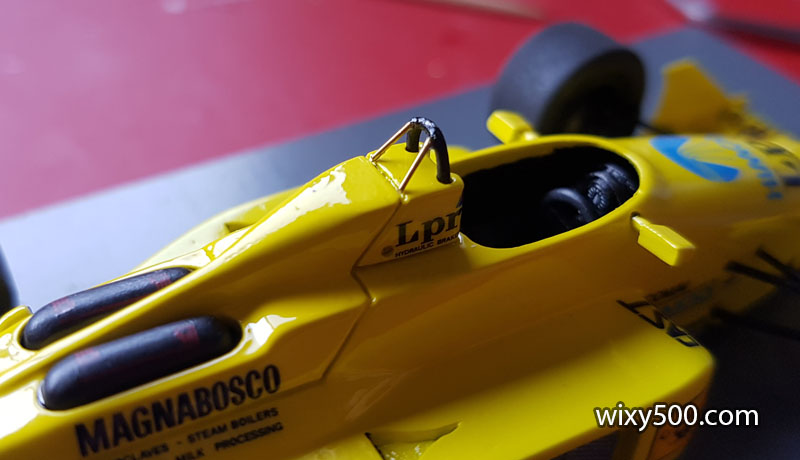
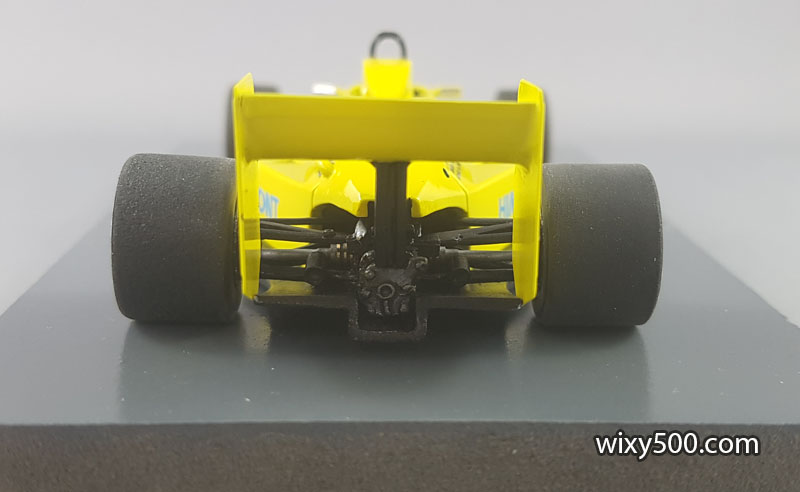
Tameo kit #75 how I received it – already been started by someone else.While the paint research was happening, I prepared other parts of the model. The gearbox was drilled to accept the drive shafts (nicely machined brass units) which have been cut to length for fitting the wheels.Each rim is two pieces (a machined half and a cast half) and requires photo-etched spokes and wheel nut to be glued in place. Wheels nuts are about 2mm wide… Tyres have had the edges lightly sanded.Fitting the spokes inside the rims, which have had some black paint added. Each wheel was then sprayed semi-gloss black.With no success finding a matching yellow, it was back to bare metal to start fresh. It also meant I could fit and solder the missing bodywork into the bottom of the radiator outlets before painting.First time soldering (well, first time since soldering tin plate in secondary school in 1982!). It’s not pretty and required some cleanup, but it worked!After much cutting, trimming, filing and test fitting, all the parts are pretty much ready for paint.Test fitting.All parts mounted ready for grey primer.Back-end assembled. Much of this detail will be hidden by the bodywork. There is hardly even a need for that engine block.Cockpit includes dials on the dashboard (decals) and photo-etched gear linkage & lever.The bottom half of the model basically done, with the cockpit, engine, gearbox and lower front arms all fitted to the floor. Next job; the main body.All the parts that were to be yellow received a coat of Tamiya’s white primer. This was the first time I’d used the Australian-made SMS paints. This is an acrylic lacquer that’s pre-thinned and ready to go straight into the air-brush. I bought the three colours above to make up the custom mix. I’d heard good things about 2K clear, so also purchased SMS’s 2-part clear kit to see how that would go.After some experimental mixing, I was really happy with the yellow I concocted by eye. It’s roughly two parts yellow to one part fluro (didn’t use the Citronella). It sprayed just like the decanted Tamiya TS paints I normally use. The final finish is not glossy so definitely required a clear coat.Decals done! There were no issues with application (Cartograf decals), but I did use a lot of softener to try and get them to melt into that satin-like yellow paintwork. The radius of the Goodyear (and especially the rear Eagle) logos is not identical to the radius of the tyres. Didn’t expect that mistake from Tameo.2-pack clear (still wet) over the lot. I was initially not that impressed with my effort with the clear, but 24-hours later it appeared to have smoothened out somewhat.I used some MDF to make a plinth which was sprayed grey with a rattle can. The base of the model is attached via counter-sunk self-tapping screws. I started with just one (see above) but added a second screw 20mm further forward that allowed better adjustment of the ride height (see later pic) and was more secure.Top A-arms, pull-rods and steering rods.Tiny ventilated front brake disk, wheel hub and brake duct are cast as one piece.With the base permanently screwed to the body, the front suspension can be assembled. The lower arms (all one piece) provide the strength. Everything else is lightly CA-glued to that. It was evident from early test fits that if the wheels were attached to the axles as intended, the car would sit far too high in the air. I wanted the finished model to be more realistic than that, so cut all the axle stubs off (note the one on the front has gone) to allow some margin with wheel placement later in the build.With the lower arms secure, front suspension must be assembled in a particular order (left front is already done). Firstly, the upright secures into the lower arm and fixed with a dab of CA glue.Then (once cut to size) the pullrod secures into the bottom of the chassis and rests on the upright.Followed by the steering arm, which pushes into the chassis and is CA’d to the back of the upright.Then finished with the upper A-arm, pushed into the chassis and resting on the top of the hub (with another dab of CA).Front suspension done, including the angled pull-rods.Suspension all fitted, plus the radiators (photo etch) in place. Model has been screwed to the base using small brass washers to set a suitable ride-height.Tameo provide a length of brass wire to fabricate the rollover bar supports. I cut two pieces of about 4mm.Then carefully glued in place, ready for paint. Mirrors are test fit, before glue and chrome-silver faces. Engine intake has a flat clear coat to replicate the filter foam this car ran.The small brass washers between the model and the plinth (one at the front, 2 at the back) set a bit of rake in the chassis. I would like to have gone lower (in real life, these cars ran almost on the ground), but I was already in trouble getting the wheels to fit with the chassis this low.Get the right light and the right angle, the gloss coat and colour really pop.